

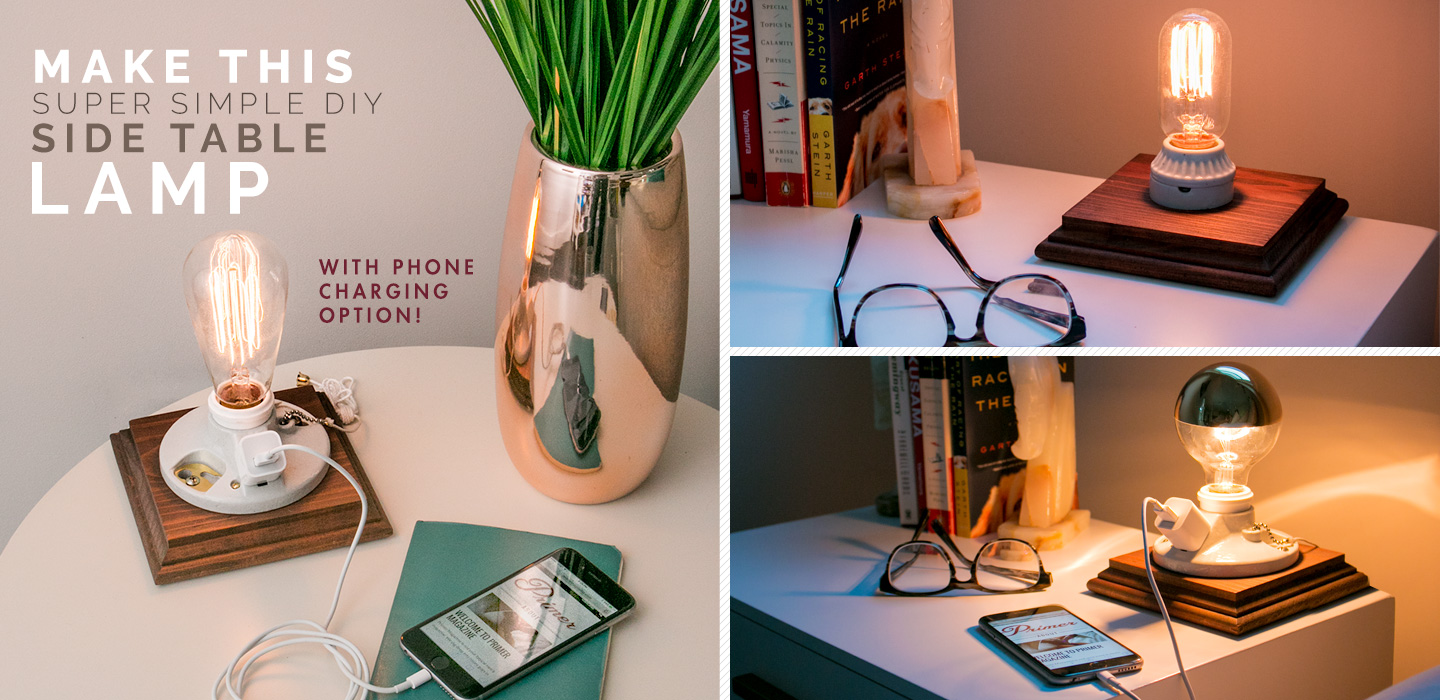
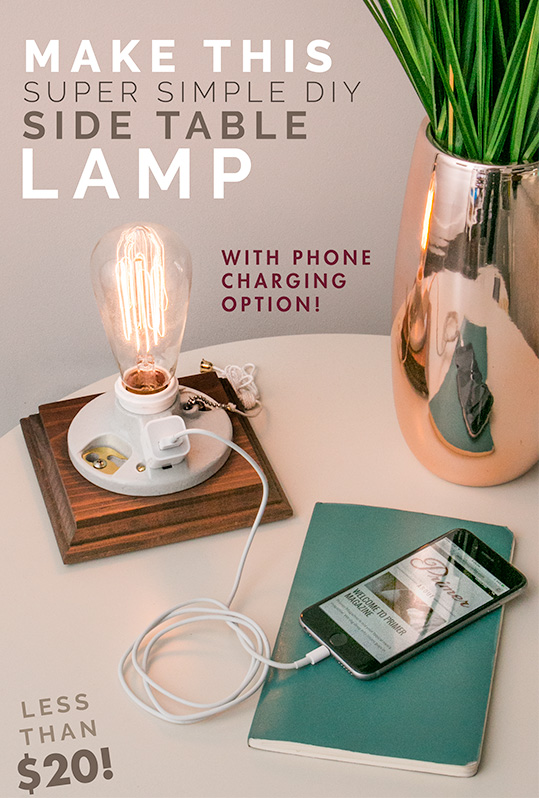
Low light side table lamps are a fantastic way to add ambient lighting to your place, as well as a little style.
Today's DIY lamp project is incredibly easy to do and dirt cheap too! If you can drill a hole and turn a screw, then you're up for the job. We don't even have to cut any wood!
Step 1: Buy the Parts
Everything for this project is available at your local hardware or home improvement store.
What you'll need:
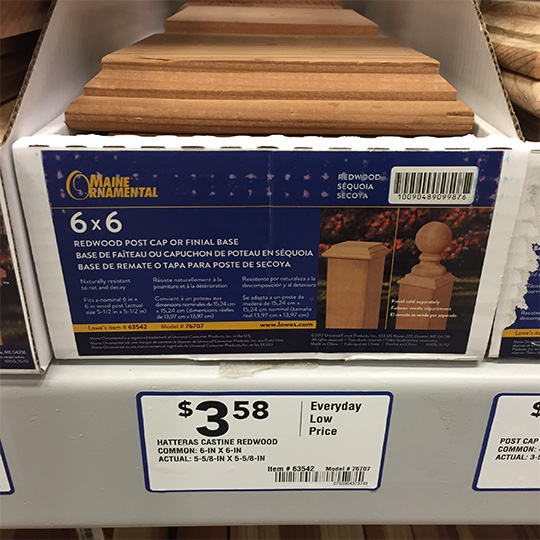
- 6″ Redwood Post Cap / Finial Base, $3 – These are in the fencing area and are meant for giving a fence post a nice finished top. It's a beveled piece of redwood and looks great as the base for our lamp.
- Porcelain Lamp Holder / Socket, $4 – These are available in plastic versions as well, but the porcelain gives it a nice, finished appearance. Either:
- Two piece ring socket (cheaper locally), or
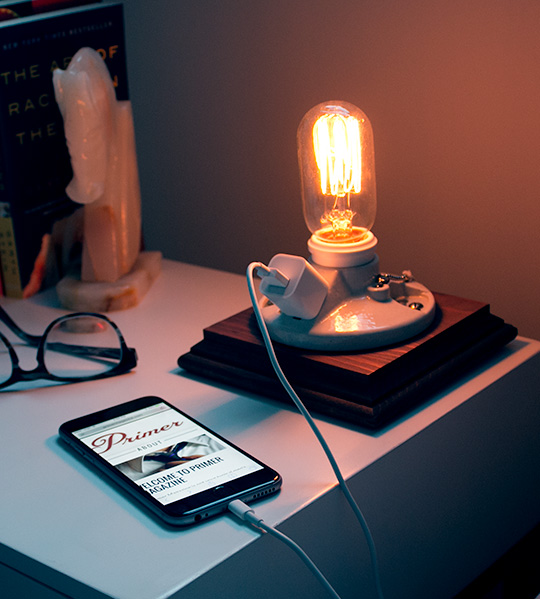
- Lamp holder with pull chain and outlet – for phone charging version
- Lamp / Appliance Cord, $4 – A standard replacement lamp cord (2 prong) for the non-charging version, or 3 prong replacement power supply cord for the lamp holder with the outlet. For the 2 prong ring socket, buy one with a switch on the cord, or you can easily install a switch. The switches will be in the same aisle as the cords. The outlet version has a pull string.
- Edison Style Filament Bulb, $5-10 – Available in a number of different shapes, including a mirrored version that you can see below.
- Wood Stain, $5 (Optional)
Step 2: Dry Fit & Drill
The post cap comes with a hole drilled through the center. We'll use that to run our wire up to the socket. If you're making the version with the outlet, you may need to make the hole a little bigger depending on how wide your cord is.
Wire your lamp holder based on whether you're doing the two prong or three prong version. This is incredibly easy, if you can turn a screw, you can wire these with ease. Just Google search “how to rewire a lamp“. The two (or three) wires are different, and one will have ribs or writing, and the sockets will have different colored screws indicating which wire goes where.
Once the socket is wired, see if you're able to get it to sit flush on the post cap. For the ring socket, you may need to use your drill to create small indentions on either side of the center hole for the wires to sit in. For the 3 prong outlet version, if you'd like your socket to sit in the middle of the post cap, you'll need to elongate the center hole on the side that the outlet will sit so the holder can sit flush and there's room for the cord. These will both become obvious once you do the dry fit.
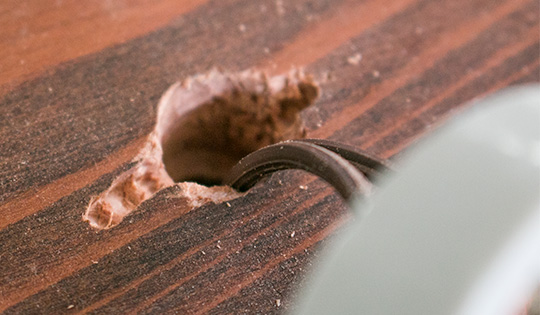
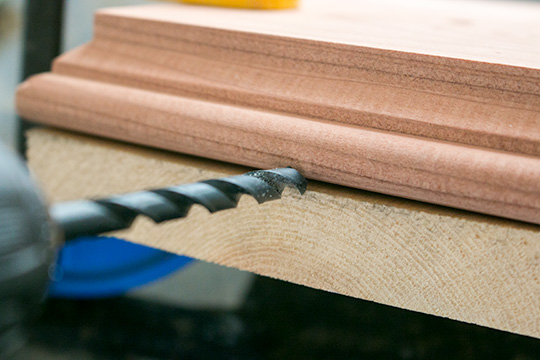
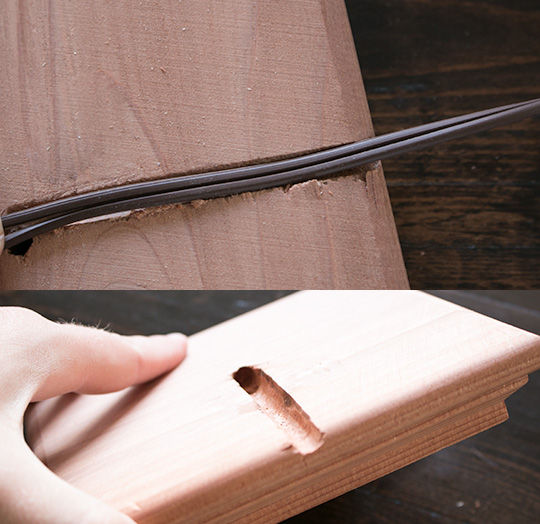
Undo the socket wiring and pull the cord through. We now need to drill a channel on the bottom side of the post cap for the cord to run through so that the lamp sits flush on the table. To do this, simply clamp the post cap to a scrap piece of wood, and use a large drill bit to drill between the two pieces of wood.
You want the cord to run out the back of the post cap, so drill your hole accordingly. You can smooth the channel out with sand paper or a file.
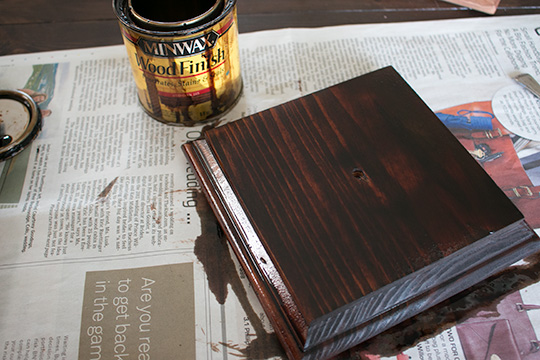
Step 3: Stain
The post cap is made out of beautiful redwood, so you don't need to stain it if you like the look of it as-is. Staining is a super simple process if you've never done it. Just wipe on a thin coat of stain, let it sit for a minute, and then wipe off the excess. That's it! Let it dry before moving on.
Step 4: Rewire and Attach to Post Cap
Run the wire back up through the center hole and rewire based on which socket you're using. Position the socket where you'd like it and mark the screw attachment holes. Drill a small pilot hole for each of the two screws, and then insert the screws to attach the socket to the post cap.
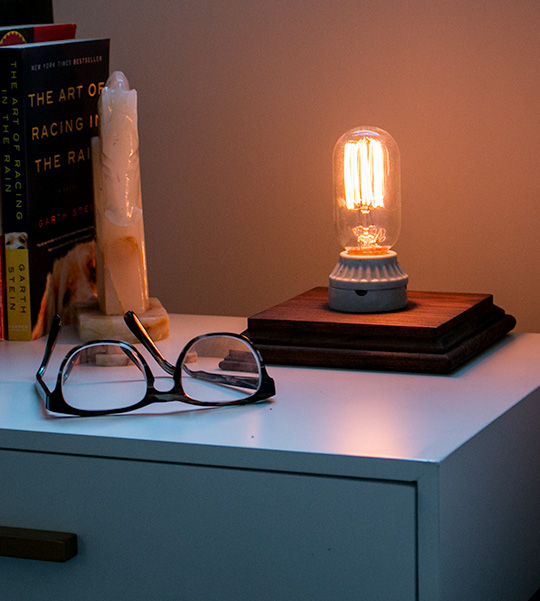
That's all there is too it! What did I say, dead simple, right?!
The style of bulb you choose can have a dramatic effect on the overall look of the lamp. Here are some of my favorites.

This is a “mirrored” bulb that I bought at CB2. They're also available on Amazon.

If you make one I'd LOVE to see it! Share a photo in the comments or tag @primermagazine on Instagram!
If you like this DIY project, please share it!