
Alex Black is an accomplished bartender at some of Vancouver's most celebrated cocktail bars.
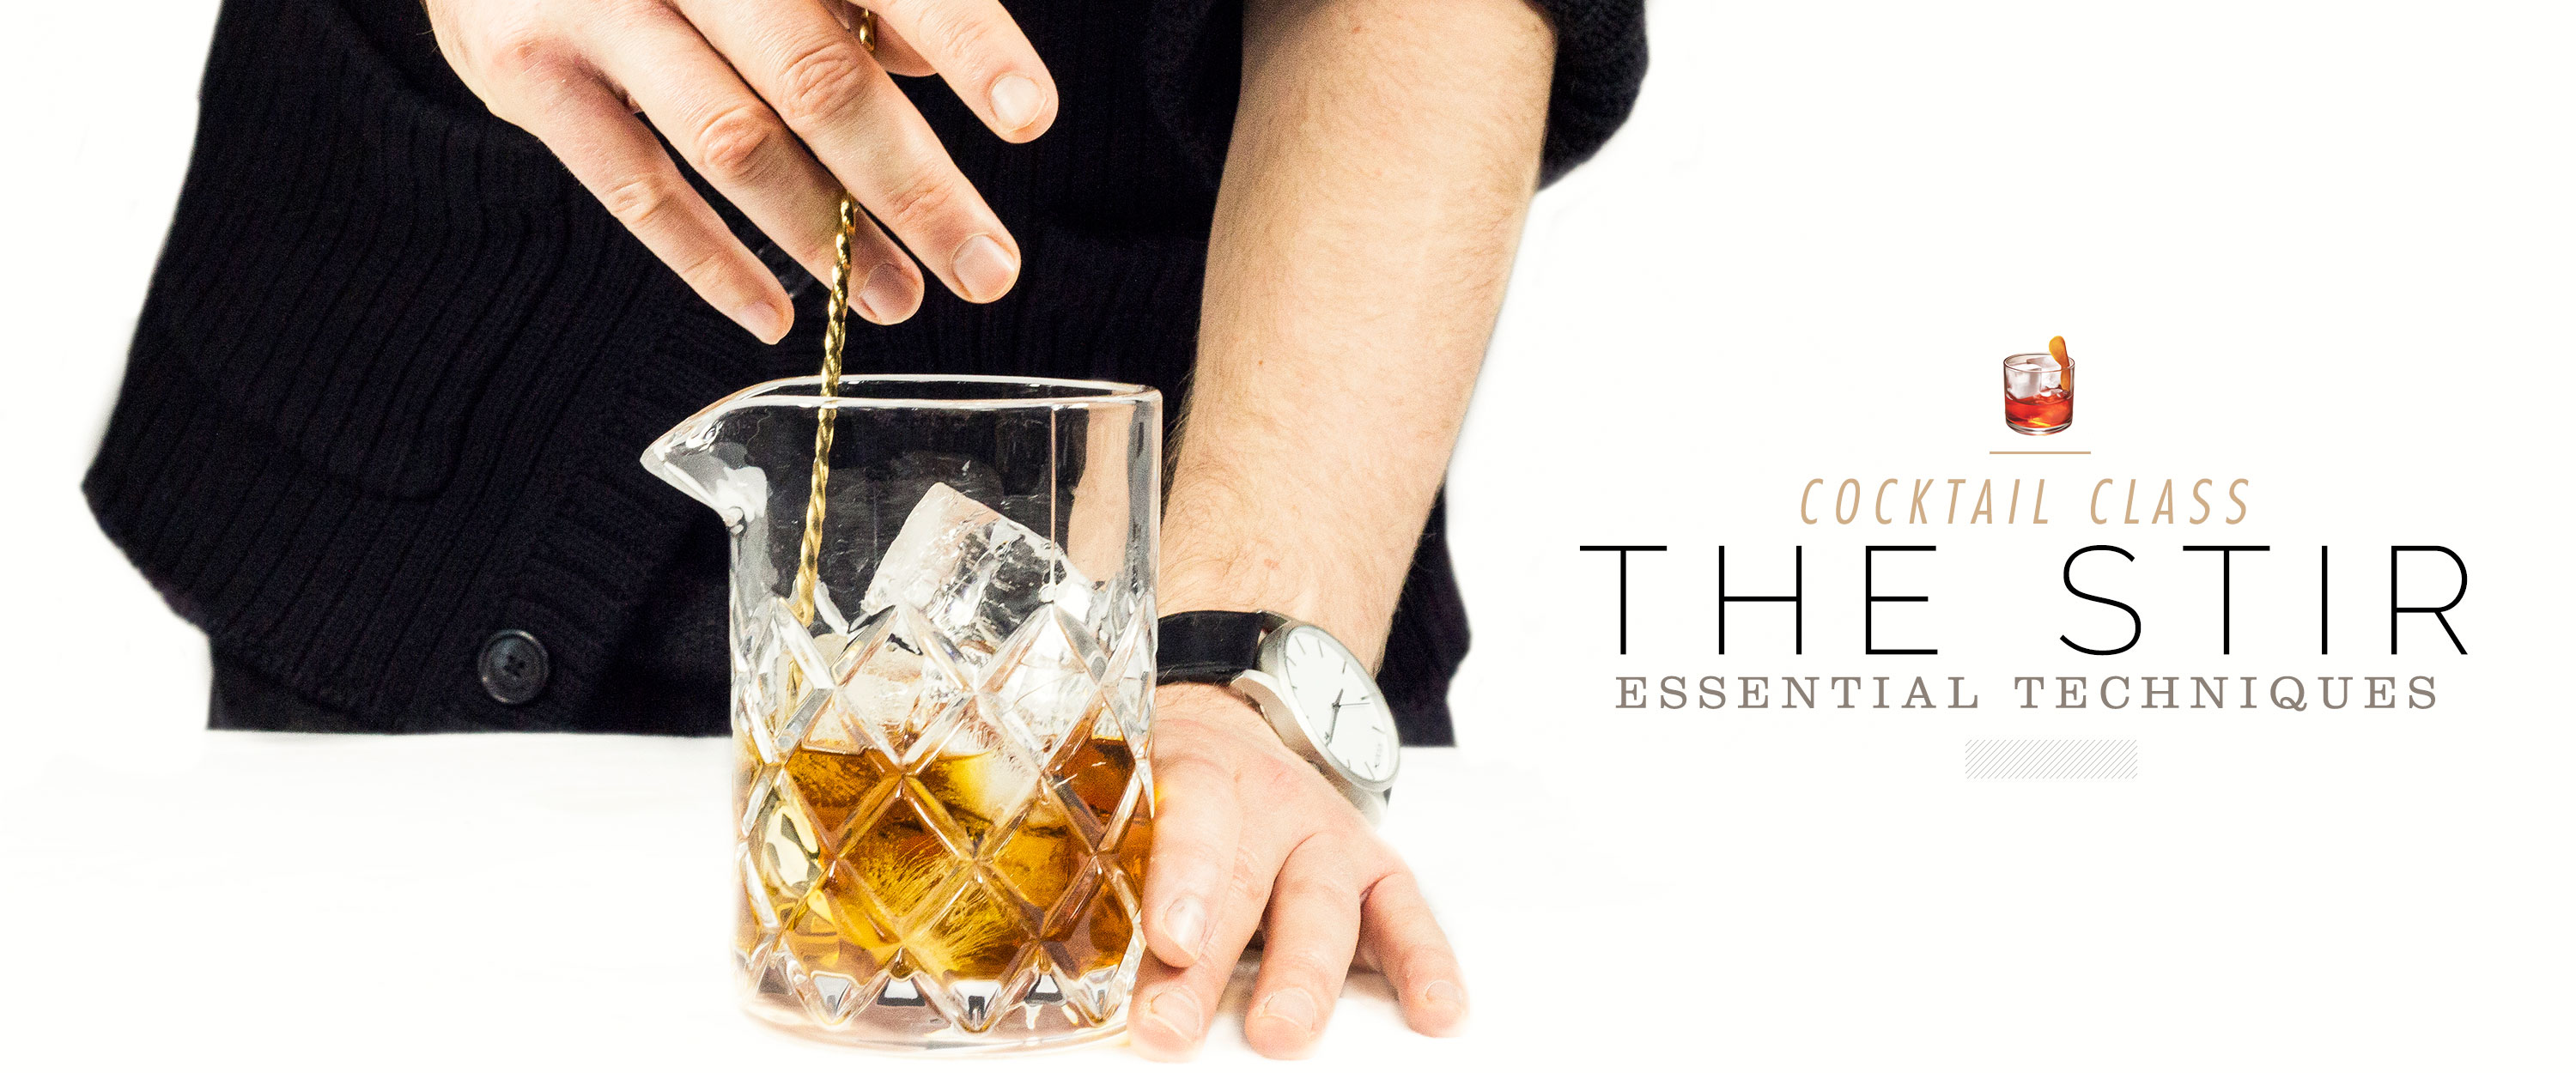
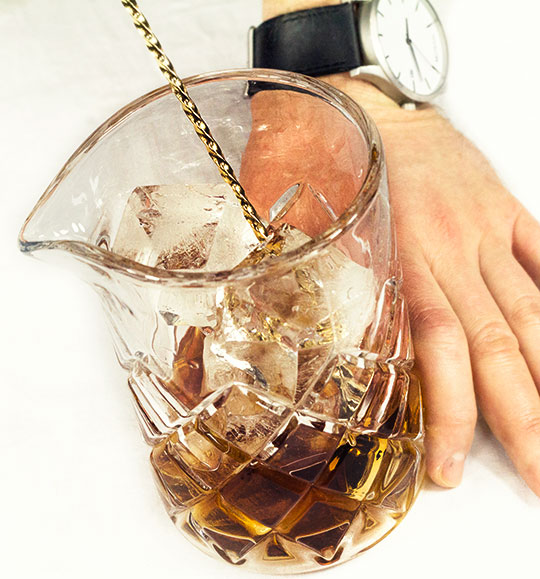
The scene is as old as the bar profession itself: A bartender moving with unmatched poise and intent, meticulously measuring out liquids, letting them cascade on top of one-another in a mixing glass and the moment he or she silently and assertively begins stirring an air of absolute confidence surrounds them as they put the finishing touches on their masterpiece before pouring it elegantly into a glass.
I find few things more impressive than a bartender who can execute the art of stirring properly, it seems almost vulgarly easy. However there is a proper technique, and I intend to have you utilizing this skill with ease the next time the spotlight is cast upon on you while showcasing your cocktail creation with the appropriate amount of style and ceremony.
We stir to achieve two very simple things: chilling and dilution. There’s a ton of myths surrounding the act of chilling and diluting but fortunately for us there’s the science of thermodynamics to lend a hand. There are lots of fascinating insights into thermal equilibriums and the processes of entropy and enthalpy, but what is essentially happening is the ice you use to mix with is absorbing the heat of the liquid surrounding it, both melting the ice as well as cooling the liquid.
Because spirits and liqueurs are generally soluble with each other, that is to say they blend together easily, it usually only takes a little stir to combine them together indefinitely, the water that is melting into the drink is also soluble and, with a little coaxing from that stir, the ingredients easily form together to make a solution. What we aim to do is fuse the ingredients together, melt the ice and chill the drink and do it in the quickest and quietest way possible, like weaving silk.
“Shaken not stirred” is in our cultural vernacular thanks to a famous British spy and I’m here to tell you that the James Bond of the movie world knows women, cars, style and has an enviable wit but he’s a notoriously terrible drinker. Stirring is almost always the preferred way to go, we stir when we have ingredients of similar densities to make a drink but it’s not until we start adding things like syrups, egg whites or juices that we need to move into shaking territory; but more on that next month. Stirring doesn’t aerate the drink like shaking, so it will remain clearer and there won’t be a noticeable change in texture, leaving the drink silkier.
When I started learning bartending, stirring a cocktail was the act of dumping a bunch of liquor over ice and stabbing it with a soda shop-like spoon for 7 seconds then dumping the contents into another glass. But times have changed, that Neolithic practice has evolved and with it a multitude of tools are available for both amateur and professional bartenders alike.
Do you need these tools to execute a proper stir? No. The equipment I like to use behind a bar to stir and strain drinks can cost hundreds of dollars, but I work in an environment where I’m required to execute that act sometimes over a hundred times a night, so my tools need to be durable and ergonomic, you can achieve the same effect for mixing a drink or two at home with items already in your kitchen.
Any cylindrical container will substitute fine for a mixing glass (nothing with edges) and a chopstick makes for an excellent stirring stick, so much so it’s the preferred tool for one of my favourite barmen, proving the barspoon is the golf ball of the bartending world.
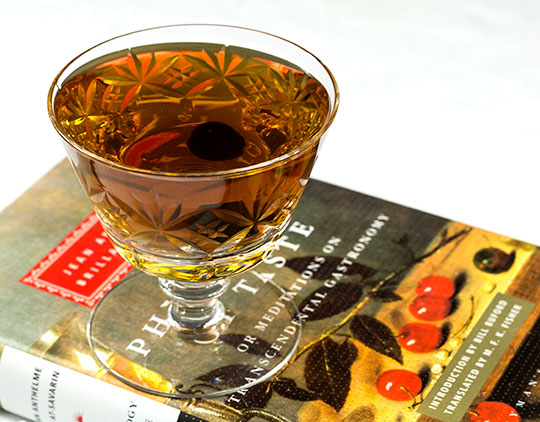
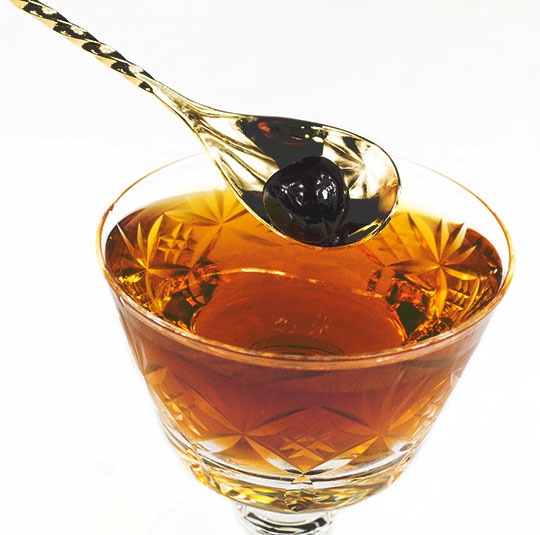
The Drink: The Manhattan
If we’re talking classics, it doesn’t get much more classic than this one. Already a popular tipple by the 1880’s the drink’s first appearance in a cocktail book came in O.H. Byron's 1884 book, The Modern Bartenders' Guide. The drink’s history is a bit murky but as best we can tell it was invented by a bartender in New York who simply went as ‘Black’.
What you’ll need:
- 2 oz. of a decent whiskey, I prefer rye but you can go the bourbon route if you wish (suggested: Smooth Ambler Old Scout Rye or Rittenhouse)
- ¾ oz. of a decent sweet vermouth, or maybe a blend of two (suggested: Carpano Antica Formula)
- 4 dashes of bitters (suggested: Scrappy’s Orange or Aromatic)
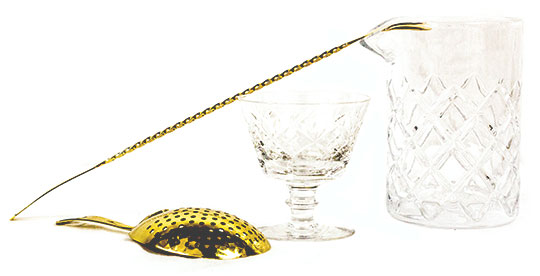
- A mixing glass (or a reasonable substitute)
- A barspoon (or chopstick)
- A strainer (or any method to keep the ice in the glass and get the liquid out)
- Ice (the clearer and denser the better – more on this in my next piece, so stay tuned!)
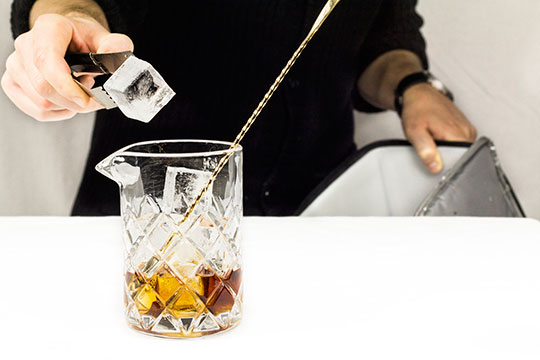
1. Take your mixing glass and add your whiskey, sweet vermouth and bitters into it.
2. Place your barspoon in the glass THEN add ice. This prevents ice from breaking off by stabbing the spoon through it if done reversed, also makes it look like you’ve done this before.
3. Lightly grip the base of your mixing glass with two fingers of one hand, keeping in mind not to transfer any body heat from your hand to the glass which may lead to over-dilution.
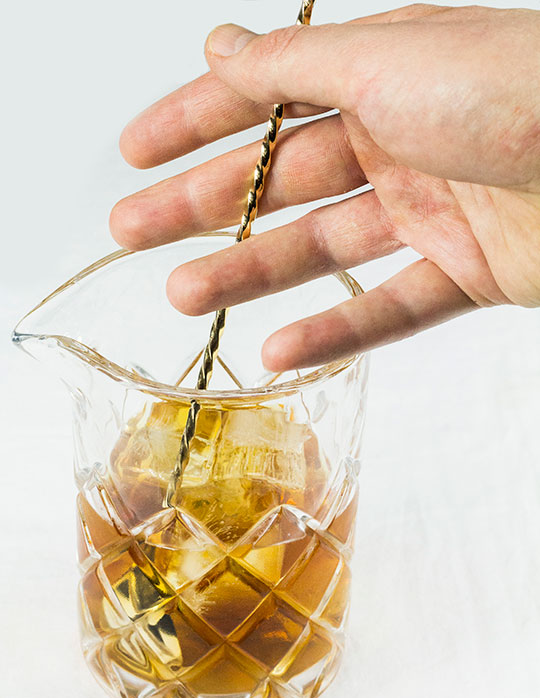
4. With your free hand pinch the spoon loosely between two fingers, here you’re simply creating a pivot point so you shouldn’t need much grip on the spoon. Gently, yet swiftly, push and pull the spoon forwards and back while guiding the base in the glass around the circumference of the mixing glass.
- Your hand should stay relaxed and not move much at all, all the movement should be in the two fingers touching the spoon and a bit in the wrist.
- The real challenge to this is making sure the drink is stirred with minimal (read: no) noise. Noise means the ice is bashing into itself and the glass creating tiny shards that can over-dilute and aerate your drink.
5. Stir as long as you want depending on how cold and diluted you want your drink to be, feel free to test along the way to see what’s right for you. A good window would be 10-30 seconds which would leave the drink around 5°C/41°F – 0°C/32°F. After 2 minutes you could theoretically get the drink down to -6.75°C/19.8°F but after that the temperature would stabilise and not get much lower.
- You don’t want to water down the drink, but you don’t want to make it so harsh it’s not enjoyable, find your sweet spot and keep in mind cocktails with heavier ratios of water tend to be more aromatic
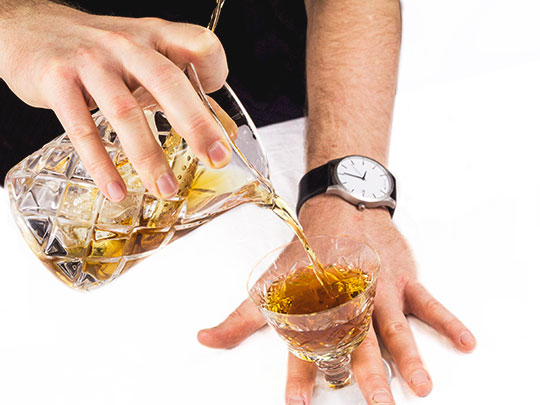
6. Strain the now finished, perfectly chilled and diluted cocktail into a chilled cocktail glass, feel free to garnish with an orange zest or brandied cherry (I’d stay away from anything so red it would better suit a clowns face than a cocktail).
7. What’s that you say? You’d like yours on the rocks? That’s fine, although the aromas that open up on this cocktail can be amazing when it starts to warm a little. Just keep in mind that your dilution will continue to go down if it’s served on ice so try under-diluting it while stirring so you don’t end up with a glass full of Manhattan flavoured water halfway through the drink.
8. Drink, enjoy & be merry.
Cheers!