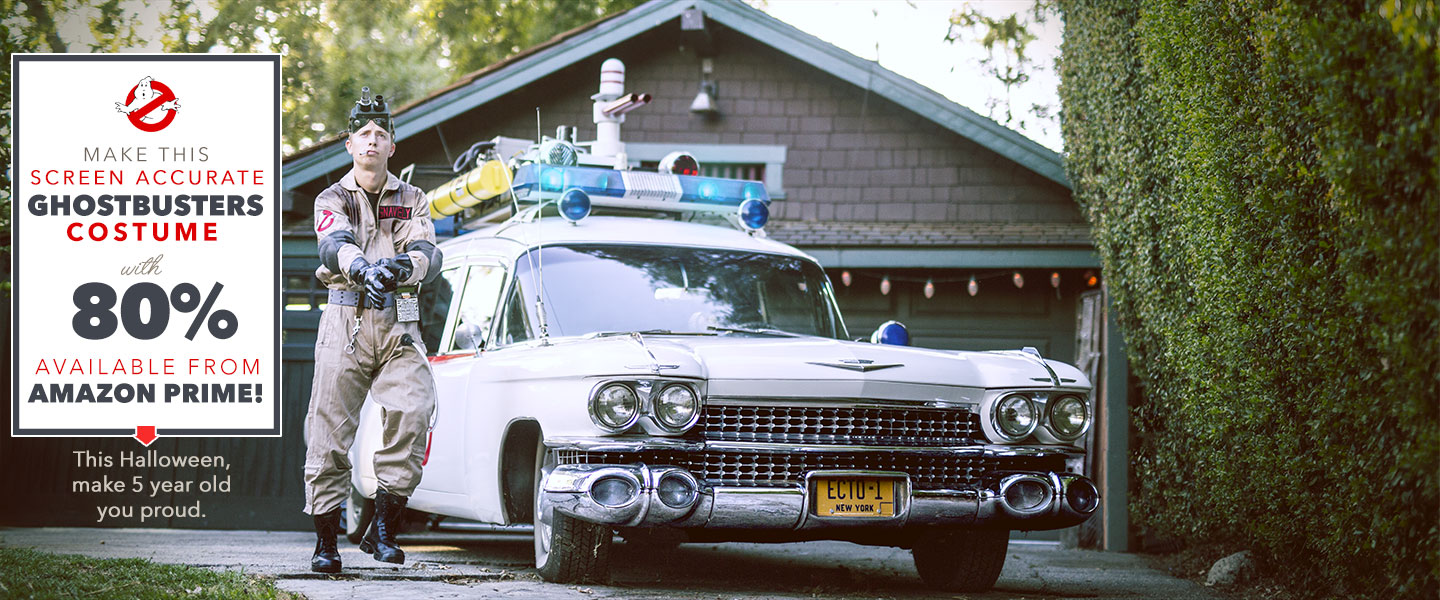
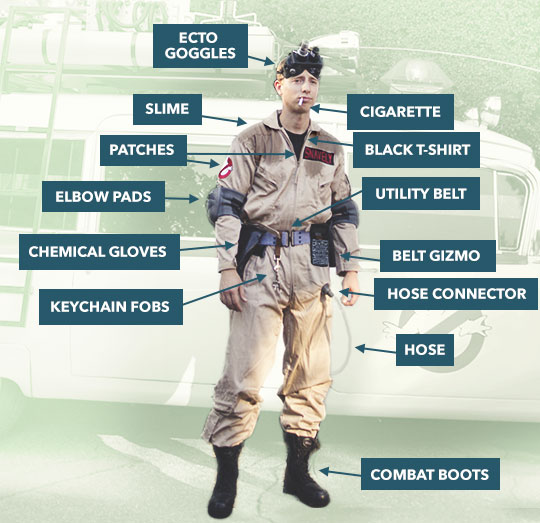
This is the homemade DIY Ghostbusters costume I've wanted to make for 30 years. I've taken everything I learned, and broken down all of the parts so you can easily order everything for your own Ghostbusters uniform.
Tell me if this sounds familiar. It's been years since you've taken Halloween seriously, let alone put any time and effort into finding a real costume. A week or two before All Hallows' Eve you check in with some of your friends to see if there are any plans for the holiday; everyone seems to agree they're not planning on doing anything. Then, every year like clockwork, come Halloween you get invited to some party or costume event and you have to scramble to pull some crappy cowboy ensemble together and feel like the lamest one there.
Well, no more. This year you'll be prepared. Heck, you'll be so prepared you might even make plans before the 31st. The best part about finally putting some time into it is you'll be able to pull this in to last-minute service for Halloweens to come.
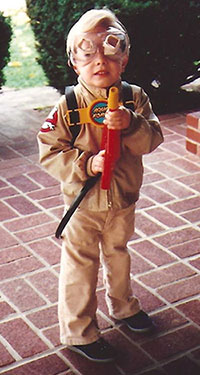
My Ghostbusters costume version 1.0.
Like most of you, Ghostbusters was a major part of my childhood. I watched the movies non-stop, recorded the cartoon every Saturday, asked for new toys for every gift-giving holiday. One of my earliest memories is pining after that blue toy Proton Pack after first seeing my cousin Mike's, I couldn't have been more than 3 years old at the time. In fact, one of my first lessons in finding courage among fear is riding through the Haunted Mansion at Disney World, crying and scared out of my mind. My dad turned to me and said, “I thought you were a Ghostbuster?” I sat up straight and for the rest of the ride I had a blast wielding a pretend particle thrower, busting the ghouls and learning we're only scared of what we allow ourselves to be scared of.
Earlier this year I rewatched the first film with some friends and I was reminded of all the happiness the franchise brought me growing up. I started to briefly research some things and stumbled across forums of fans creating costumes and building proton packs. The more photos I saw, the more I knew what I wanted to do for Halloween. This year I wouldn't be forced to show up in a BS police outfit – this year I'd give myself something I had always wanted as a kid. This year I'd make 5 year old me proud.
The more I researched how to make a Ghostbusters costume, the more scattered everything became. While there were countless first-hand accounts of fans making costumes, what parts they used, where they got them, there was always a large feeling of improvisation instead of detailed specifics. People would list certain things you could buy online, but then simply say they found the rest of the miscellaneous parts locally. I decided I wanted to put together a Ghostbusters costume completely from items on Amazon.
I quickly discovered that while a majority of the items for a Ghostbusters uniform were available on Amazon, some of the essentials weren't. For example, you can find the Ghostbusters No Ghost logo patch for sale, but if you look closely and read the reviews, you'll find the patches aren't screen accurate and don't look very good. (Don't trust the main image, look in the reviews.) I also decided I wanted to do a custom Ghostbusters name patch; and while making the DIY Ecto Goggles is insanely easy, the cheap PVC connectors that cost only $.36 at Home Depot were being sold for upwards of $10 each on Amazon. So almost all of the pieces you need can be bought on Amazon with free Prime shipping, but for accuracy and cost, there are a couple of items you'll need to pick up locally.
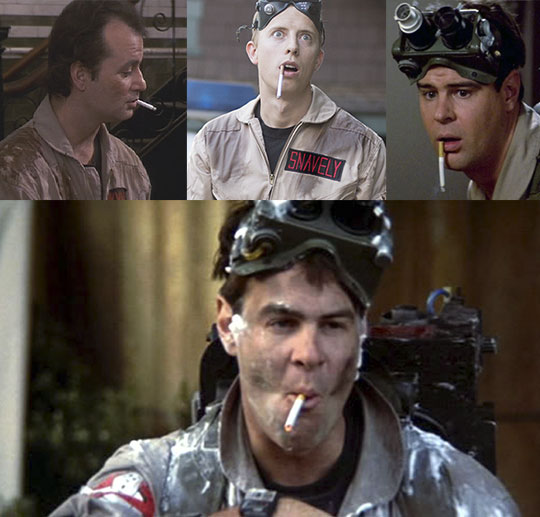
It also didn't take me long to realize that constructing a proton pack that I'd want to wear was just too time intensive. I decided instead to create a costume for the weathered, tired everyday Ghostbuster. We see the guys like this multiple times throughout the film, meandering through the firehouse in between calls, days since they've had a good night's sleep. Their uniform is stained with slime, they're huffing on a cigarette to just get through the day. Because we don't have a pack, the extra attention to the details, like the goggles, and the different elements of the utility belt, really complete the look.
Update! I've since added some awesome affordable options for the proton pack and ghost trap if you want to add those!
What follows is long, but don't mistake that for meaning it will take you a long time to put together. Once you order all the items from Amazon and make one trip to pick up the few remaining items, this Ghostbusters costume can easily be done in a couple of hours on a weekend afternoon. I included a lot of reference photos from the movies and dove into how I specifically made things. My goal is that you, or a future fan researching how to make a Ghostbusters uniform, won't have to do all the digging and researching that I did. A huge shout out to all of the amazing fans and contributors on forums like GBFans, whose detailed research, screenshots, and prop making made this project possible.
Ghostbusters Costume: Buy the Parts
Color Legend
| Available on Amazon | Available on eBay | Available on Amazon but is cheaper locally | Available locally only |
If something says it's sold out on Amazon, be sure to check the “other sellers” list.
The Ghostbusters Uniform
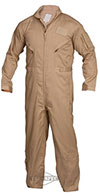 |
Tru-Spec Khaki Jumpsuit, $85 The military spec jumpsuit. This version, made by Tru-Spec, is the one commonly recommended by the fan community. The Ghostbusters wear them baggy, so don't order it too small. I'm a small/medium in most things and ordered a medium. The legs are long, but they get tucked into the boots anyway.
If you needed a smaller size, say for a petite woman or child, the Propper jumpsuit offers sizes from 34s-52L, but is $100 more than the Tru-Spec. I used one of these to make a costume for a 4'11”, 92lbs woman in size 34s and the quality, color, and details are great. See the bottom of the article for a photo. (The sleeves needed rolled and the legs were long, but otherwise fit great.) Rothco also makes a khaki jumpsuit with many similar details (tan color, rounded collar, slanted chest pockets). If you need an alternate for sizing, price, or stock availability, this utility coverall or a flight suit could work, though it isn't screen accurate. |
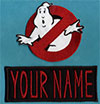 |
eBay – No Ghost Logo and Custom Name Patches, $19 These iron-on patches are size and shape accurate and come from the go-to source for the forum fans, eBay seller katarra8. She's super fast, mine arrived in 3 days. If you want to order from Amazon you can try these, but they're not as accurate. |
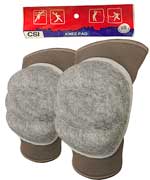 |
White Volleyball Knee Pads, $19 (In-stock alt 1, $9 / In-stock alt 2, $10) These come with a logo but readers report it can be removed with an X-acto or similarly sharp knife.
Or, if you're willing to spend more and have time for shipping, you can buy completed pads from GBFans for a few dollars more. |
| Gray Spray Paint for Knee Pads, $16 To paint the white knee pads. | |
 |
Black Undershirt, $12 |
 |
PVC Pipe Union, 1/2″ Female, $14 This is used to connect the hose to the leg. |
 |
PVC Pipe Nipple Male, 1/2″, 1-1/8″ length, $2 This goes in the pipe union as a part of the hose connector. |
 |
1/2″ Clear Vinyl Tubing, 10 foot, $10 This can also be bought locally for about $.30 per foot. You'll need 5 to 6 feet. |
 |
Vietnam Era Combat Boots, $53 |
 |
Slime – 3M Wire Pulling Lubricant, $20 Stainless, non-toxic gel to create a wet slime look. |
 |
Fake cigarettes, $6 |
The Utility Belt
 |
White Military Web Belt, $13 These are one size and are adjustable. |
 |
RIT Gray Dye, $6 for beltSuper fast and easy. |
 |
Chemical Gloves, $19 |
 |
2 x Dog Leash – Dollar Store, $2 For creating the key fobs. I found these at Rite-Aid. |
 |
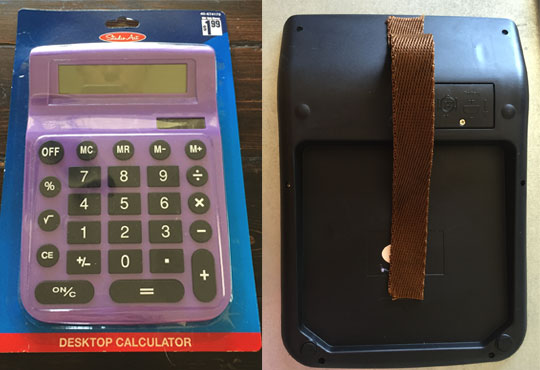
1 Large calculator – Dollar Store, $2 For creating the Belt Gizmo. I bought this at The $.99 Store. |
DIY Ghostbusters Ecto Goggles
 |
Hobart Welding Goggles, $16 If these sell out, here is another Amazon alternative. |
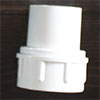 |
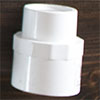
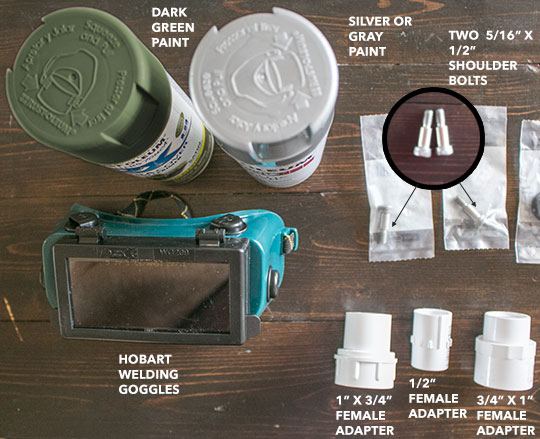
1″ x 3/4″ PVC Female Adapter, $.64 Goggle lens. These fittings, while standard sizes, come in different shapes, so if you can't find these exact ones, you can use the one's your local store has. |
 |
3/4″ x 1″ PVC Female Adapter, $.64 Goggle lens. |
 |
1/2″ PVC Female Adapter, $.36 Goggle lens extension. |
 |
Two 5/16″ x 1/2″ Shoulder Bolts, $1.57 eachThese are used as the lens adjusters. |
 |
Dark green spray paint, $6 |
| Silver spray paint, $8 You could skip this and just use the gray paint you're using for the elbow pads. |
Total Price as Listed: $328.20
$263.20 if you already have black boots and a black t-shirt.
Update! Optional additions:
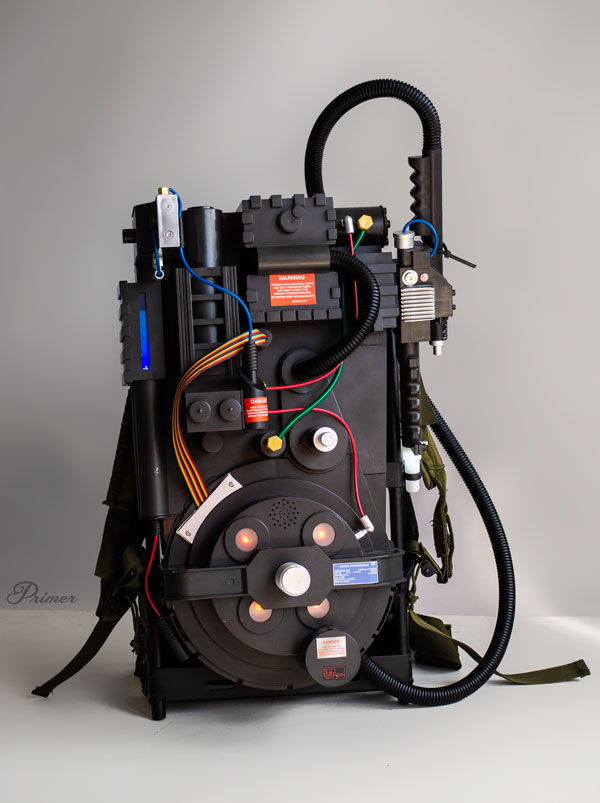
Best Cheap DIY Ghostbusters Proton Pack and Trap Option
Since publishing this, the Halloween store Spirit Halloween has started releasing some Ghostbusters items that work great for a budget Ghostbusters costume. Their balance of design accuracy and price basically makes constructing your own not worth it unless you're going super-affordable with something like cardboard or for a costly, impressive hero pack.
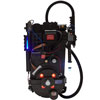 |
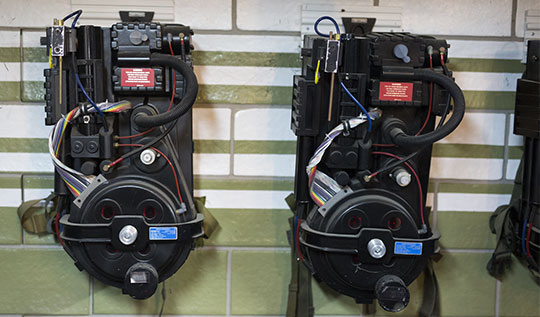
Spirit Halloween Proton Pack, $90 It's got all of the major components, plus it lights up and has sound. The only major downside is that it's about 80% the size of a correct proton pack, but for the price and quality, these packs have created a whole new mod niche for upgrading, including accessories created to fit the smaller size. They have since also added a life-size version. |
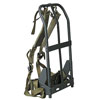 |
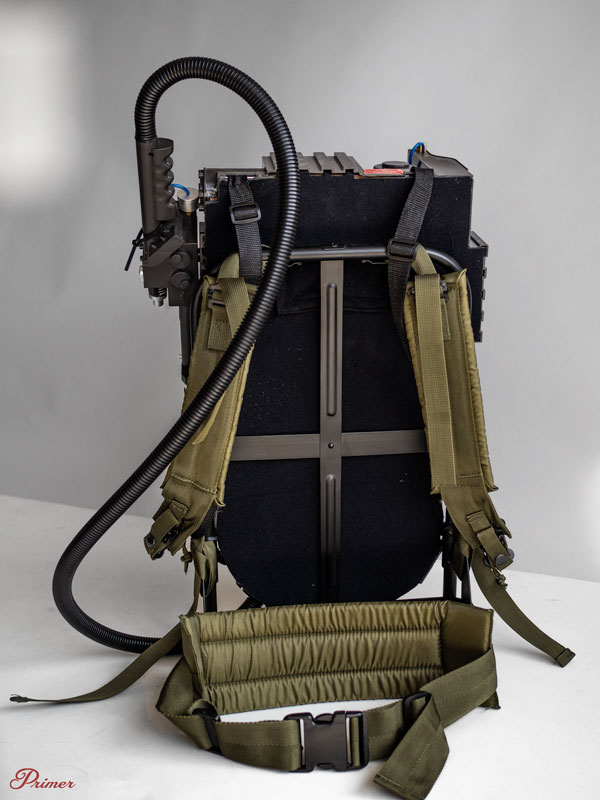
A.L.I.C.E. Frame, $70 Actual proton packs are mounted on these military pack frames, which is where the padded straps and waist belt come in for the costume. This is an optional upgrade for the Spirit pack, but really adds a bit of heft to the smaller pack and outfit as a whole. |
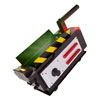 |
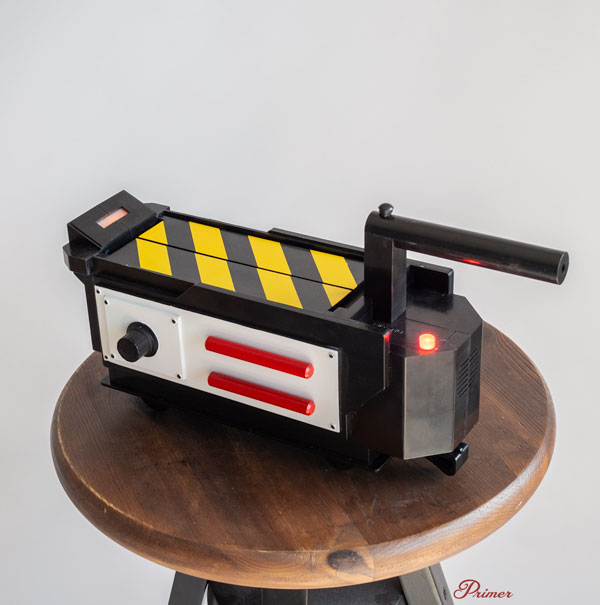
Spirit Halloween Ghost Trap, $40 A well-sized budget option that lights up and has sound. Even if you skip the proton pack, this trap is a nice addition to your belt. |
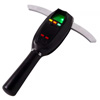 |
PKE Meter, $40 A great addition to the belt. |
Assembly
These instructions are grouped by part for ease of reference, but all the painting (elbow pads, goggles) and hot glueing (hose connector, belt fobs, and gizmo) can be done at the same time, while dyeing the belt.
1.1 Ghostbusters Uniform
The khaki jumpsuit should be worn baggy to match the look of the films. The Tru-Spec suit has the correct assortment of pockets, rounded collar, zipper, and tone of the film. I wear a small or a medium in most shirts and ordered a medium. The pants are really long and baggy, but if you wear clothing underneath as they're intended and tuck the legs into the boots, the fit fills out.
Each Ghostbuster always wears a black crew neck t-shirt underneath.
1.2 Ghostbusters Patches
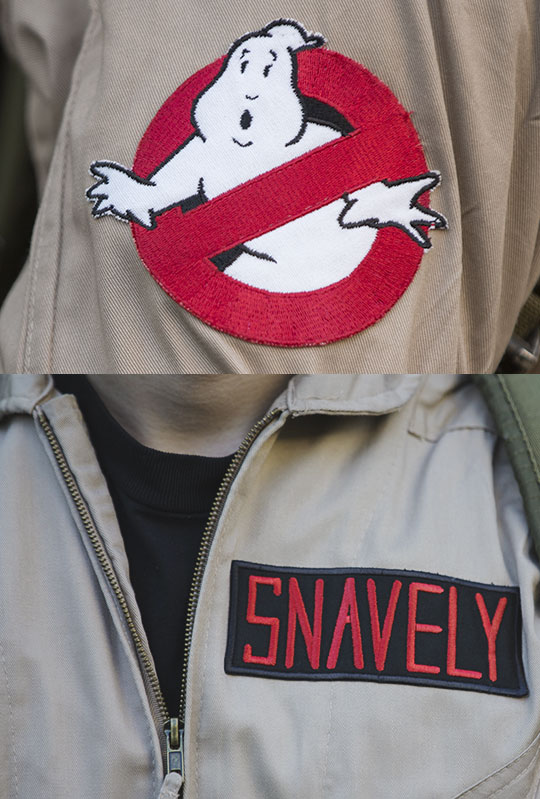
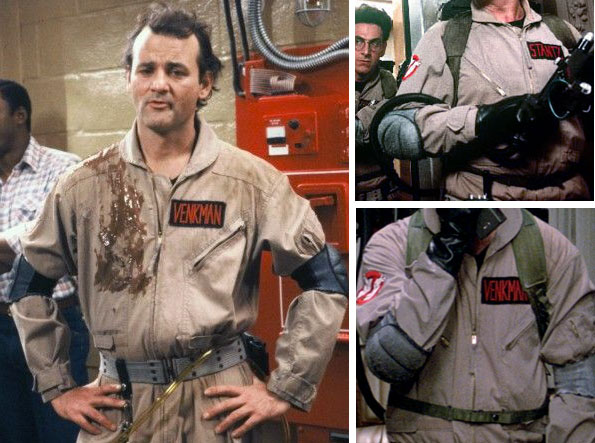
The most iconic parts of the Ghostbusters costume after the khaki jumpsuit are the No Ghost logo and name patches. These are super easy to apply, no sewing required!
Begin by removing the attached velcro name patch that comes on the jumpsuit. I had considered, and you can as well, leaving this on and using it to afix the custom name patch to the suit so that it could be swapped for other names later if I wanted. The reason I didn’t go this route is because the name patch would be raised due to the extra velcro behind it, and because the placement is incorrect according to the movie.
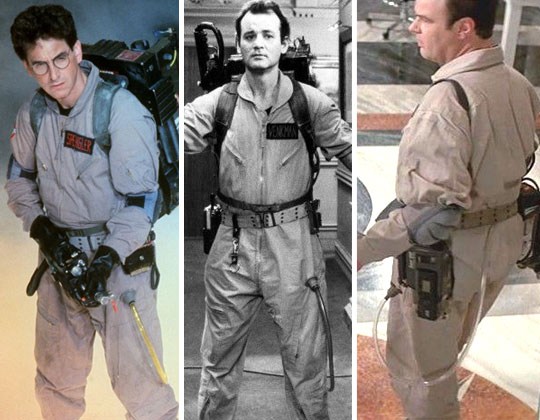
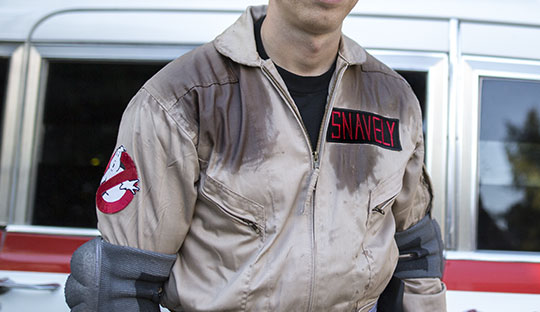
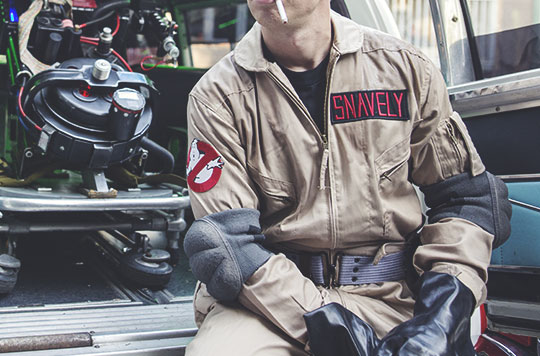
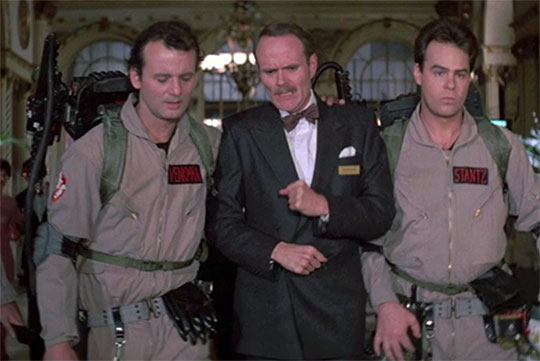
Notice in these screenshots that the left edge of the name patch is almost touching the main zipper. This is so when wearing a proton pack the straps don’t cover any of the name, which would happen with the traditional military placement.
Removing the velcro is a cinch, simply turn the suit inside out and use a knife to cut the thread loops holding it to the suit.
The No Ghost logo patch goes on the upper right arm. For proper placement, put on your elbow pads (tuck the extra material underneath the pads to recreate the movie look) and place the patch approximately half way between the edge of your shoulder and the top of the elbow pad.
The name patch goes on the upper left chest, and the left edge is approximately half an inch from the main zipper.
Iron on Instructions
The patch seller as well as many forum members suggest sewing the patches on in addition to ironing. I chose not to do this because I don’t anticipate wearing it that often, but it’s always something you can do later if you need to.
Turn your iron to full heat. Place an old t-shirt between the iron and the patch and press and hold for 15 to 20 seconds. Pull the sleeve inside out, place the t-shirt between the iron and suit and press and hold to heat the back of the patch for another 15 to 20 seconds. Heating both the front and back ensures the adhesive is properly attached to the uniform.
Repeat this process for the name patch.
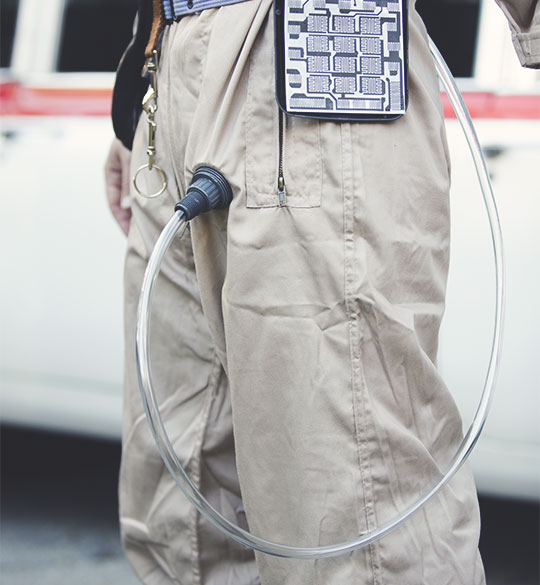
1.3 Ghostbusters Hose & Hose Connector
The long, draping hose is an iconic part of the Ghostbusters costume, which you shouldn’t omit. It adds visual complexity and texture, and without it the costume won’t look complete, even if an onlooker can’t put his finger on why.
The hose’s function is never addressed in the films, though in interviews Dan Aykroyd has suggested they’re astronaut / fighter pilot inspired catheter tubes. Which makes sense, if a common part of your job is getting the piss scared out of you.
The hose in the first film is a transparent yellow color and in Ghostbusters II it’s clear. Many on the forums suggest using yellow RIT dye, the same kind used on the belt, to tint the hose, but unfortunately when I tried that the color didn’t stay at all. Others suggested some other tinted liquids but I just didn’t think it would create a uniform stain to be worth experimenting with it. So, our hose is from Ghostbusters II.
In the film, the tube attaches to the uniform by a small connector that is sewn on, with several thread points around the perimeter:
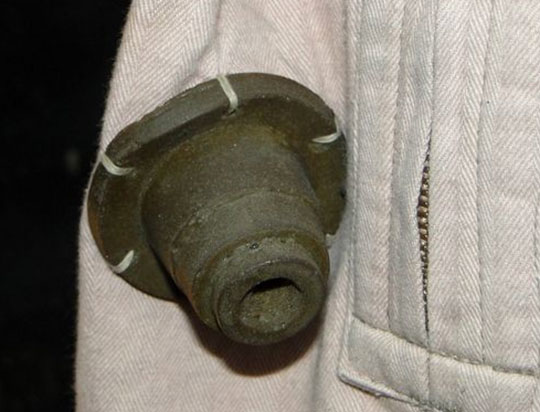
from Ghostbusters Fans
I chose to use a screw on PVC connector because it looks almost identical in shape to the real one, but also because it isn’t a permanent solution. It can be added and removed as necessary.
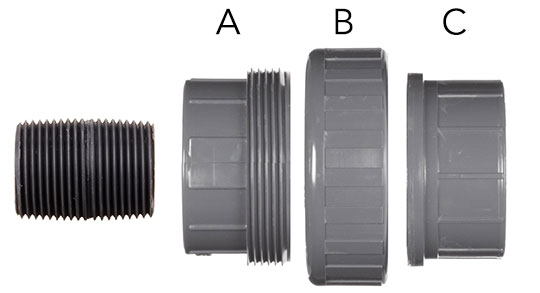
The PVC union has three parts, (A) a front connector that is threaded (this will be the visible part on the suit), (B) the back part that screws on to that on the inside of the uniform, and (C) a removable non-threaded female plug on the other end. We don’t need that part, so you can put that aside.
We use a threaded 1/2” PVC pipe nipple with a 1-1/8” length screwed into the front connector (A) to create a shape similar to the film’s. The 1/2” vinyl tubing slides into the nipple freely and to ensure it stays in, glue the inside of it with a little bit of hot glue.
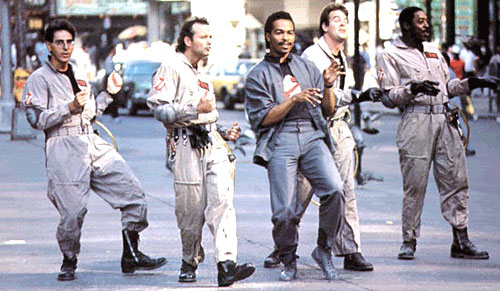
The hose drapes down to about knee level or a little below, then comes back up and slides in to the back of the belt. Surprisingly, this is how the hose is connected in the films, it’s literally just tucked into the belt, which you can see at several points in the film, including in the photo of Ray above.
With the belt sized properly, you shouldn’t have a problem with it coming loose, but you could use another PVC union as we use on the front on the back if you’d like to create a more finished look.
1.4 Ghostbusters Boots
If you already have black boots that have a combat boot design to them they should work just fine. The real boots from the movie are Vietnam-era Paratrooper Jump Boots, but those are hard to find for less than $100 so for this costume we’ll use Vietnam-era Jungle Boots for a similar look and profile. These are available on Amazon for around $30, and should also be readily available at your local Army Navy store. If you’re looking to create a super accurate version, look specifically for Corcoran model 995. Unfortunately, it was recently discontinued, so you can go for the updated Corcoran 1500 which doesn't feature the side zipper, or try a reproduction from Magnoli Clothiers.
The flight suit legs tuck into the top of the boots and create a billowy look. If you want to adopt the laissez-faire attitude like Venkman, you can just let the legs fall over like normal pants. However, your flight suit legs will almost certainly be too long so you’d need to tailor them. You could use this method to shorten the legs without any sewing.
1.5 Slime
Since we're going for the pack-less, tired and weathered Ghostbuster, we need some slime to show how hard we've been working. Finding a slime solution that wouldn't stain the uniform was surprisingly tricky. At first I thought using laundry detergent would be smart: It's the right consistency and the color works. Unfortunately quick research led me to discover that laundry detergent will stain if you let it dry on clothing.
So I went to the Ghostbusters boards and found an unlikely fix. The fine fans on the forum suggested wire pulling lubricant gel, which by design is clear, odorless, non-toxic, and doesn't stain. I picked some up on Amazon and did some tests, and what do you know, it works as advertised.
It will dry eventually, but much slower than if you just used water alone. Don't be afraid to really layer it on, the more you use, the longer it'll last.
2. Ghostbusters Elbow Pads
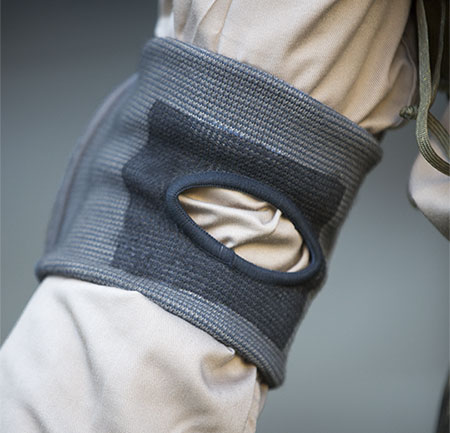
The elbow pads have an inconsistent color throughout both films ranging from light gray to a very dark gray, so no matter how you go about coloring them they’ll be screen accurate.
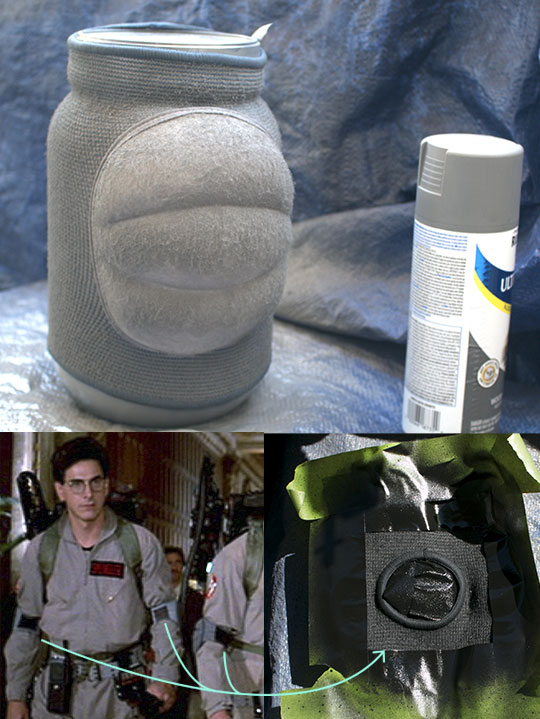
The elbow pads are created by spray painting white Volleyball knee pads. [Update: Amazon now sells three section gray knee pads that aren't quite screen accurate but will make do if you're in a rush]The knee pads have a distinct three section design, and also feature a black square patch on the inside elbow. Alternatively, GBFans sells screen accurate gray elbow pads for $25.
The Ghostbusters forums frequently mention dyeing the knee pads with the same RIT dye as the belt, but when I tried this I found the actual foam pad didn’t take any color at all, and the non-cotton parts of the elastic band didn’t either, resulting in a white pad with a striped band.
Everyone else spray paints theirs, which is fast and easy and creates a great looking finished product. The paint does make the pads a bit fuzzy, but close inspection of the film reveals their pads also have this texture.
The knee pads from Amazon now come with a logo that readers report can be removed with an X-acto knife prior to painting.
To ensure the elastic is a consistent gray when expanded on your arm, slide the pads onto a large cylinder such as a protein shake tub. Use a good quality gray spray paint like the Krylon linked above. As with all spray painting, you’ll want to hold the can about 15 inches from the pads and slowly cover the area. The pads dry quickly so give it 2-3 coats to make sure you get into all the nooks.
Once that’s done mask off a square on the inside of the band and paint that black.
3.1 The Utility Belt
The gray belt is equally important as the gray elbow pads and leg hose for creating the screen accurate look. To create the belt, we’re using a white cotton web military belt and dyeing it gray with RIT fabric dye.
Do not be intimidated by the dye process, it’s extremely simple and is super fast. When using RIT dye you can use a bucket or use a washing machine. I live in a building with shared laundry so I chose the bucket method just in case any stray dye was left in the machine for the next person.
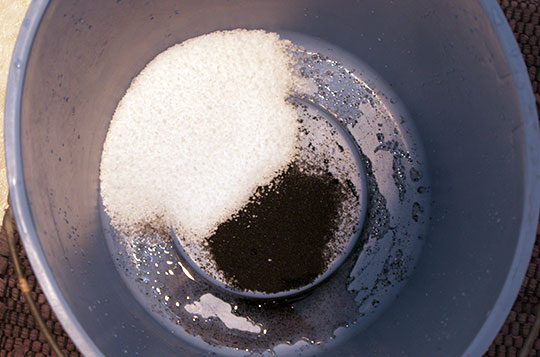
Pour extremely hot water into a bucket – I used an electric kettle – along with the powdered RIT Dye and 2 cups of salt, per the package instructions. Stir the powder into the water and then place the belt in the bucket. Press it into the gray water to ensure equal coverage.
Be careful with getting the stain on your hands, it can take awhile to get off. If only we had some sort of rubber gloves we could use…oh yes! Use your black chemical gloves that you bought for the costume to protect your hand from the stain.
Leave the belt in the stain for an hour, checking in and re-submerging it every 15 minutes or so. Once the belt is the color gray you like, remove it from the dye and let it dry, obviously being careful with what you let it touch. When mine was dry the metal parts of the belt had a gray coating on them that wiped off with a wet paper towel. Make sure you do that so it doesn’t get on anything else.
The belts are sizable, simply find the folded over end with the two hooks on it and place them in the appropriate holes to give you the long enough length.
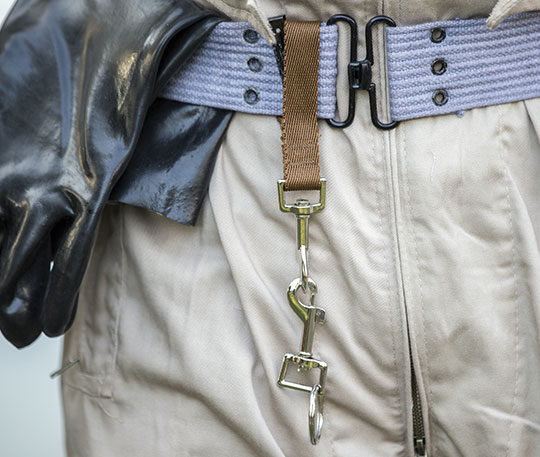
3.2 The Ghostbusters Key Fobs
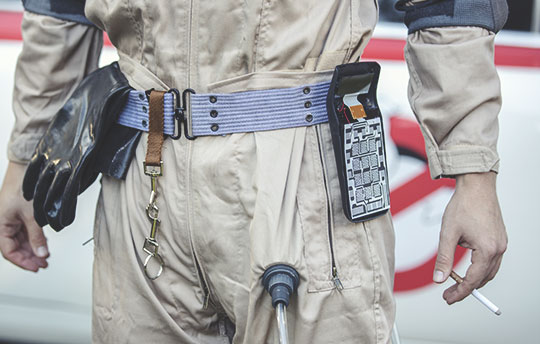
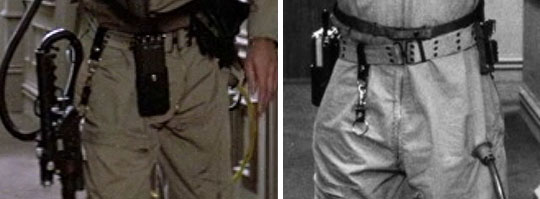
In the film each Ghostbuster has their own set of key fobs attached to their belts above their right leg. These are used to store both the neutrona wand from the pack as well as the trap.
Unfortunately this is one of the items that isn’t available on Amazon at a decent price. Created with a combination of bolt snaps, key rings, and leather loops, similar real-world options are $14+ each. Even at a local hardware store, the bolt snaps are $4 a piece.
The solution is dirt cheap! Go to your local dollar store and buy two dog leashes. I actually found these brown leashes at Rite Aid for $1 each.
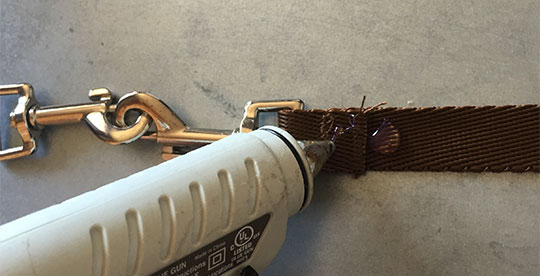
Take one of the leashes, and starting from the bolt end, cut the leash about 8 inches, leaving it attached to the bolt. Create a loop that is big enough for the belt to slide through and hot glue the cut end back to the bolt end.
Remove the bolt from the second leash and connect it to the looped bolt. Voila! $2 belt fobs.
3.3 DIY Ghostbusters Belt Gizmo
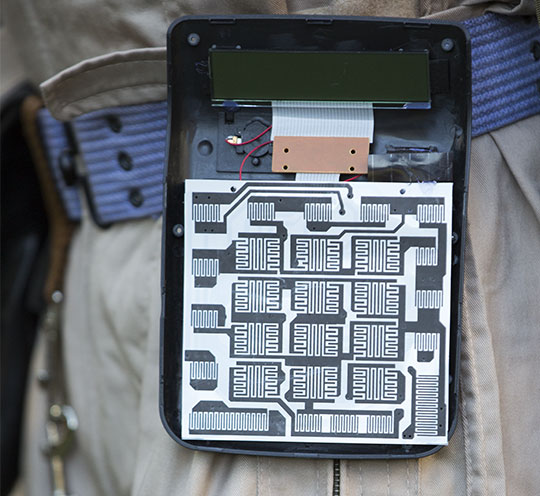
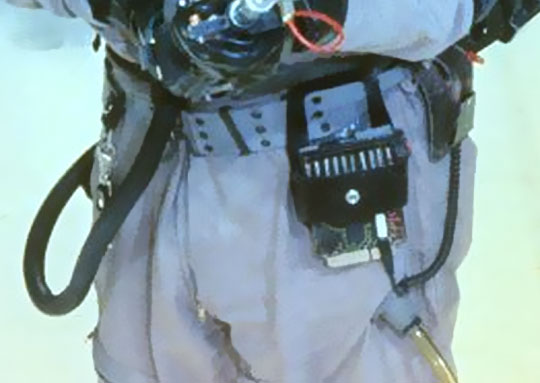
Above the Ghostbuster’s uniform hose connector is an electronic gadget holstered on the belt that’s known as the Belt Gizmo. This item is never explained (some speculate it's some type of readout for the proton pack) and is just present to beef up the utility belt.
This item is the least screen accurate part of our Ghostbusters costume. The film’s gizmo is created with a Sanyo ICC-808D calculator circuit board, some nixie tubes, a coiled wire, as well as some various other electronic components and is attached to the belt with a black leather holster. I felt recreating this was a little too far down the rabbit hole for this project. However you can find plans on building your own or you can buy them off of eBay.
To create something with a similar effect, buy a large button calculator from the dollar store. Remove the faceplate by unscrewing the screws on the back. Inside you’ll find rubber or plastic buttons, a paper circuit board, small solar panel, and the screen. Take a moment, play with it and be surprised at how something so simple can calculate complex math. Incredible.
Anyway, take your hot glue gun and glue the screen, solar panel, and paper circuit board in place. Cut a 5 inch section of your dollar store dog leash and hot glue that to the back of the calculator to create a belt loop.
3.4 Gloves
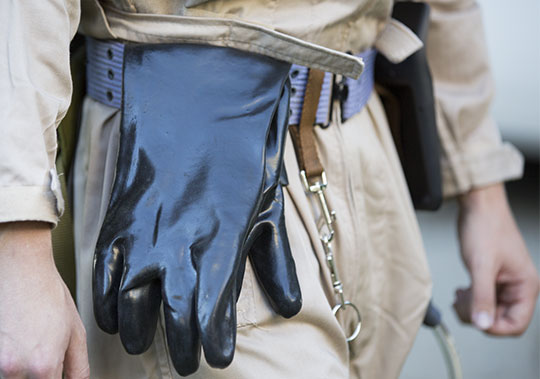
While you can wear the gloves if you want, I like draping them over the belt like the Ghostbusters do. It adds more complexity to the belt, and your hands won’t be sweating the whole time.
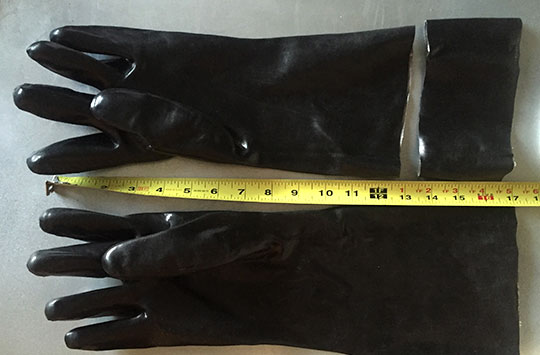
The chemical gloves from Amazon are long; longer than they should be for the first film. The second film’s gloves are about as long as the Amazon ones, but I like the way the shorter ones look both when worn and when draped over the belt.
Simply measure the gloves to about 12 inches and cut them with scissors.
4. Ecto Goggles
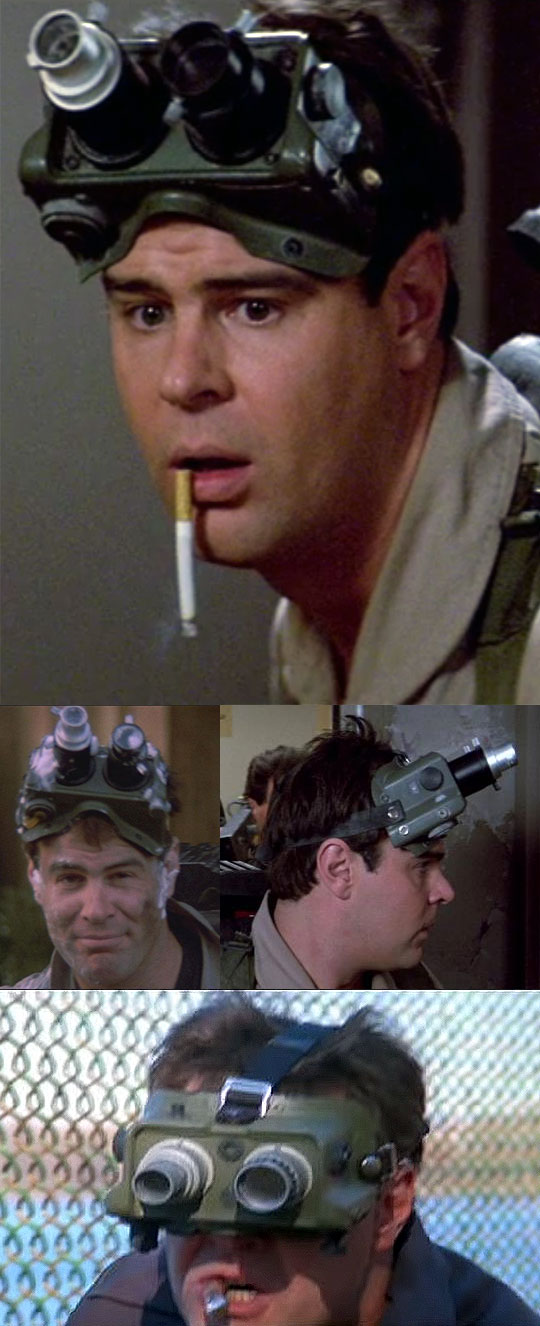
The Ecto Goggles are shown in use during the Sedgwick Hotel scene in Ghostbusters, as well as in the montage of Ghostbusters II, but are seen resting atop Ray and Egon’s heads throughout both. It may be tempting to skip the goggles, and if you’re in a mad dash to finish the costume you could forgo them, but having them on your head really takes the Ghostbusters costume to the next level and they’re super cheap and super easy to put together.
The real goggles were created by using the base of surplus military night vision goggles model number AN/PVS-5a, which you can find on eBay if you want. A lot of dedicated fans and prop makers use the real deal for their goggles, unfortunately due to the demand from the Ghostbusting community, these non-working useless military surplus command prices of $50+.
You could splurge and pay over $400 for the previously released Mattel version. There is also a cheaper costume option released for Ghostbusters Afterlife that you can get on Amazon and try to gussy up with the sticks and some paint. My preference is I think the DIY route will have a more substantial feel.
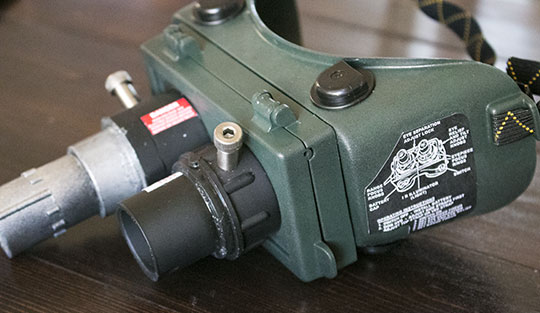
Instead, we’re going to use similarly shaped welding goggles from Hobart. Our DIY version will cost less than $17, with the most noticeable difference between these and the real deal is the third strap that goes over the top of the head. The only other parts to the goggles are three PVC pipe pieces, two shoulder bolts screwed into the pipes to mimic optic adjusters, spray paint, and free printable labels.
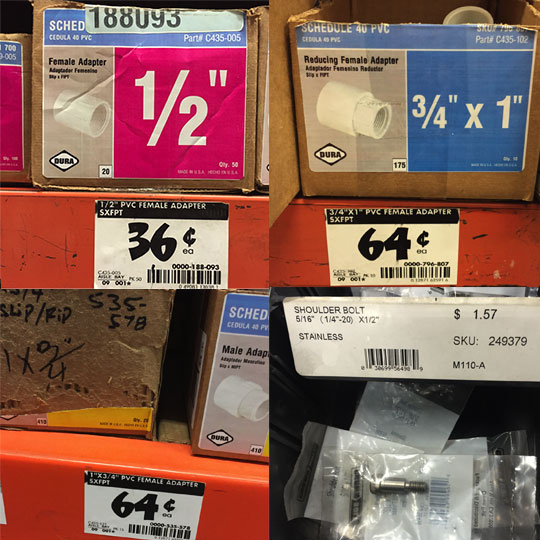
The welding goggles and spray paint can be picked up on Amazon, the labels can be printed for free, but unfortunately the 3 PVC pipe parts need to be purchased at your local hardware store. Locally they cost around $.68 each but on Amazon they’re upwards of $9. That’s crazy.
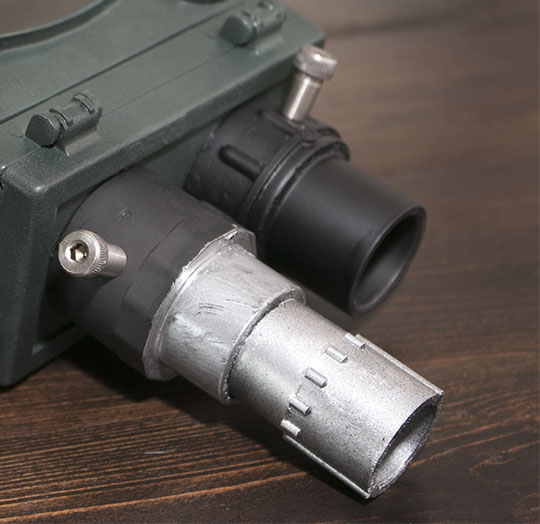
The external lenses are made of three PVC parts. The lens on the actor’s right are made of two pieces, to create a 3 tiered shape, and the lens on the actors left is made of one piece that is about half as long as the completed right piece.
Here’s what you need.
- 3/4” x 1” reducing female adapter ($.64 at Home Depot)
- 1” x 3/4” PVC female adapter ($.64 at Home Depot)
- 1/2” female adapter ($.36 at Home Depot)
- Two 5/16″ x 1/2″ shoulder bolts ($1.57 at Home Depot), which are in the drawers in the fastener section
- Green and silver/gray spray paint.
These are common fittings but they do come in different shapes, so if your local store doesn't have the exact ones I used, you should be able to find something that will still work.
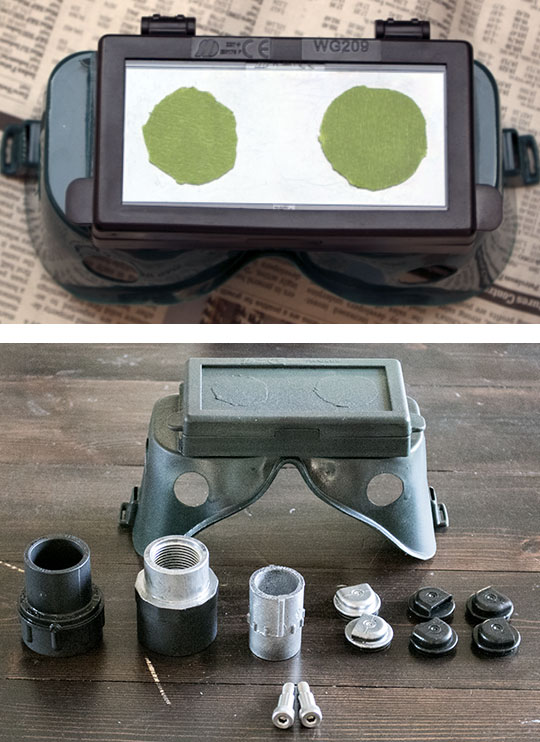
The welding goggles are a green/teal color already so if you’re short on time you can skip painting them the olive drab color. To paint, remove the strap and the various black plastic vents from the goggles. They just pop out and are easy to pop back in. Cut out two circles the size of the base of the two largest PVC parts from masking tape and place them on the front lens of the welding goggles.
Drill a hole in the side of each of the two lens bases for the shoulder bolts to screw into. These are our “lens” adjusters. Where you drill in the bases doesn’t matter, you’ll place the bolts based on their orientation when you glue them to the goggles.
Spray paint the goggles dark green. Spray paint the two larger PVC parts black, and the smaller 1/2” female adapter silver. If you don’t want to buy silver spray paint, you can use the same gray that you used for the elbow pads. Take two of the black plastic vents that you removed from the goggles and paint those gray also. These will mimic the knobs on the goggles.
As with the elbow pads, do multiple passes for consistent coverage.
Once everything is painted, remove the two masking tape circles from the goggles. Screw in the two shoulder bolts. Glue the silver female adapter to the smaller 3/4” adapter. I used black silicone to connect those two pieces, as well as attach the lenses to the goggles, but you could also use hot glue. Use whatever is convenient and quick drying.
Once everything is dry and glued together. the last step is to stick on our labels. The labels below were created and donated to the community by Hprops and Ghosthead. Click on those links and print out the labels at 100%. (Both sets of labels have extras.) Cut out the labels and use a glue stick to place them.
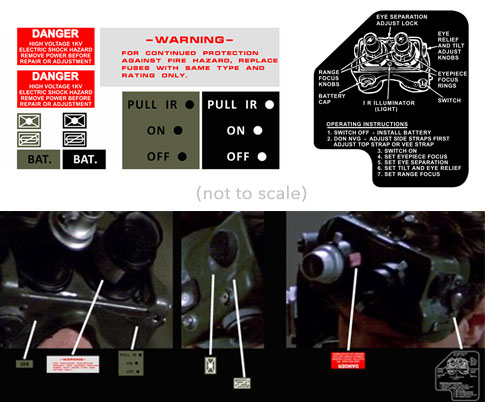
Label placement diagram by GB Fans
5. Cigarette
All of the Ghostbusters except for Egon are shown smoking throughout the first film. They're hard-working exterminators and it was the 80's. You could skip the cigarette but then you'd miss out on doing the classic Ray-surprised-by-Slimer look. It's a fun touch for any DIY Ghostbusters costume, especially if you don't have a proton pack.
Update!
6. Proton Pack
Since originally posting this uniform guide, the Halloween store Spirit has been releasing officially licensed Ghostbusters items. These items have an impressive attention to detail and while they're toy-level quality, these are things I wish had existed when I was a kid. However, don't feel obligated to spend the extra money to add the pack and trap to your uniform: I wore mine as originally intended – as one of the guys pack-less, worn out after a long day – plenty of times and even won a costume contest.
The Spirit proton pack is a great option for a frugal costume. They now offer two versions. The first is the original which I have, ringing up at only $90 and the most notable issue about this option is that it isn't full size – it's about 80% the size of an actual proton pack. However, for a majority of fans, and almost everyone else, this won't be that noticeable in person. For me personally, it's the smaller size of the neutrona wand that is more noticeable than the actual pack size.
They also have added a “life-size” proton pack version which is $250.
A whole niche of modifications have popped up for the Spirit pack to upgrade them or make them more screen accurate like 80% size ribbon cables, better lights, and more. So while the original Spirit version is 20% smaller than a real one, fans who aren't willing to drop the $250+ for a full size kit or build their own from scratch have embraced these as a smart alternative. In fact, a lot of people who have impressive pack replicas use the Spirit packs to wear to festivals so that nothing happens to their “hero packs.”
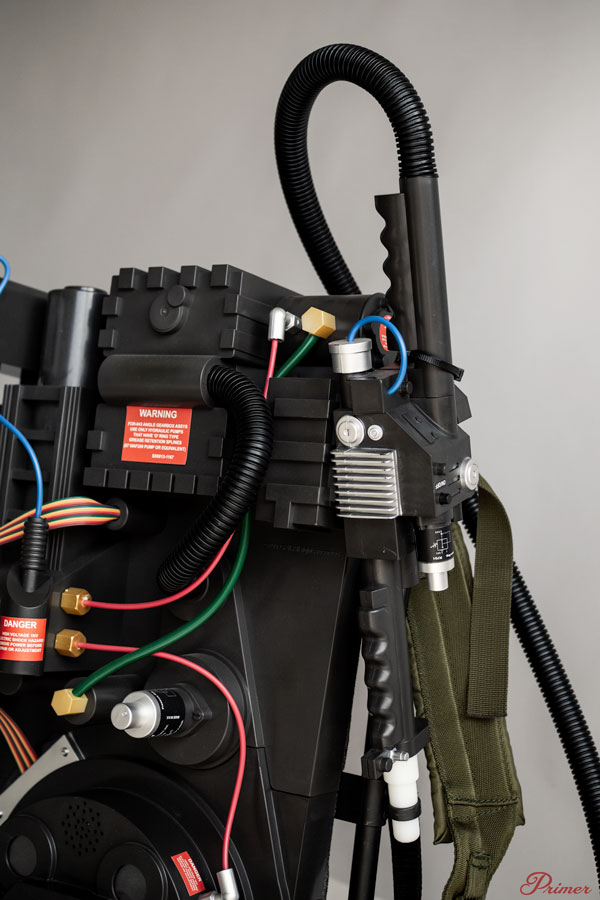
I put a zip tie on the wand so that I can attach it to one of the belt fobs, the way Egon does.
The 80% size Spirit pack has simple black shoulder straps. Attaching the pack to a military A.L.I.C.E. pack frame, as the ones in the films were, gives the smaller pack a bit more heft, as well as makes the whole costume look spot-on from the front. By mounting the pack on a frame, you can also adjust it so the top of the pack sits a little higher on the shoulders to mimic the look from the films. This also sells the whole thing from the front.
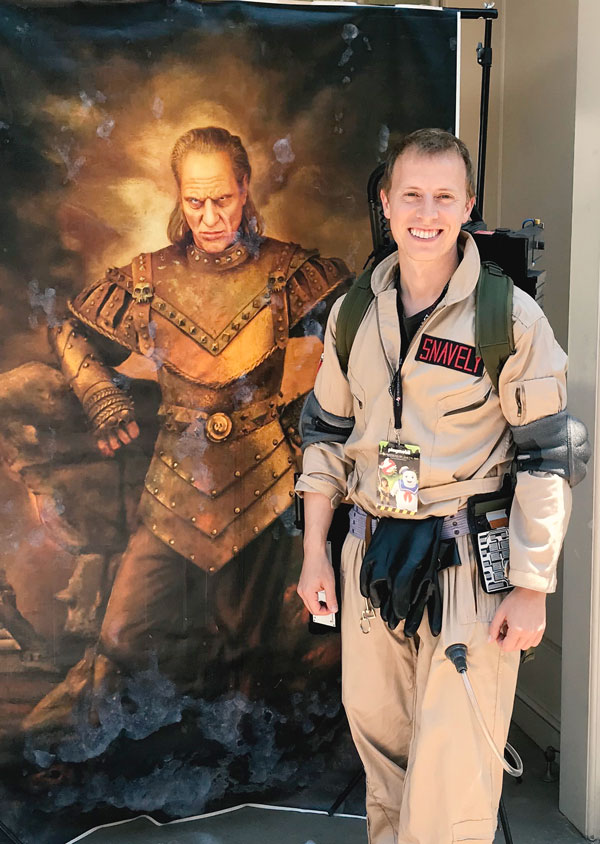
The pack itself is sturdy enough for the price and balancing quality and price, makes you not mind wearing it in a crowd or at a convention, as I did at the Ghostbusters 35th Anniversary Fan Fest on the Sony Lot:
You can see the hefty, padded straps add quite a bit to the costume as a whole, and since I mounted the pack a little higher on the frame, the top of it sits above my shoulders like a full size one would.
I didn't do anything fancy to mount the Spirit pack to the frame. In fact, I didn't even remove the straps that came on the pack, I used them as the mounting mechanism.
As you can see here, I slipped the original straps over the frame on top, on the inside of the frame's straps to lock it in place while wearing, and then simply used zip ties on the bottom, slipping it through the Spirit strap adjuster clip and wrapping it around the metal frame. That's it! I've worn it a bunch this way and it works great, and best of all, it's not permanent and maintains access to the battery pack to turn the lights and sound on.
Ghost Trap
Perhaps even before buying the proton pack, you could pick up the ghost trap. This full size trap has lights and sounds and has a built-in belt clip so if you're going for the original pack-less costume, the trap will add a bit of fun gear to your belt.
Links for the pack, frame, and trap are included at the top for both.
The Ecto-1
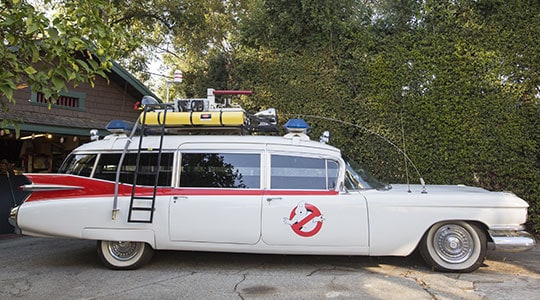
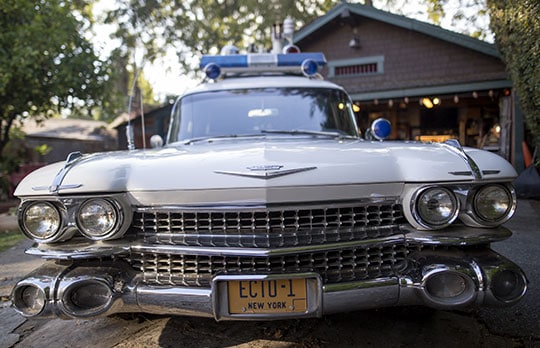
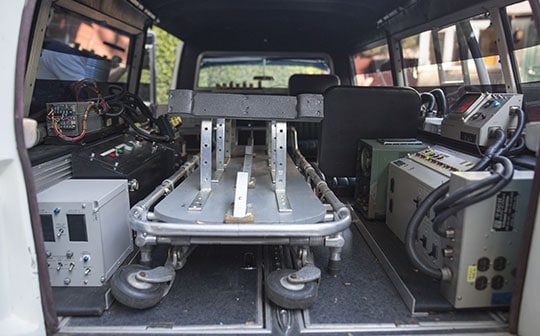
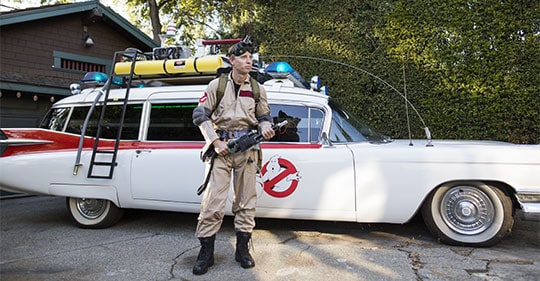
I want to give a shout out to Sean B., whose immaculate Ecto-1 is featured in our photos. It's identical to the film version, and I was genuinely blown away when I saw it in person. A true artist, most of the components were custom made from measurements Sean took from the real vehicle when it was sitting rotting on the film lot. In fact, after the recent restoration of the film car where some liberties were taken, Sean's Ecto is actually more screen accurate than the real thing. And if his Ecto-1 doesn't have you jealous yet, he also has a wall of Proton Packs and used to own a converted DeLorean Time Machine. A huge thanks to Sean for letting us photograph with his beautiful car and for being one of the nicest guys I've ever met.
If you make your own costume, I'd love to see it! Share it with us in the comments or on Instagram and tag @primermagazine! I'll add them here for everyone to enjoy.
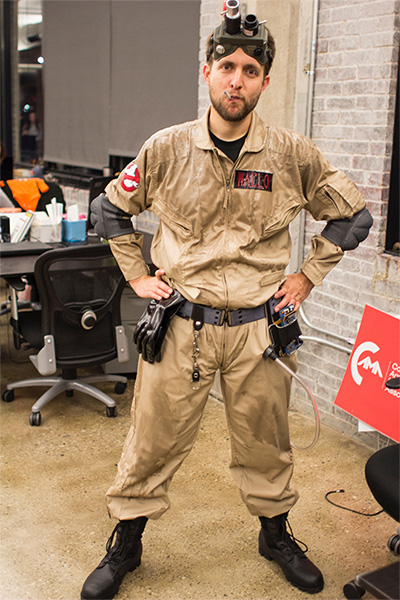
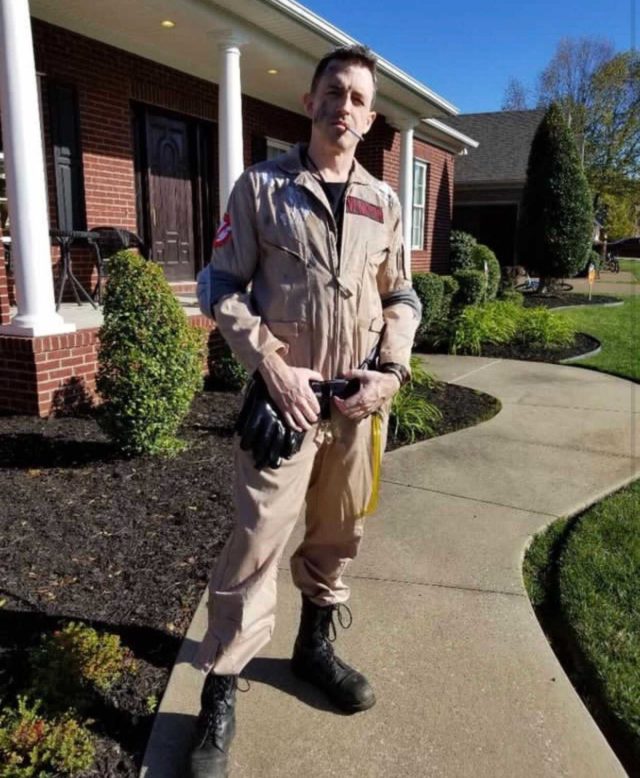
Primer reader Mike's contest winning uniform!
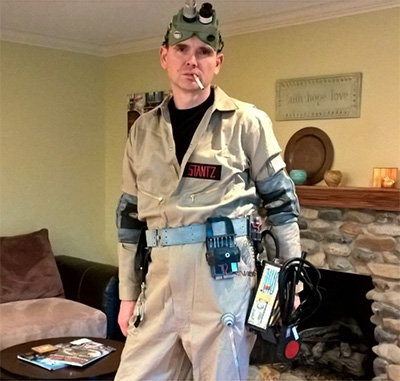
Primer reader Mark H's uniform with upgraded gizmo and trap!

Check out this awesome uniform put together by Primer reader James
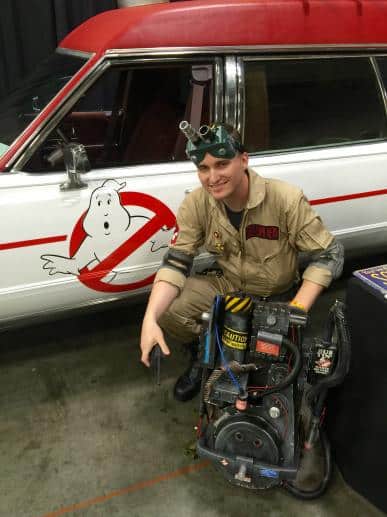
James also made an amazing proton pack!
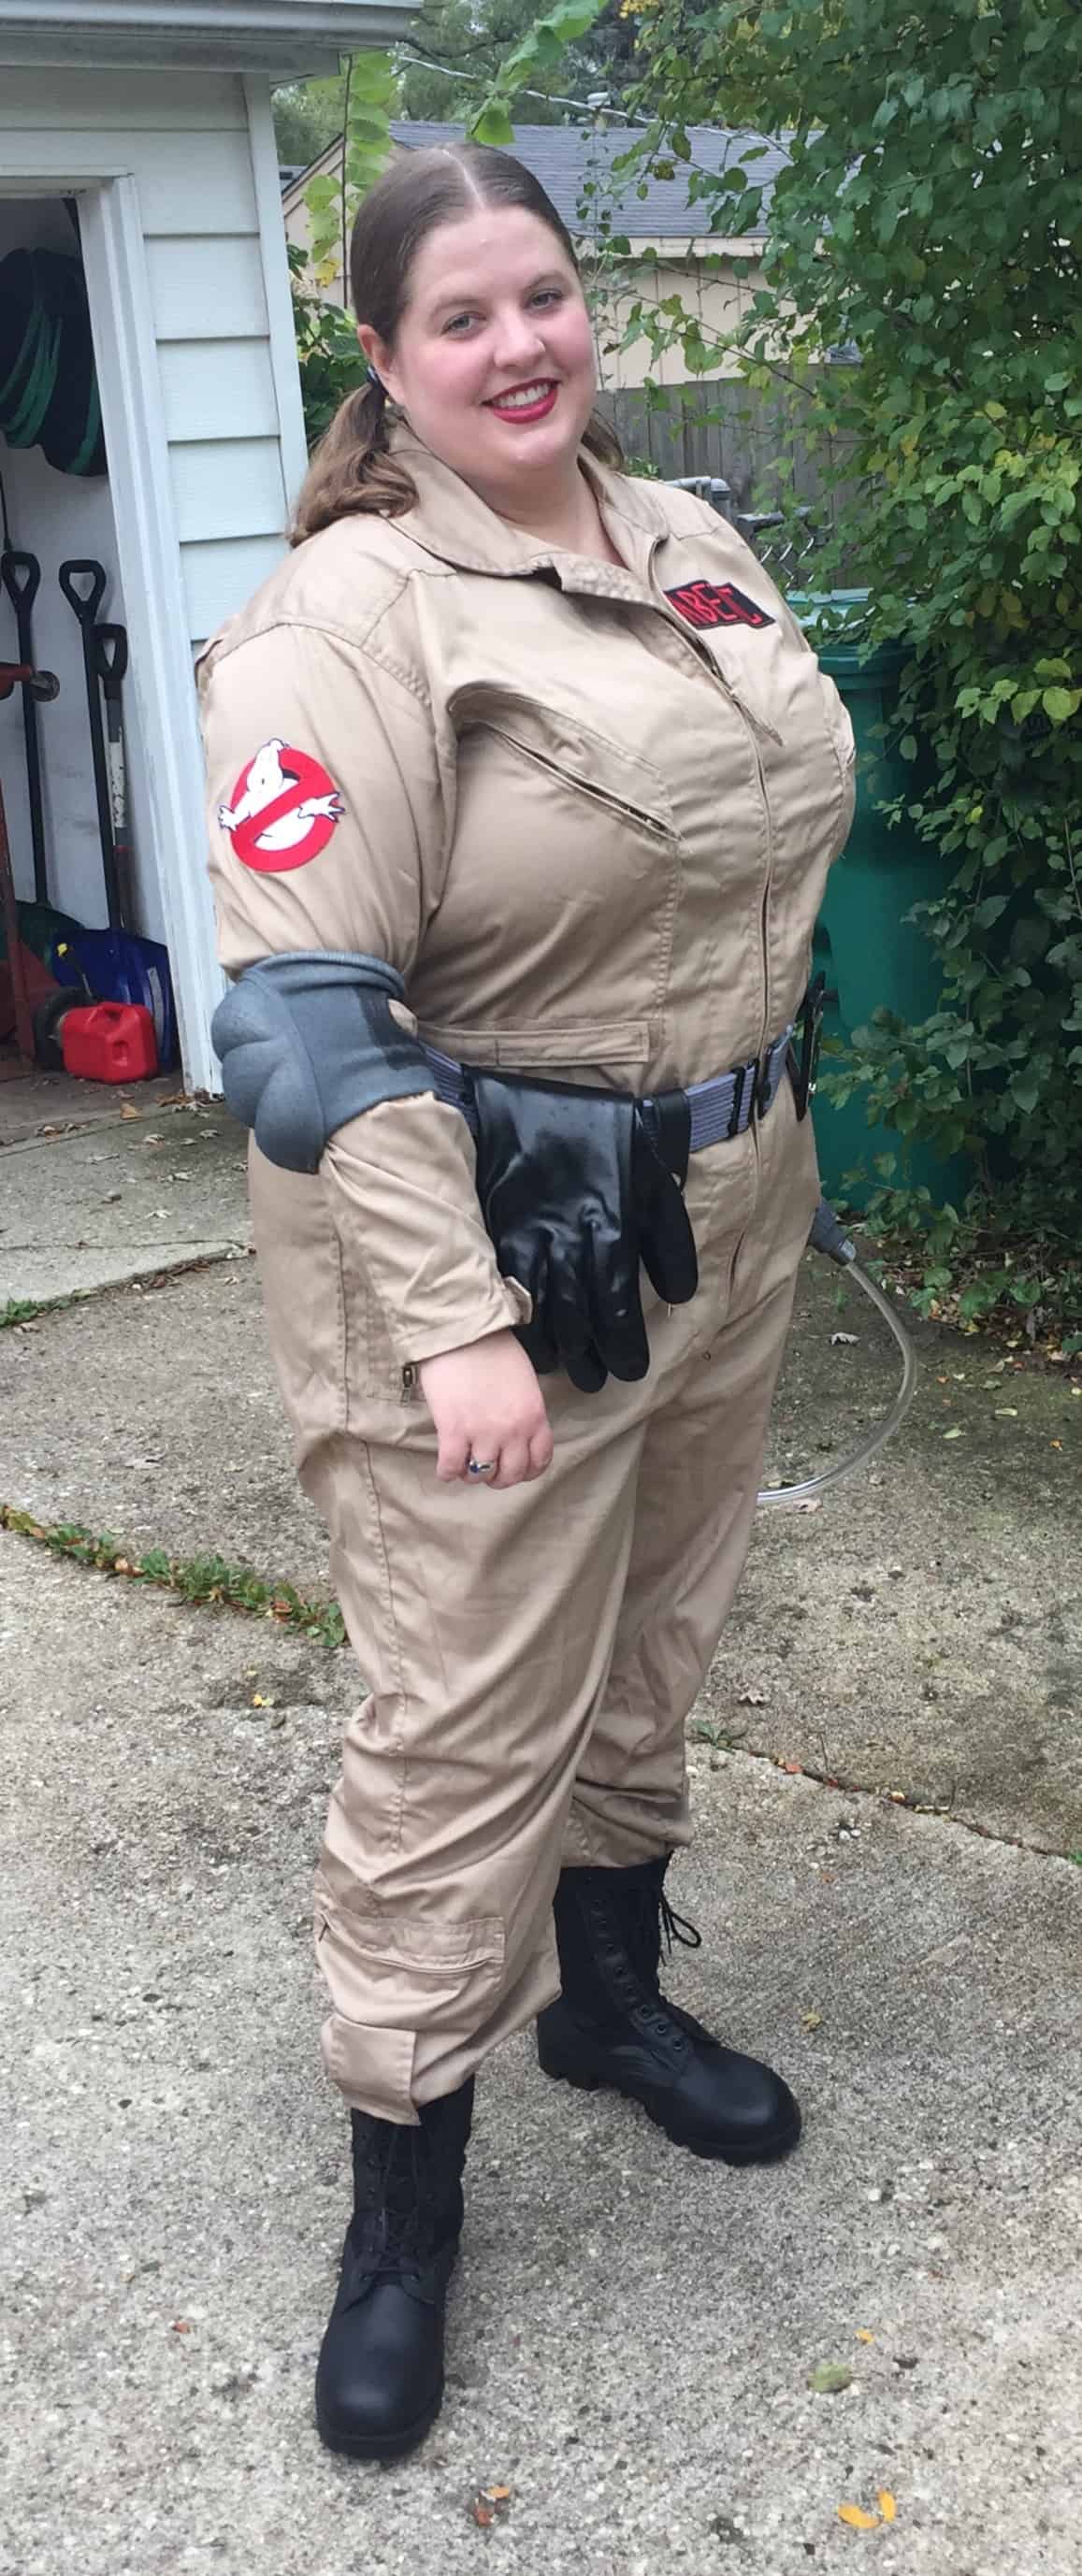
Primer reader Jamie's costume turned out perfect
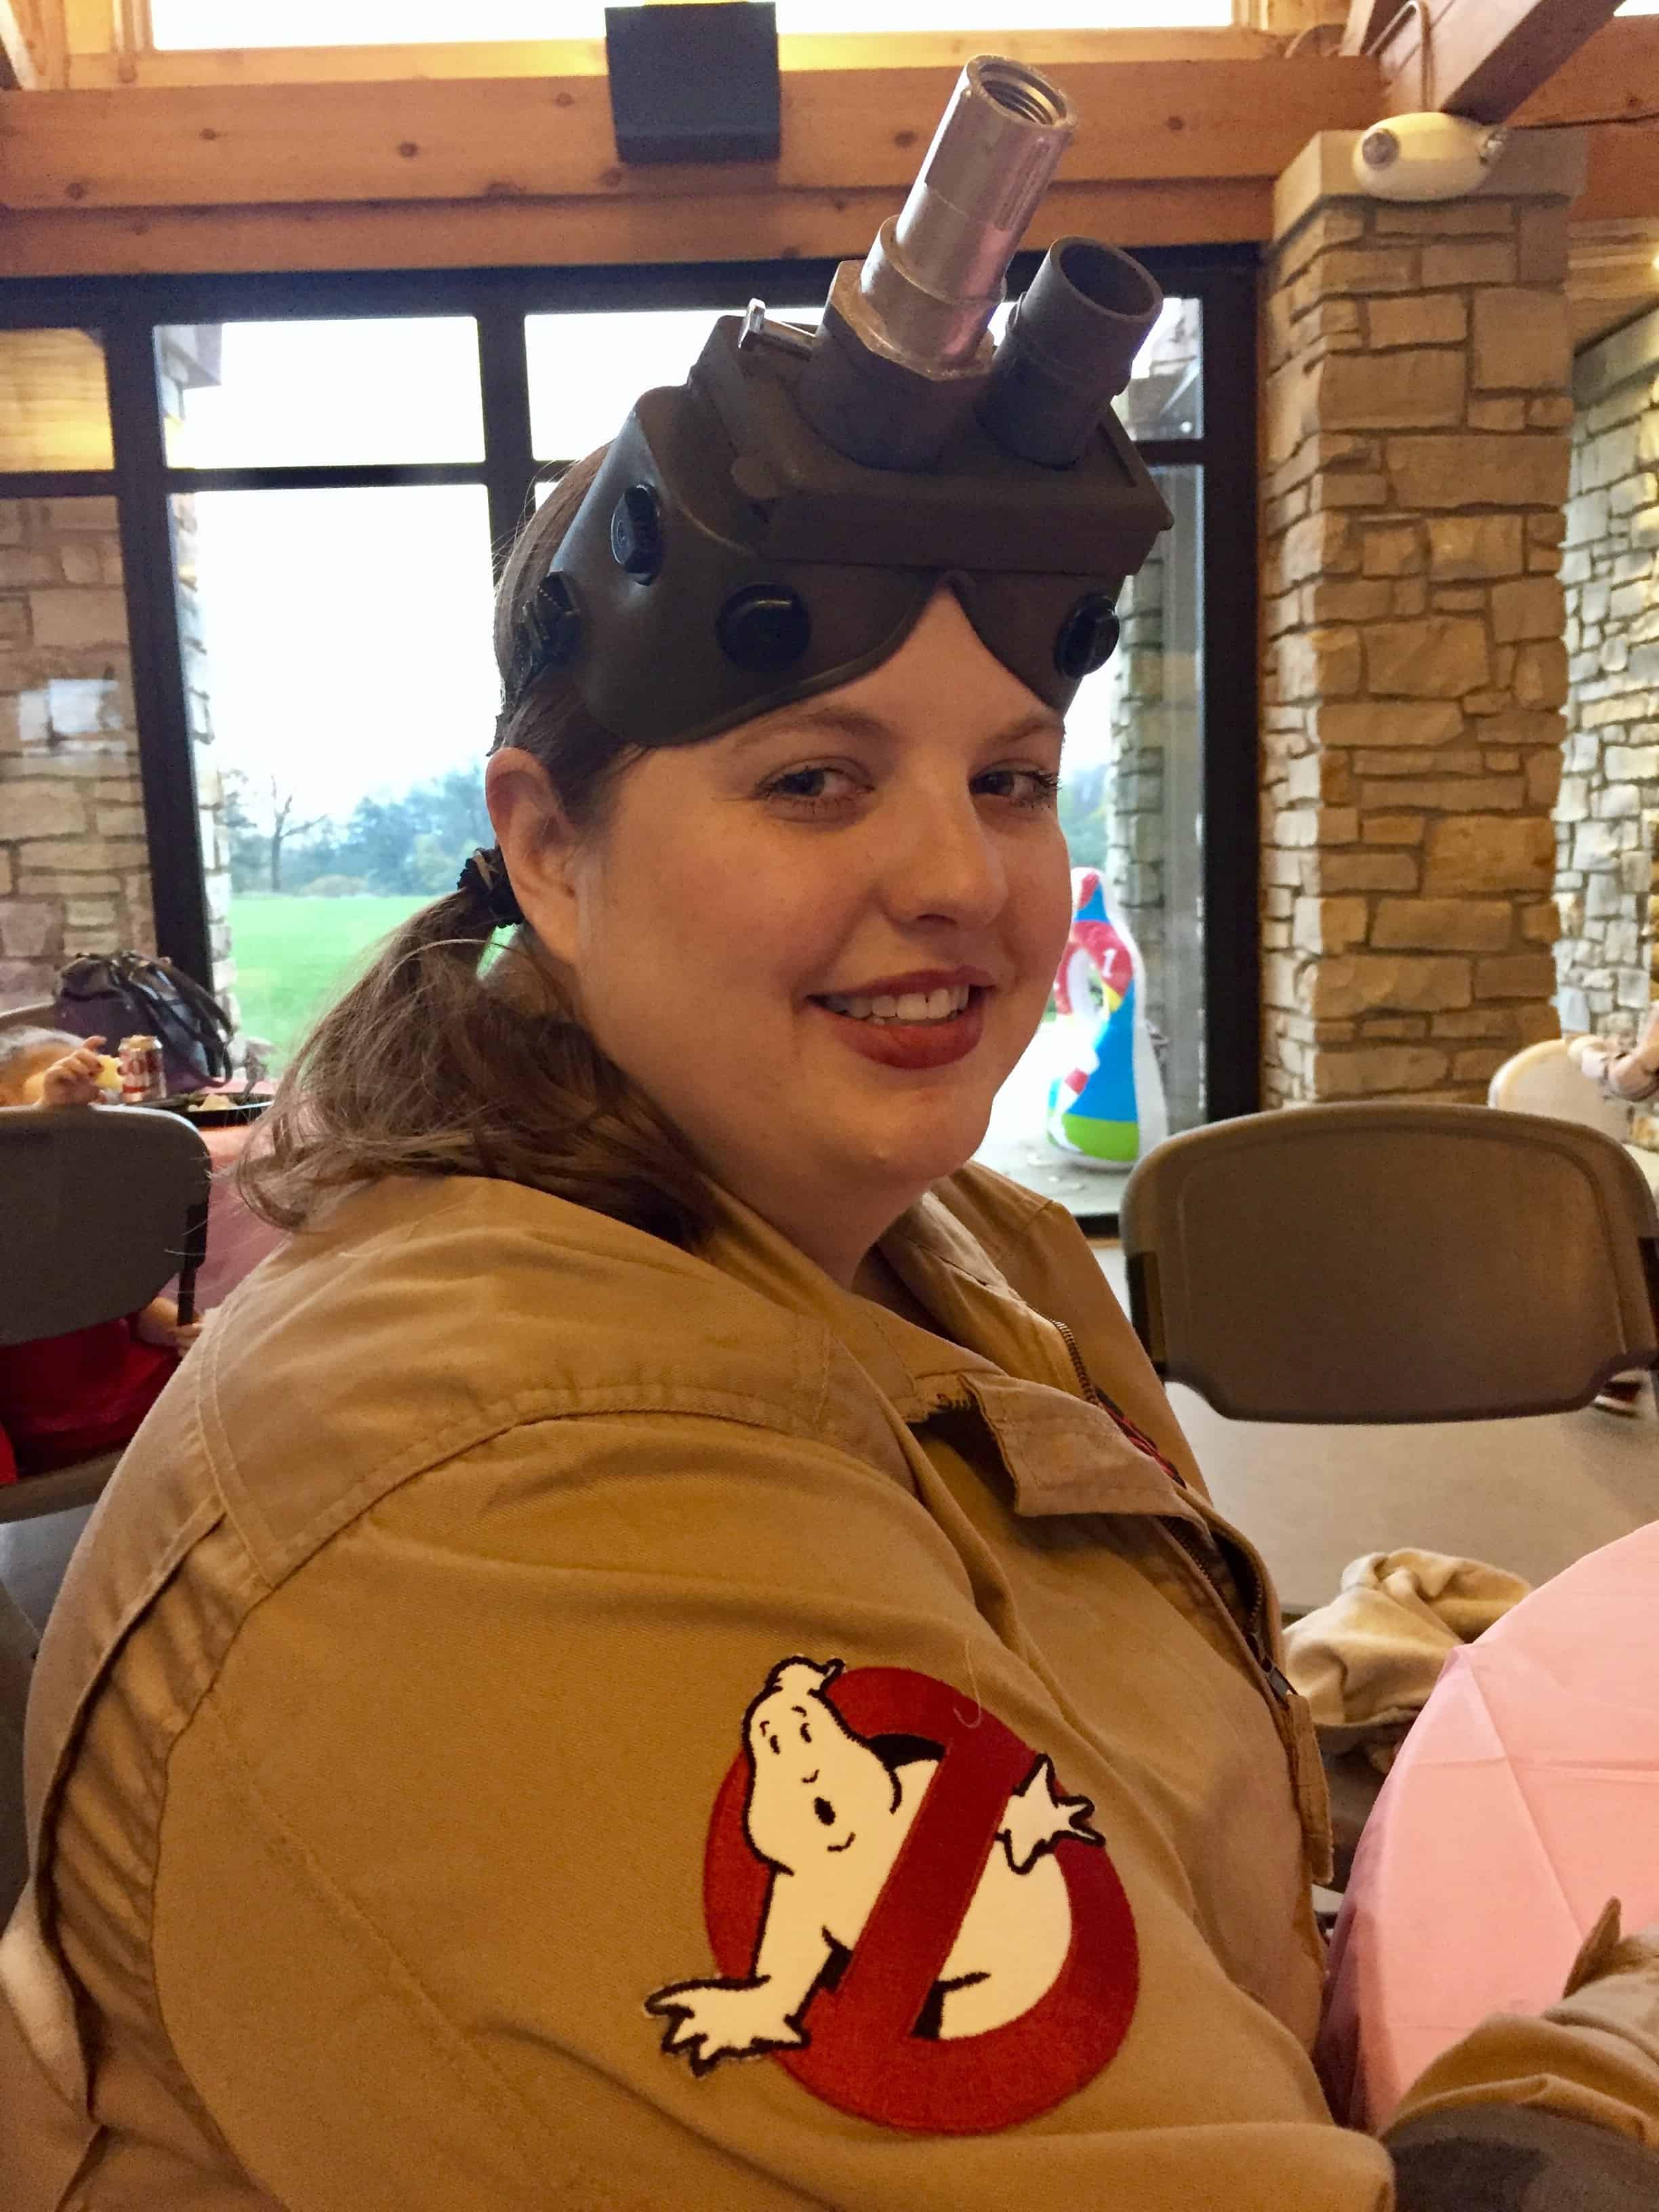
Jamie's goggles turned out great, too
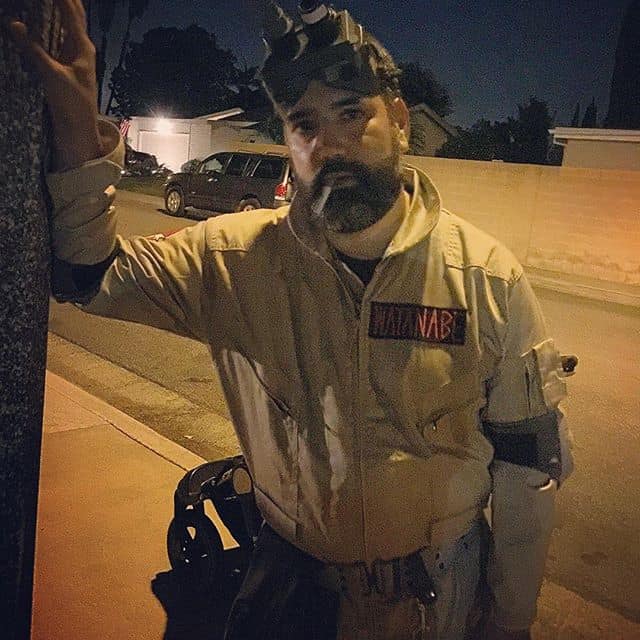
Jeffrey shared his costume with @primermagazine on Instagram. Nice!
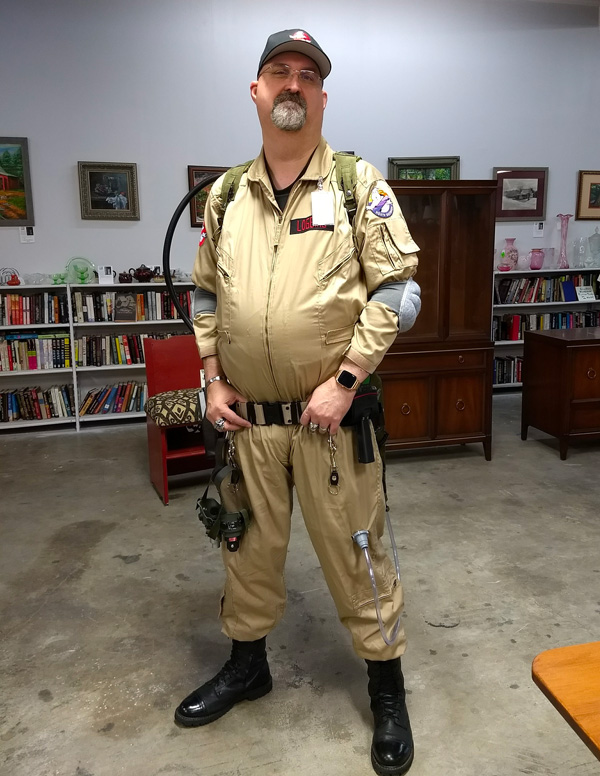
Reader Van's awesome Ghostbusters uniform, complete with modified Spirit Halloween pack
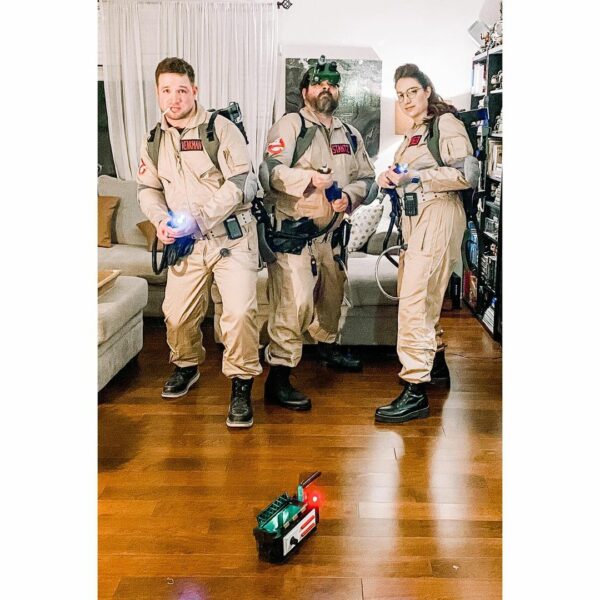
Amazing turnout for these Ghostbuster team costumes shared by amandathecow!
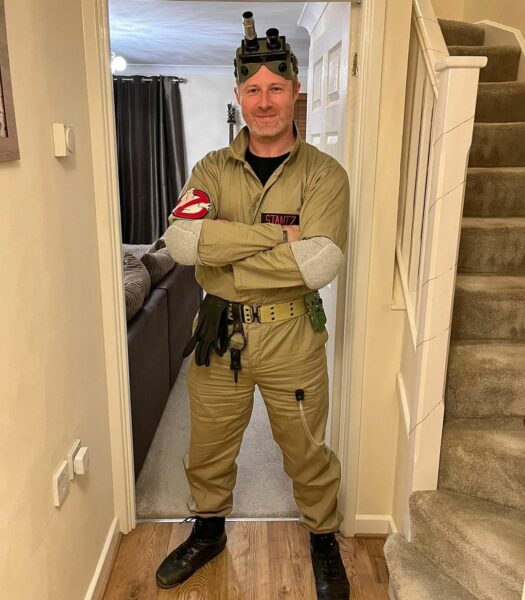
Matt Speedle looks awesome in his Ghostbuster's Halloween costume
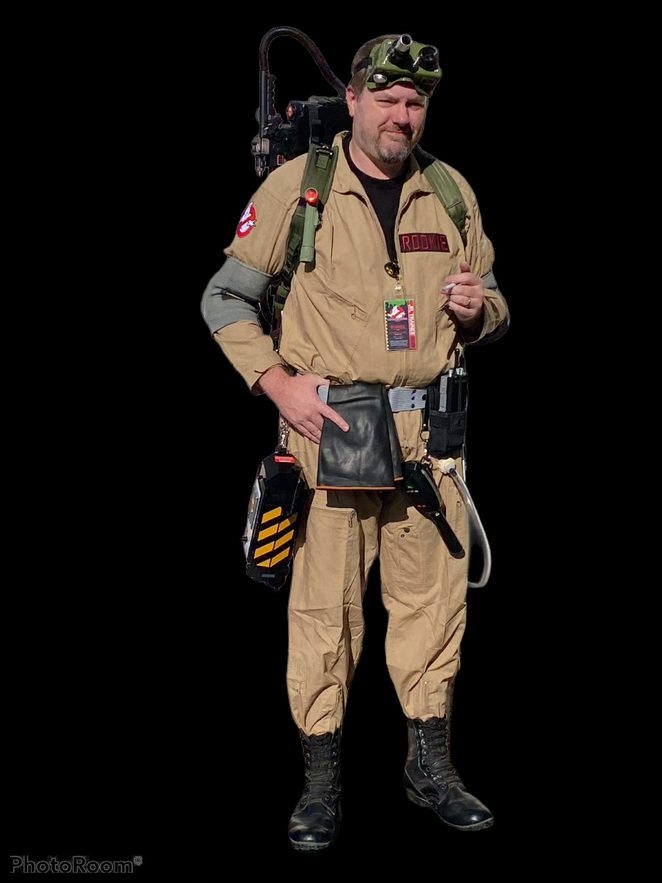
Primer reader Edwin M. Dye made this impressively complete Ghostbusters uniform!
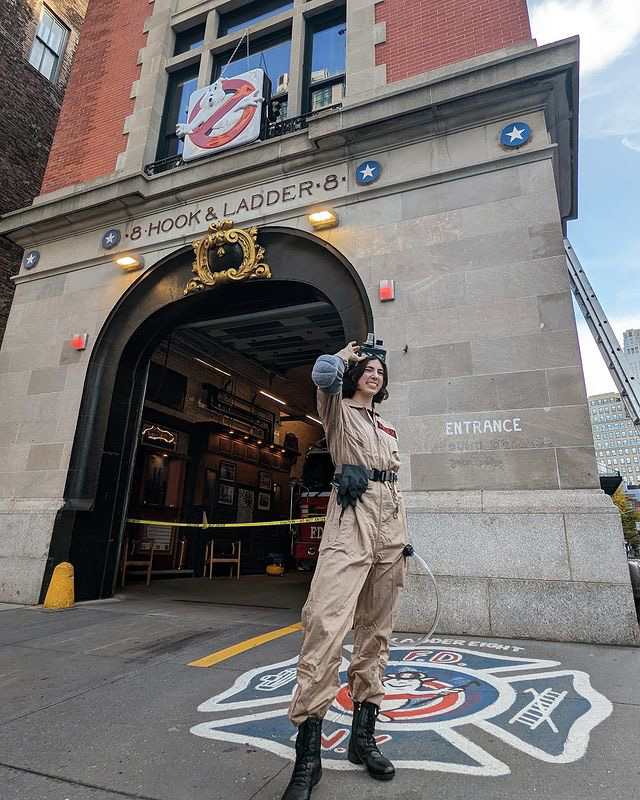
Primer reader @mayakatefrueh wearing her great Ghostbusters uniform in front of the actual firehouse in New York.
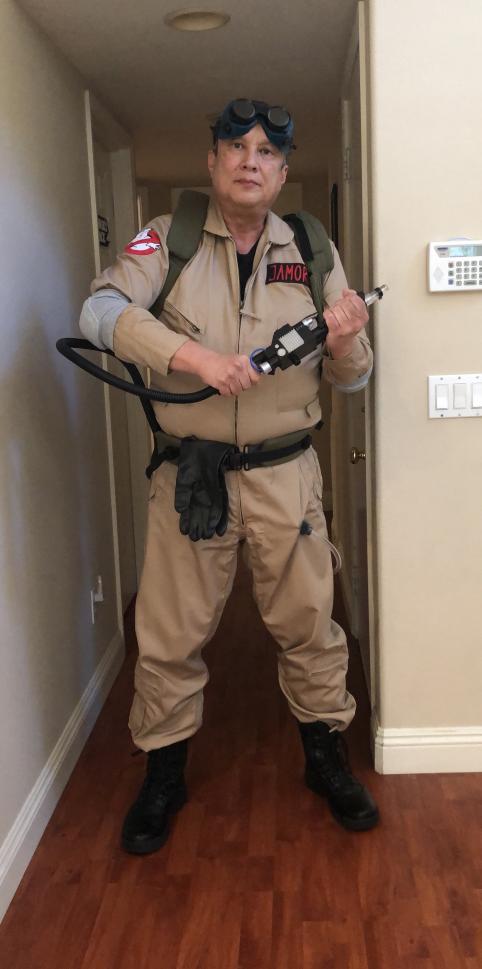
What a terrific turnout for Val Jamora's costume!
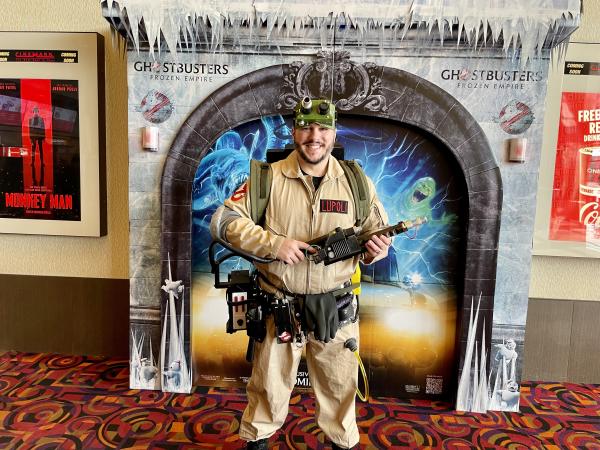
Check out this amazing costume put together by Matthew Lupoli to wear to the opening weekend of “Ghostbusters: Frozen Empire.”

Connie and her crew looked great in their annual golf cart parade, complete with Ecto golf cart.
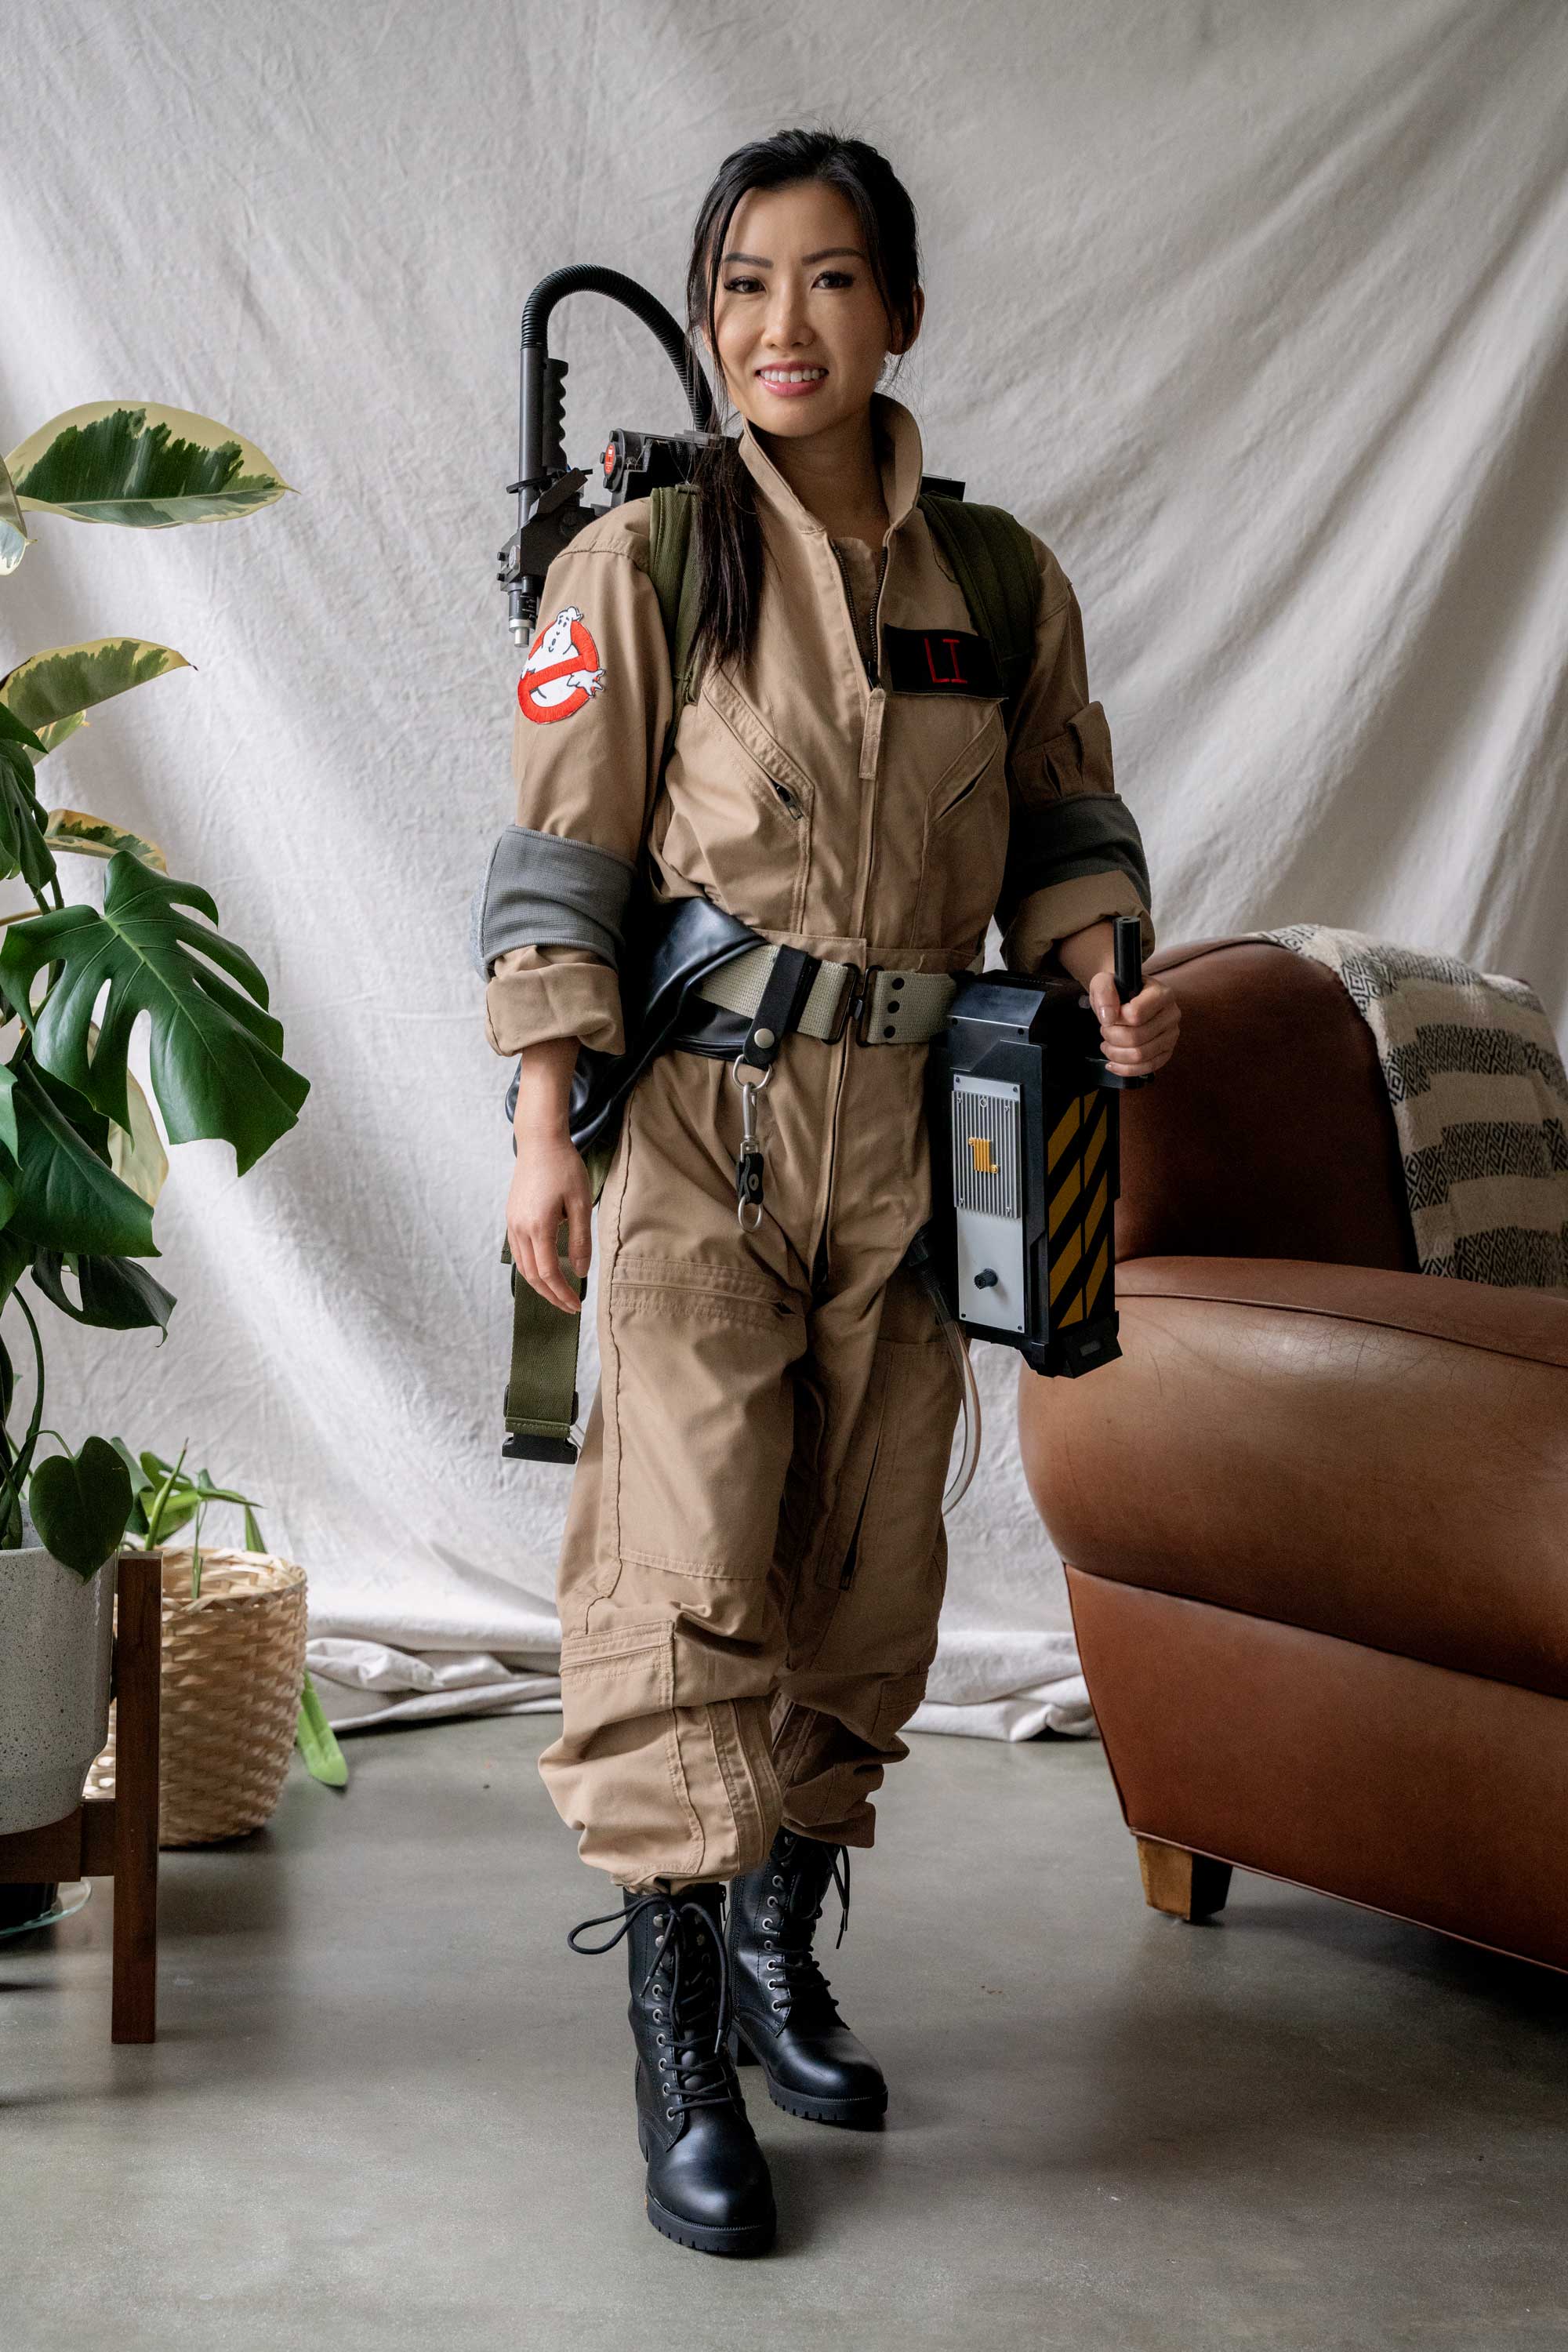
Here is a photo of the costume I mentioned in the uniform section featuring the Propper jumpsuit. You'll find it's challenge finding a Ghostbusters jumpsuit that will fit a small, petite woman or child. The Propper jumpsuit is a perfect color (I like it more than my Tru-spec), and the pockets and details are all correct. The jumpsuit comes in smaller sizes as well as short length options on Amazon, however it is more expensive than the other suits mentioned. Additionally for this uniform, I used keyfobs and elbow pads from GBFans, and the pack and trap are the ones mentioned from Spirit Halloween.
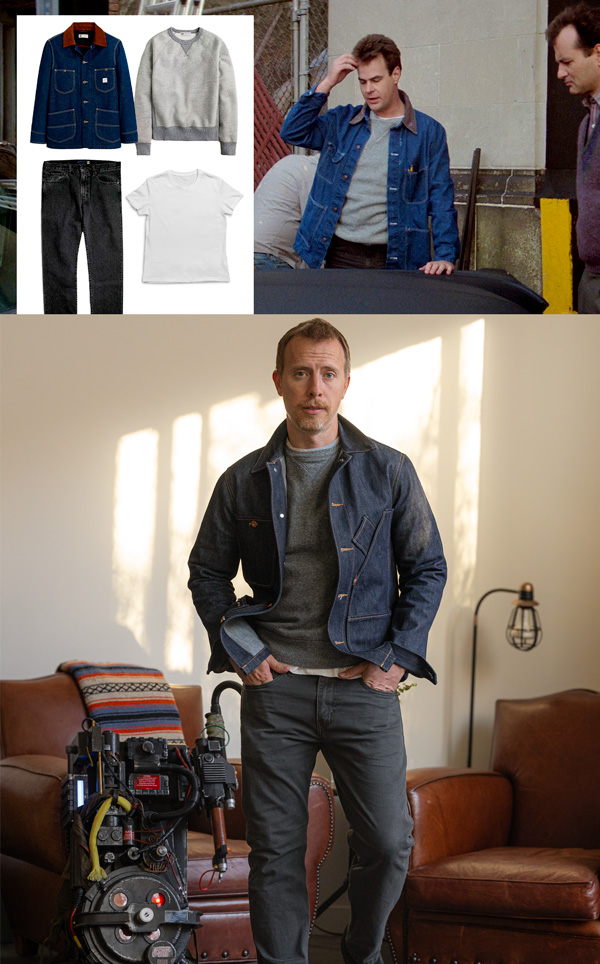
Recreate the Ghostbusters' off-duty casual style for everyday life with our newest guide:
Ghostbusters Inspired J.Crew And You Can’t Convince Me Otherwise – Outfits + Style Picks














![It’s Time to Begin Again: 3 Uncomfortable Frameworks That Will Make Your New Year More Meaningful [Audio Essay + Article]](https://www.primermagazine.com/wp-content/uploads/2025/01/begin_again_feature.jpg)
