

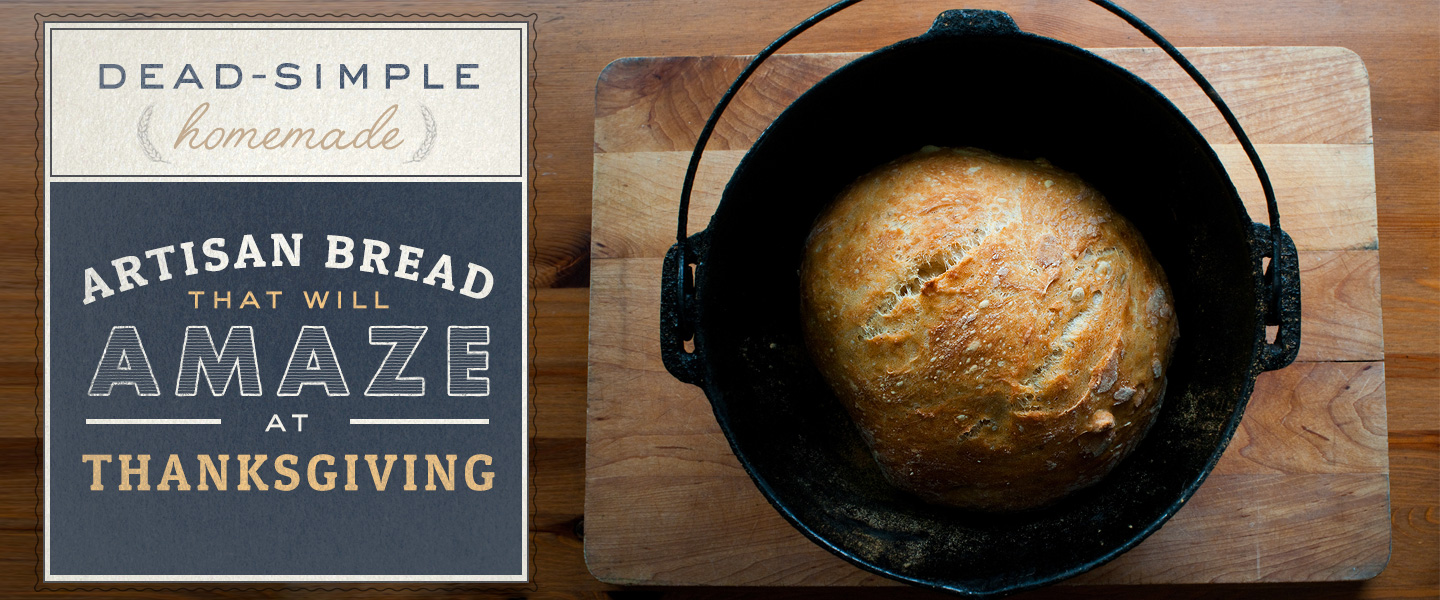
Note from Andrew: I first took my stab at making Stillman's recipe below last Thanksgiving, and not only was it super easy, it was so delicious too. In fact, it was such a hit at my family dinner get-together they've requested I make it again, but bring more! I'll be experimenting a little this year, maybe with sesame seeds on one, and maybe a cheese and garlic crust on another. Even if you stick to plain, your dinner – and especially your post-Thanksgiving turkey sandwiches – will be to die for. Fun fact for dinner:
When was sliced bread invented?
Why bread?
What’s on your list of Man Skills to develop? Bread is at the top of mine, just above evasive driving and below helicopter flying.
Breadmaking is a basic, essential, primal skill. But I’ve always been intimidated. I assumed it was highly technical; beyond my skills in the kitchen. I love to cook but I’m not a gourmand – I don’t read food blogs, take classes, or follow celebrity chefs. For me, food is functional first and pleasurable second.
Bread is a workhorse food. Slap some turkey on and it’s a sandwich; jelly, and it’s toast. Yet bread has the power to turn a good meal into a great one. There’s just no substitute for fresh, handcrafted bread direct from your own oven.
Over time it feels like the common art of baking bread has been lost, partly due to our food-industrial complex and perhaps, for guys, the perception it’s the domain of the housewife.
Not so.
The development of grain-based societies allowed our hunter-gatherer ancestors to settle down, build civilizations, invent writing, architecture, and trade. Bread is portable, highly nutritious, and helped fuel man’s expansion across the globe. Bread was so essential to the ancient Greeks that their name for the non-bread part of the meal was opson, or “condiment.”
I had two criteria for this project: simplicity and wow factor. Your dinner guest should say: “You made this?” I was also fortunate to have the expertise of Casey Coman, Bakery Director at Chimera Cafe, a restaurant/cafe/bar in Tulsa, Oklahoma known for it’s baking program. Casey’s been honing her craft for nearly 10 years and I came away with a method for great bread with very little effort and no exotic ingredients.
What you see is my first-ever attempt at handcrafted bread. No airbrushing, and no pro chef funny business. I’m just a regular guy who knows how to chop garlic, heat olive oil, and use some measuring cups.
If I did this, you can too. Period.
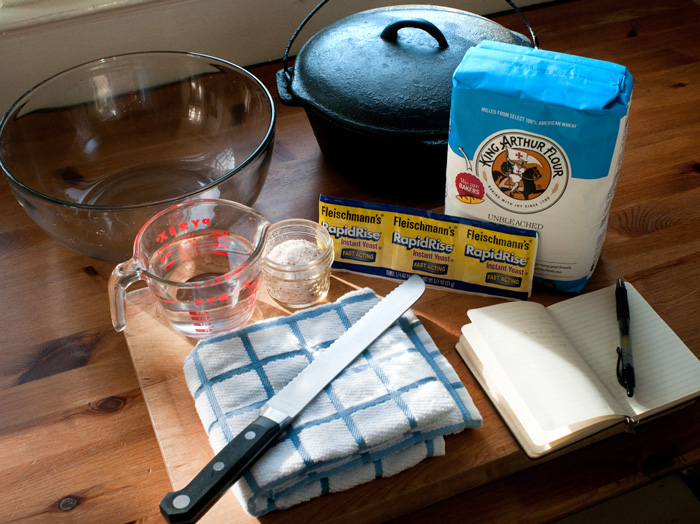
Materials
Almost all of the tools you need are already part of your kitchen. The one special piece of gear you need for this bread is a Dutch Oven. Coman explains, “In this recipe you’re working with a pretty wet dough and during baking it seals in the steam, which is essential for the bread to rise.” They’re $36 on Amazon or $5 at a yard sale and a highly versatile piece of kit.
- Large mixing bowl
- Clean dish towel
- Large spoon
- Measuring cups & spoons
- Sharp serrated knife
- Spatula (optional)
- Utility knife (optional)
5 More Awesome & Easy Things You Can Make in a Dutch Oven
Braised Short Ribs, Garlic & Rosemary Roast Chicken, Slow-cooked Tomato Sauce, Ancho Turkey Chili, and Hands-off Homemade Apple Sauce.
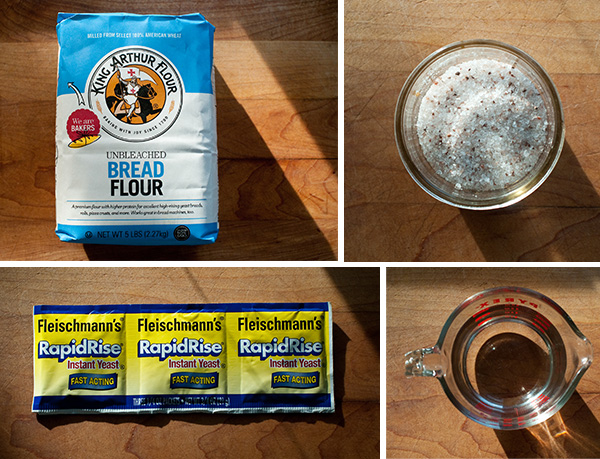
Ingredients
The ingredients are alarmingly simple. An investment of $8.25 makes 3 loaves.
3 cups bread flour – $5 (You can sub All Purpose, but here’s why we recommend bread flour)
1 ½ teaspoons sea/kosher salt – $3
¼ teaspoon instant yeast – $.25
1 ⅝ cups water (aka 1 ½ cups + 2 table spoons)
Plan Ahead (A Bit)
It only takes about 30 minutes of hands-on time but this recipe begins about 24 hours before you want to serve. Why? Time equals flavor. “It doesn’t take a lot of effort for flavor to be drawn out of flour,” says Coman, “but it does take time. You can’t get around that.” By far, the most time consuming part of making this bread is allowing it to rise.
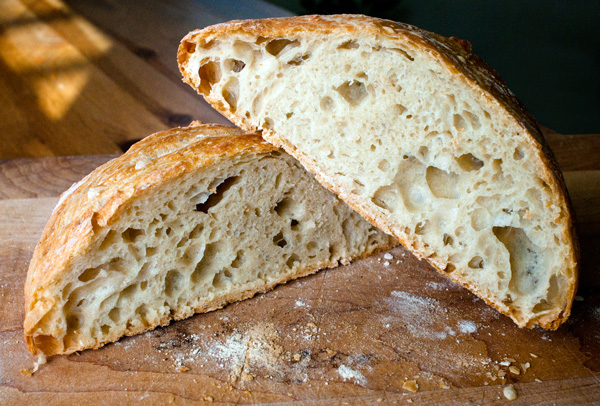
Coman explains, “The longer your bread has to rise the longer the chemistry of the fermentation process has to work. As the yeast works into the kernels, it releases sugar and creates gases.” The sugars are part of what makes bread so flavorful. The gasses, specifically carbon dioxide, will form bubbles that eventually become the nooks and crannies that make bread porous and springy.
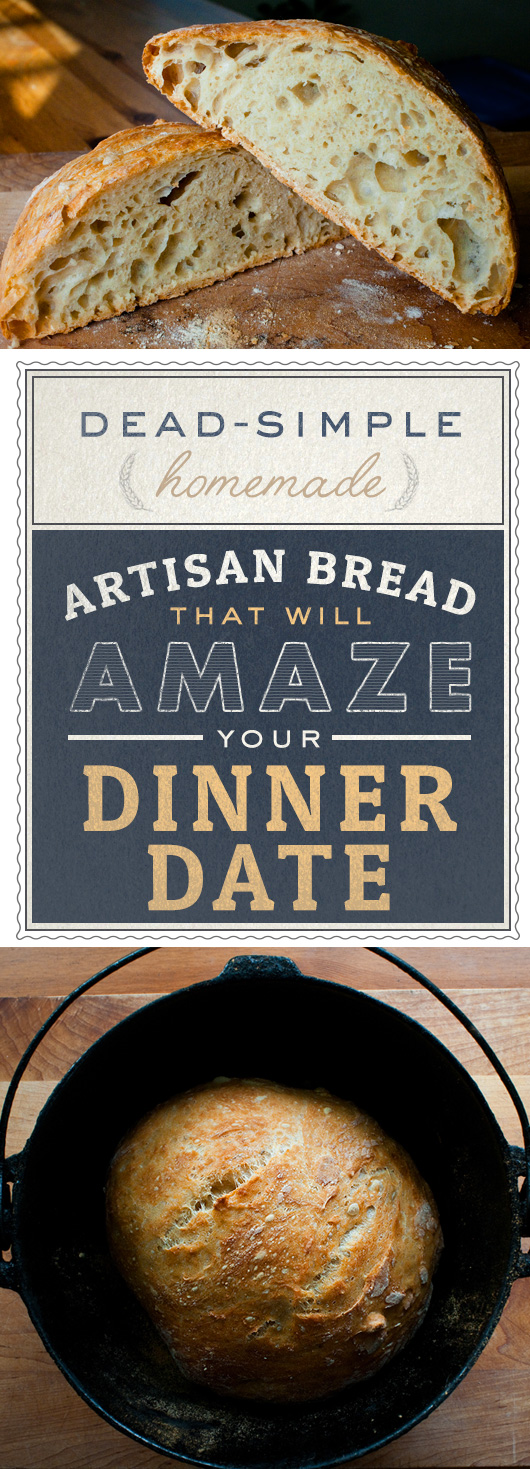
I’ve structured the timing of this recipe to be perfect for a Friday night dinner date and fit a normal working schedule.
Here’s how it works:
What time do you usually wake up? Rewind the clock 12 hours and this is when you should combine your ingredients. After dinner is perfect: before you do dishes, throw your bread together and rest easy. It will rise over night.
Before heading out to work you’ll do the folding and shaping, then put it in the fridge while you’re at work. The minute you get home, pre-heat your oven. An hour and a quarter after you walk in the door it’s done.
Get ‘Er Done
Night Before
Step 1: Mix (7-8 min)
In a medium-to-large mixing bowl, combine flour, salt, quick yeast and water. Stir until blended. Beware: the result is very sticky. I recommend first stirring with a big spoon, then finish mixing with your hand until all flour is evenly hydrated. Your dough will be sticky, stringy, and globby. This is good.
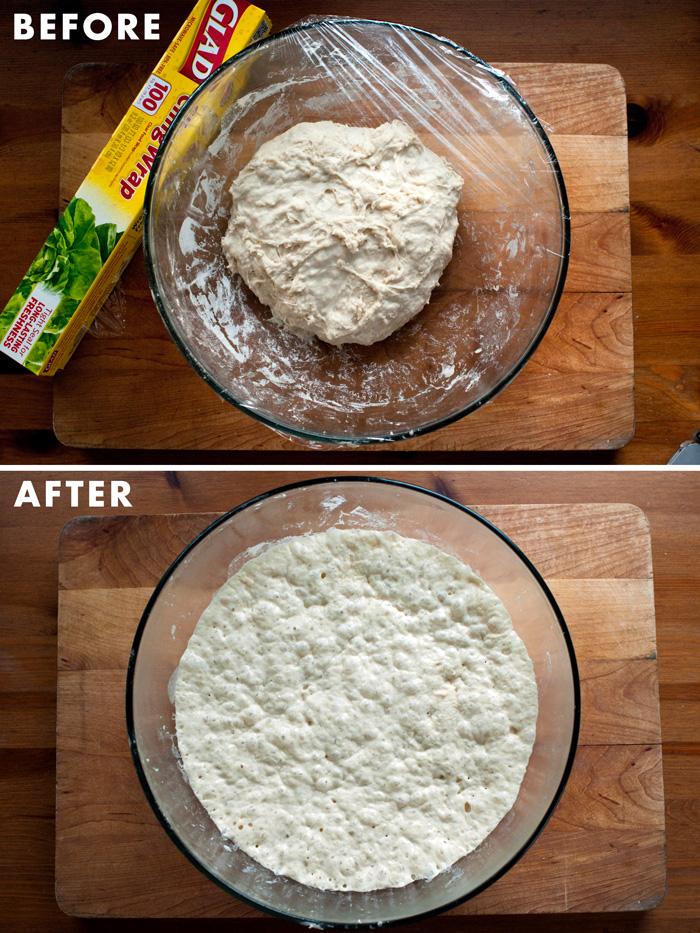
Step 2: Rise (12+ hours hands off)
Cover with plastic wrap and let the dough rest for 12+ hours at room temp. My first loaf sat for 17 hours at approx 70 degrees.
Day of Part 1: Before Work
Step 3: Folding (5 min hands-on, 15 hands off)
Overnight, your dough will expand fourfold. You know it’s ready when the surface is dotted with bubbles. It will smell a bit like stale beer.
Your dough is a sticky blob, so I used gravity and a spatula to guide it onto a lightly floured surface. Sprinkle some flour on the dough and your hands (to help with sticking) and fold it in half a couple of times.
Cover it loosely with plastic wrap or tin foil and let rest for 15 minutes.
Step 4: Forming (5 min hands-on, 2-8 hours hands off)
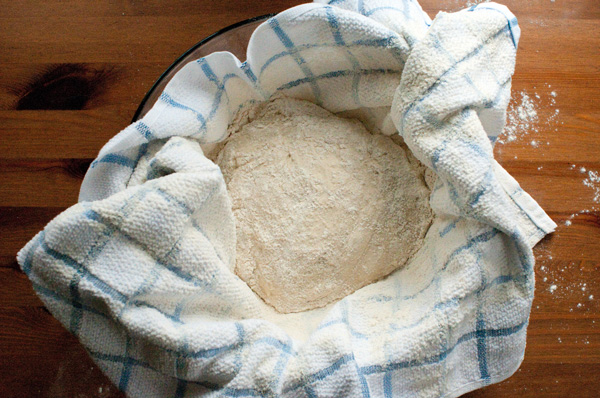
“Forming helps the dough rise further and develop it’s shape,” says Coman. While the dough is resting, completely coat one side of your cotton towel with flour. This is to prevent the dough from sticking when transferred.
After 15 minutes, transfer your folded dough to the cotton towel. I found it tricky to get my hands around it, so I slid a spatula underneath to help.
On the towel, shape your dough into a rough ball. It won’t want to stay this way, so I quickly folded the towel around my dough ball and placed it back in the mixing bowl to maintain some of it’s shape.
Note that whatever side of your dough is face up on the towel will be face down when you drop it to the Dutch Oven for baking.
Place the bowl containing your dough in the fridge for 8 hours while you’re at work. Alternatively, you can skip the fridge and leave your dough out for 2 hours at room temp.
Day of Part 2: After Work
Step 5: Baking (5 min hands-on, 45 in the oven)
About 30 minutes before you’re ready to bake, heat your oven to 450 degrees fahrenheit and place the Dutch Oven inside to preheat. You want it piping hot when it’s time to bake.
Uncover your dough and flip it into the Dutch Oven, bottom up.
If your dough sticks to the towel, unwrap it first, place on a floured surface (flour from the towel should be enough), and gently re-form. Then place it in the Dutch Oven, being careful not to burn your hands.
An optional step: You can “slash” the top of your dough to give it an irregular, aesthetic look. “This dough is really wet and grabby,” says Coman, “so you’ll need something really sharp like a razor.”
I improvised with a utility knife from my toolbox, and found I needed to slash it pretty deep to get any nice markings.
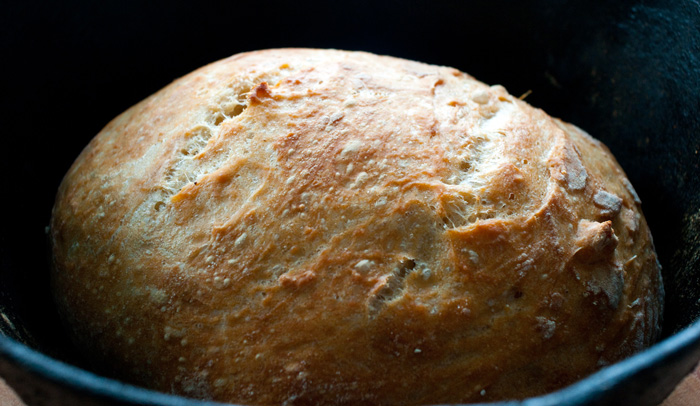
Bake for 30 minutes at 450, then remove the oven lid and bake for 15 minutes at 450 to brown the crust.
“As you bake it, the dough releases steam,” says Coman. “You get a really beautiful burnished crust from the initial steaming, and complete the crust by baking it without the lid.”
Remove carefully and tip the loaf onto a surface to cool for a few minutes.
Sweet Satisfaction
My very first loaf ever is the one you see in the photos. It came out crusty and chewy with a robust flavor and caramely smell. The crumb is perfect – lots of nooks and crannies to absorb olive oil, butter, pasta sauce, or steak drippings. When I cut it, it lets out a satisfying scrunch!
If you’re on the fence about this project, consider the cost: One bag of flour (I sprung for the fancy King Arthur flour at $5.55) and one three-pack of yeast ($1.29) easily yields three loaves, for a cost-per-loaf of $2.28. Compare that to $12.50 for a sandwich loaf at high end bakery chain Le Pan Quotidien.
The Dutch Oven, of course, is an up-front cost but if you consider it – as I do – a lifetime investment in your kitchen like all cast iron cookware it’s still stupidly cheap to make your own bread.
The most rewarding thing? Knowing you can make bread with your own two hands. Twenty-four hours ago I didn’t know I could craft something so delicious and fundamental to food. And it’s guaranteed to impress. Coman reassured me before I started out: “Anything you make at home is going to be impressive… so chill out man.”
Pick up a Dutch Oven, King Arthur Bread Flour, and RapidRise Yeast on Amazon.