
People may mock IKEA for its limited styles, cryptic instructions, labyrinthian retail stores, and the stigma that the furniture usually screams, “This is from IKEA!” no matter where you place it in your home. But the truth is, IKEA’s products are solid for the price – and if you take care of them, they can be as robust and long-lasting as items that cost five times as much.
On top of that, those basic looks people like to mock? They’re actually an excellent blank canvas for all of your own design ideas, providing ample opportunity to “hack” and improve these pieces and transform them into decor that actually lines up with your aesthetic.
Below are four simple tactics for modifying affordable IKEA furniture and turning it from “Swedish assembly line” into “smart, stylish, and custom”.
Repaint and Refinish
Repainting is an easy, obvious tip for any and all furniture, but it is particularly applicable to IKEA pieces, which usually have limited color and finish options. On top of that: once you have a new solid paint job, you can take that piece to another level by deliberately distressing that new color to give it some rustic character.
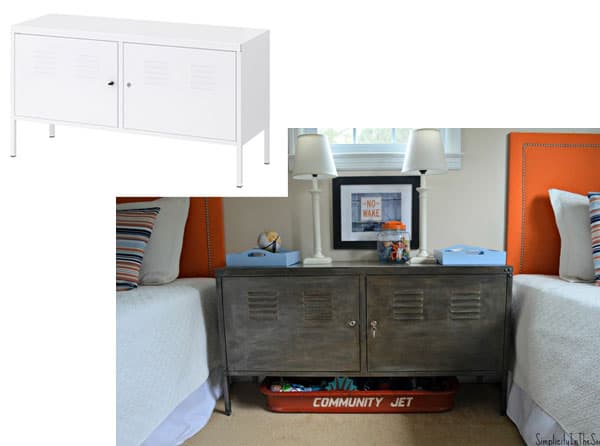
This quick DIY uses chalkboard paint, craft paint, and wax to make a metal IKEA cabinet look like something out of Restoration Hardware or an old World War II movie. When in doubt, simply use a fine grit sandpaper to rough up the edges of a pristine paint job to create the illusion of age. You can also weather a piece by giving it a wash of watered-down paint, which will really emphasize all the details in your furniture’s texture (this is most effective on woodgrain).
Sometimes, IKEA pieces don’t need to be completely overhauled in the paint department – they just need an accent or two. For instance, you can make this Alex unit really stand out by painting the drawer fronts different colors while leaving the body a solid white or grey. And this $40 Rast dresser can be exponentially improved with some simple multicolored Chevron stripes.
When buying something you specifically intend to repaint, always try to find the lightest color you can, whether it’s white or grey or a very blonde wood grain. A lighter base color will save you headaches later on (if you’ve ever tried to turn a piece of black furniture into yellow or light blue, you know how difficult that can be).
If you’d like a classic Primer guide to refinishing furniture, try this one. It may not be about IKEA products specifically, but the principles are the same.
Helpful hacking hint: putting in the effort early will save you frustration (and additional effort) later. An extra round of sanding and a thorough application of primer at the start will make your final paint job really pop and look professional at the end. This is especially important when dealing with those IKEA pieces that have a laminate finish (which is engineered to resist scrapes and stains) – you really need to sand thoroughly and put a “tooth” across all the surfaces to ensure your primer and paint adhere well.
Add Wood
Any basic, solid-colored IKEA piece will take on a whole new aesthetic with natural wood added as a surface, door, or shelves. Not only will the style quotient of your affordable furniture improve with this design tweak, your furniture will also look far more expensive and like something from an expertly curated apartment. Plus, it will immediately become one-of-a-kind.
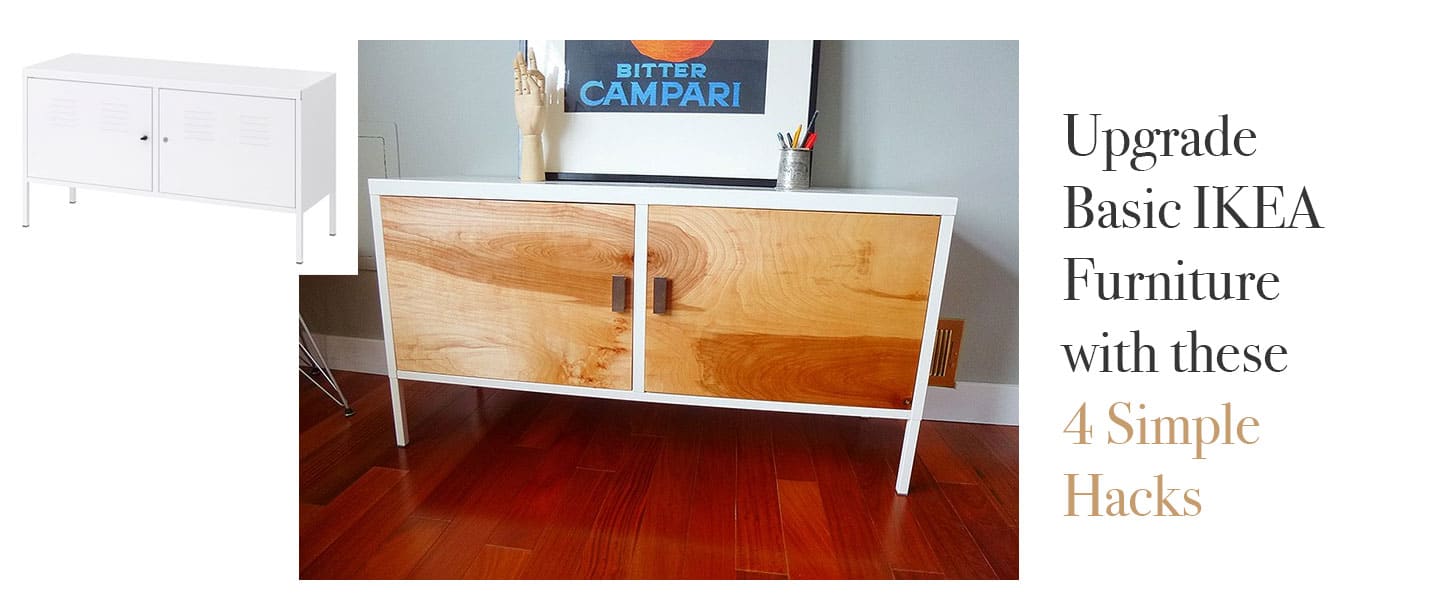
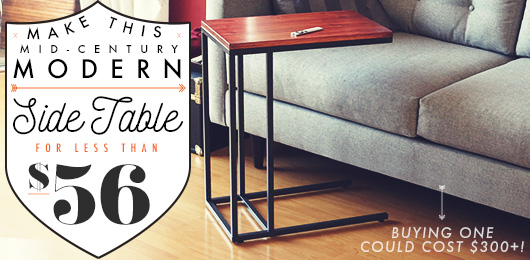
We’ve previously featured a cool and easy IKEA project on Primer: how to craft an awesome mid-century modern side table out of a cheap laptop stand by adding a single piece of wood to the top. And that’s the best way to try out this trick. The look is particularly effective on metal furniture, like the PS Cabinet (which is a long time favorite of ours on Primer) or the Lixhult cabinet, which will immediately warm up with the inclusion of some natural wood. You don’t even need to attach the wood, as its weight (and the weight of whatever eventually sits on top of it) should keep it in place without much issue. If need be, you can put a few removable adhesive strips on the underside of the wood to provide a little friction.
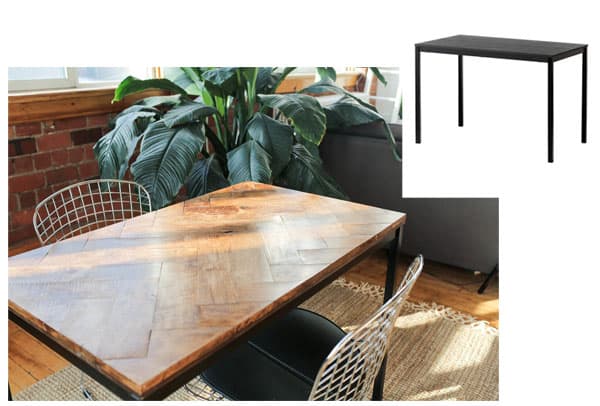
Of course, adding a wooden surface doesn’t necessarily need to be so basic. You can really upgrade the look of something – like this otherwise boring-looking Tarendo table – by creating a patterned wood tabletop. This tutorial thoroughly details the process of making a beautiful herringbone dinner table top for the Tarendo using only basic lumber, which elevates the table’s vibe from “broke college student” to “catalog cover photo chic”.
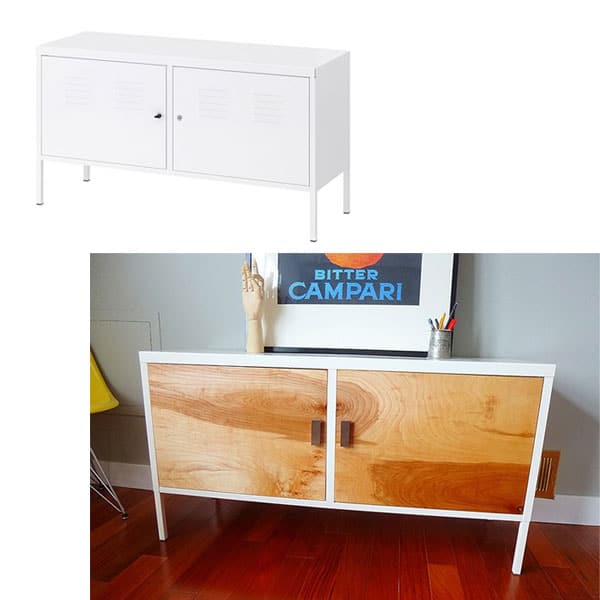
Though it takes a bit more work, you can also improve the front of an IKEA piece by adding wood. For example, replacing metal doors with custom cut pieces of plywood will ensure the cabinet looks like a mid-century credenza in Don Draper’s office, rather than something out of your old high school locker room. You can also completely overhaul the appearance of a boring piece by putting faux drawer fronts on it, either to evoke an antique apothecary shop or to channel a $1200 West Elm buffet.
Any kind of wood will work for these projects – I personally have used everything from laminate pine to finished plywood to reclaimed scrap from dumpsters on several different IKEA upgrades. Two things to keep in mind, though:
- Soft woods (like pine, which is usually the cheapest option) will dent more easily; they are not ideal for surfaces you expect to endure a lot of activity, like a dinner table or kitchen island countertop.
- If you plan to stain your wood, factor in the wood’s natural color. That will affect just how dark your stain will look when finished.
If buying lumber and cutting large pieces of wood is not feasible for you, there are plenty of great ideas for transforming a basic IKEA piece like the $15 LACK side table using a bundle of wood lath from Home Depot or even the free paint-stirring sticks from any hardware store.
Helpful hacking hint: if you’re new to woodworking, a good way to get familiar with the ins and outs of cutting, sanding, gluing, and staining wood is to get an old wood pallet and practice on that. Pallets are free in most places, so you don’t need to feel guilty about making your mistakes on them. Check Craigslist, Facebook Marketplace, or near your local business’s dumpster to scoop up some of this practice material. Pallets are also great to keep as a work surface, to prevent you from damaging valuable floors or tabletops when working on projects.
Reconfigure and Combine
Much of IKEA’s popularity comes from the commitment to creating affordable furniture that fits into larger collections, which makes decorating an entire room or home simple and intuitive. This commitment to design ease has another advantage: plenty of IKEA pieces can be stacked, joined side by side, or modified with other similar IKEA items as a means of “frankensteining” a distinct, one-of-a-kind piece of decor.
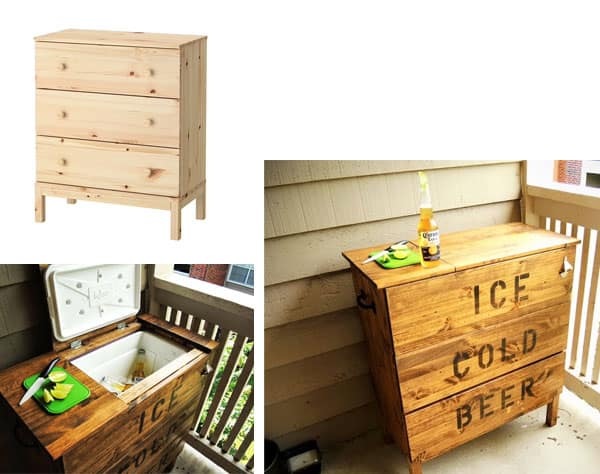
A lot of IKEA items are very plain in their appearance but have good “bones” that can be completely reimagined to become something else. Check out this farm style dresser which was gutted to hold an ice box, transforming it into a beer cooler and drink serving station perfect for a backyard barbecue or house party. This ingenious concept combines IKEA desktops and table legs into a completely unique flat file storage unit (it would also be great for rolls of fabric or paper).
The IKEA Kallax collection is primed to be modified, whether it’s selectively removing vertical dividers to accommodate a specific storage need or blending two different colors of the shelves, to create the illusion of a custom paint job. This beautiful project involved taking two vertical Expedit shelves, laying them on their sides, stacking them, screwing them together, adding legs, and then creating a patterned countertop made out of wood paint-stirring sticks. (Note: the Expedit collection has been retired, but the Kallax series is pretty much identical.)
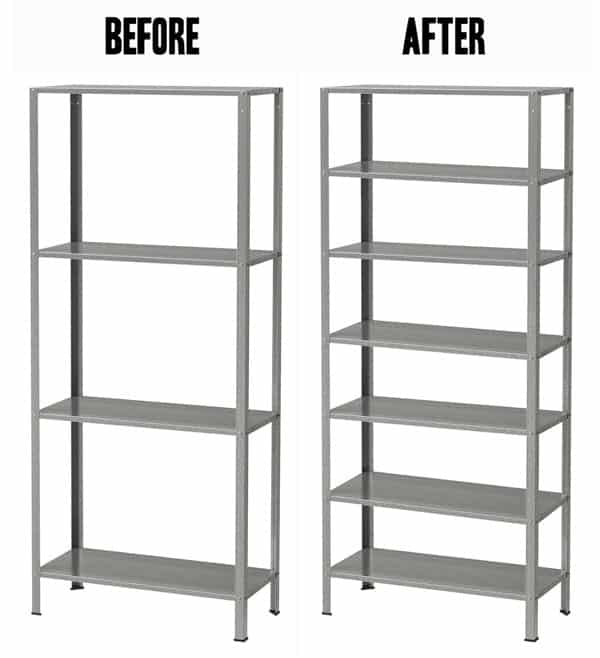
We’ve highlighted this galvanized steel Hyllis shelf on Primer before (way back in 2015) and it’s still an absolute steal at $17, with endless possibilities for customization. However, the height of the shelves could prove less than ideal, depending on your storage needs. The solution? Buy a second Hyllis unit just for the parts (again, just $17!) and add three more shelves to the design to double your shelf space. All you need to do is drill some holes. Here’s a Photoshop mockup of that plan:
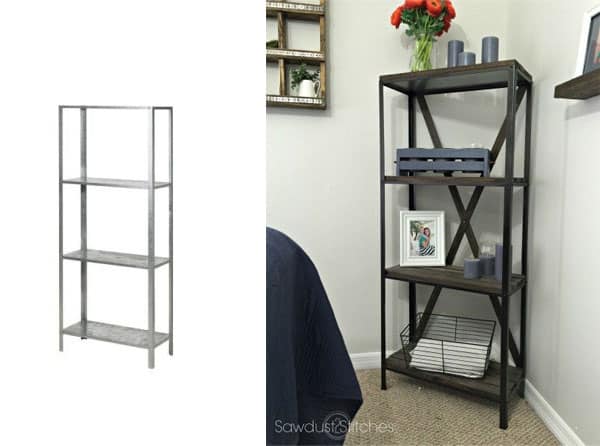
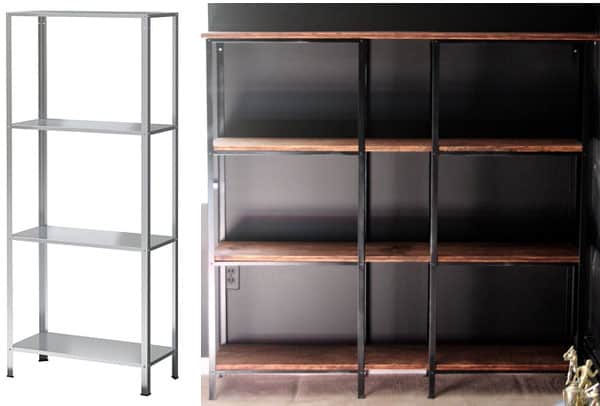
You could even expand this idea and line up multiple hacked Hyllis units next to each other to cover an entire wall, like in this project or this one, at a fraction of the cost of actual custom shelves.
Swap in New Hardware
Stock IKEA drawer pulls and cabinet handles are fine and will do their job for a long time. But they’re not always ideal and can lack a certain stylistic element that may be present elsewhere in your space.
Swapping out the hardware on a piece of furniture is about as quick and simple a “hack” as there is. It’s a cheap and clean way to instantly update multiple pieces in your home. Plus, it’s easily reversible in the event you change your mind or your decor changes.
I’ve mentioned the PS Cabinet a few times in this article already. It’s a great candidate for upgraded hardware, as the PS only has two key locks rather than standard handles or pulls. Though these locks are effective for locking up valuable stuff, they aren’t terribly functional or easy on the eyes. Thankfully, they are easily removed and can be replaced with anything from to a very DIY leather-and-bolt combination to some repurposed IKEA wall hooks. The leather loop pull idea also works on larger cabinets and drawers, using only a roofing nail.
IKEA itself has plenty of handle options to help you upgrade but be sure to also check out your local hardware store, places like Anthropologie, Hobby Lobby, or even Amazon to find a variety of styles. And if you really want some hardware that can add character and style to any piece, check out an antique shop or maybe just make your own!
Helpful hacking hint: if you’re installing handles or pulls in multiple places and want to be sure they’re all aligned correctly, make a wooden “stencil” guide to ensure you mark the same spot every time.