Tools. Fixing things. Getting your hands dirty. These are all concepts guys identify as being manly. No man has ever said, “I have zero interest in being able to use tools to build or fix things.”
Unfortunately, these days most guys don’t know how to use tools to build or fix things. It’s both an incredible sign of how far our society has come and a horrible loss for young men that most guys don’t need to learn to use tools. In a culture of consumerism, with a buy-a-new-one-when-it-breaks philosophy, people see no need to spend the time tearing apart a $30 toaster.
And to a certain extent, we get by doing that. While many may consider it a waste of time to try to fix something they have no idea how to fix, it is a waste of money and materials when patching a wire or a dab of glue could get it working back in tip top shape.
I’m no different, and it’s not something I’m proud of. I don’t know a lot about tools, or the proper way to go about fixing most things. I helped a friend replace his bathroom door once. That shit still doesn’t close without using two hands.
A few weeks ago my freezer started making a horrible rattling noise, which was making it impossible to enjoy watching TV. Eventually, deciding it was unlivable, and buying a new refrigerator too expensive, I got out my toolbox and did an aggressive slow-mo action star swagger into the kitchen.
The thing is: I have no business fixing the motor on a freezer. I know little about fixing things, and even less about how a refrigerator works. Which is insane, since my grandfather owned a refrigeration repair business. A true metaphor of how quickly these handyman skills have evaporated in only two generations.
If you’re like me, this is something you’re not proud of. The fact that I can’t swap out the windshield wiper motor in my girlfriend’s car or repair the gas fireplace in my apartment that hasn’t worked since I moved in 3 years ago is something I consider to be a major stain on my manhood. I think about how much extra money I’m going to spend in the future when I own a house, have kids breaking things left and right, and the only option is paying a repairman or physical replacement.
Guys I know like to tout that time is money. And it just doesn’t make sense for them to spend 6 hours on a Saturday trying to fix something. That’s probably true, unfortunately. But if they knew how to fix it, it would’ve been done in a third of the time.
This lack of DIY skills is something Craftsman is well aware of. The tool company that was founded in 1927 was rated “America’s Most Trusted Brand” and the brand with the “Highest Expectations.” They know a thing or two about making tools that last. The problem? With the deterioration of the general population’s ability to fix things, and desire to buy tools, their business will literally dry up.
So they came up with an interesting idea: fly 15 bloggers who aren’t very tool savvy to their Craftsman Experience studio in Chicago and give them hands on training with some neat DIY projects.
When Richard (give ‘em a follow on Twitter: @craftsmanclub) asked if I’d like to come out, I jumped at the opportunity. The basic idea is that the Craftsman Experience studio would be set up to hold 5 expert DIY bloggers to teach the other 15 noobs how to use tools by working on specific projects.
For example, Timothy Dahl from his blog Charles & Hudson, showed us how to make sawhorses in under 5 minutes with just 2×4’s and screws. An incredible skill to have when working around the house or in the garage.
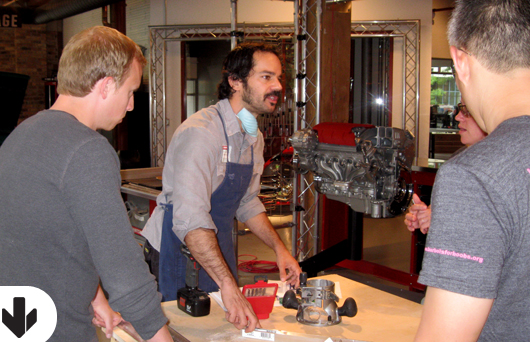
Mike Senese, co-host of Catch It Keep It, taught me how to be inventive with the tools on hand by building a jig for a wood router to create a tapered edge on a pizza peel.
» Mike Senese teaching us the ways of the router
It was like shop class all over again, except this time I was actually interested and the teachers still had all their fingers. To say the least: The whole thing was an incredibly invaluable experience.
Meeting the other students was also an awesome part of the summit. I got to hang out and use power tools with Brett McKay from Art of Manliness for a couple days, which was a real pleasure. We’ve chatted often over the years through email and it was great to finally kick it with him in person.
I discovered Mommy and Daddy bloggers are actually pretty kickass. Check out Shannon’s blog Whiskey in My Sippy Cup and Jim the MMA fighting father of 2 over at busydadblog.com. Not only did Shannon show me the proper way to pour a can of Guinness, her and Jim are proof the fun life doesn’t end after kids.
Using the tools under knowledgeable supervision and learning the reasons for the building techniques are things that will help me for the rest of my life.
Here are a few others that I found useful:
1. Why I’ve Been Stripping Screws All My Life

Better than a power drill, several of the teachers at the summit were using impact drivers. Similar in looks and function to a power drill, an impact driver has one very special aspect that keeps it from stripping screws: When the driver encounters resistance from a screw getting stuck in the wood, instead of endlessly spinning and stripping the screw, it delivers a sudden downward force to get the screw moving again. Genius.
2. MDF: The Magical Wood-Cardboard Hybrid
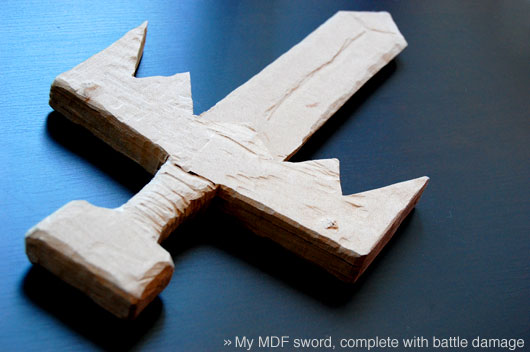
One of the projects that really brought out the kid in all the bloggers was building our own swords.(!) Holly Conrad, a professional builder of props and costumes for video games and live shows, introduced me to a miracle product that I can’t believe I knew nothing about before.
Medium-density fiberboard, or MDF for short, is an engineered wood product that is cheap and easy to work with. Professional propmakers use the stuff to make the prototypes of guns, weapons, and anything else they’re tasked with making, that they then make molds of to make the final plastic, camera-ready versions.
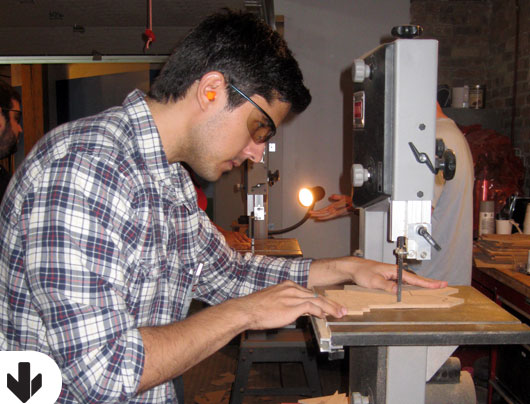
We used a band saw to cut out the shape, used epoxy to hold the handle to the blade, and gave it the finishing touches with a rotary tool.
» Brett McKay from AOM using a band saw to cut out his MDF sword.
Why does this excite me so much? I realized the uses were endless. Because of its workability you can use it to make tons of household objects, and because of it’s relative strength it’ll hold up under moderate stress. From impressive decorations and molding to fashioning replacement parts, MDF is a very useful product.
I wish I knew about it when I was 12, my toy arsenal would rival the underground gun locker in Terminator 2. I can’t wait until I have kids old enough so I can build them some sweetass ninja swords.
3. What a Router Does and Why It’s Magnificent
If you can imagine that a saw cuts through wood then a router assists you in cutting along wood. As I mentioned above, Mike showed us how to use a router to gradually shave off the end of a piece of plywood to create a tapered edge for our pizza peels.
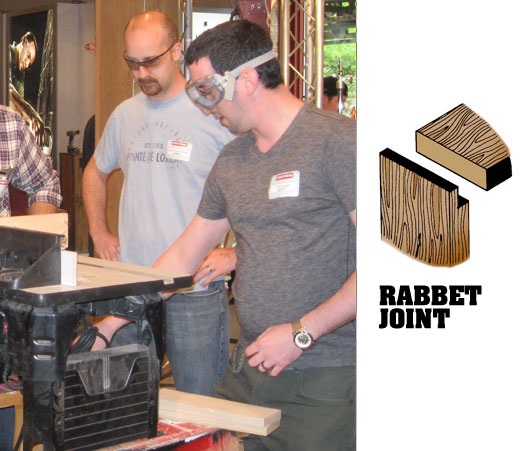
Stuart from ToolGuyd showed us how to use a table router to create rabbet joints, which you’ve definitely seen used in your furniture. A rabbet joint has a little section cut out of the end of the wood to fit into a trench, or dado, that’s been cut into the adjoining piece. This is a nice way to give what you’re working on a finished look, and can be stronger than a typical butt joint (where two pieces are just screwed together).
» Stuart from ToolGuyd showing how to use a table router to create a rabbet joint.
4. Why Wood Glue Works and Why You Should Use It
I always assumed wood glue was just a stronger version of white glue since it’s commonly made by Elmer’s. It turns out this isn’t the case, and wood glue actually works very well and creates a strong bond.
This is because of the glue’s ‘specific adhesion.’ This adhesion results from the glue penetrating the wood cells and creating a strong attraction between the wood and the glue. Relatively little wood glue can be used to create a very strong bond.
There’s an old saying, “glues don’t fail, only woodworkers do.” A properly glued joint will likely never fail under intended use.
5. How to Make a Countersink

This bit has a long bit that is about the size of your screw to create a pilot hole. On the drill end of the bit however, is a round piece of metal that chews into the wood and creates an indent for the head of the screw to sit in, thus creating a flush screw head.
However, if you don’t have a countersink bit, you can fake it by first drilling your pilot hole with the appropriate drill bit then going back with a larger drill bit the size of your screw head and only drilling down the depth that the screw head will sit.
Voilà, a simple poor man’s countersink.
Check out the Craftsman Experience on Facebook for more how-to's and live demonstrations.


