
Project by The Sorry Girls
When it comes to keepsakes, the standard amongst Americans is to stash them all in a box and shove that box under a bed or into the back of a closet, only occasionally taking it out during a spring cleaning binge or before a move.
But if these items are so important to us, we should keep them in a place where we can see them and be reminded of what’s important, every day. Better yet, we should put them on display for everyone to see (and maybe become slightly envious of).
So how do you display these mementos in a way which is both visually pleasing and corresponds to your individual style? Below are six great options that will get your cherished trinkets out from under the bed and into the proud light of day.
Shadowbox
Though you can definitely go the traditional route of simply mounting one item to the back of a shadow box to display it on the wall, there are several other ways to take advantage of this versatile product.
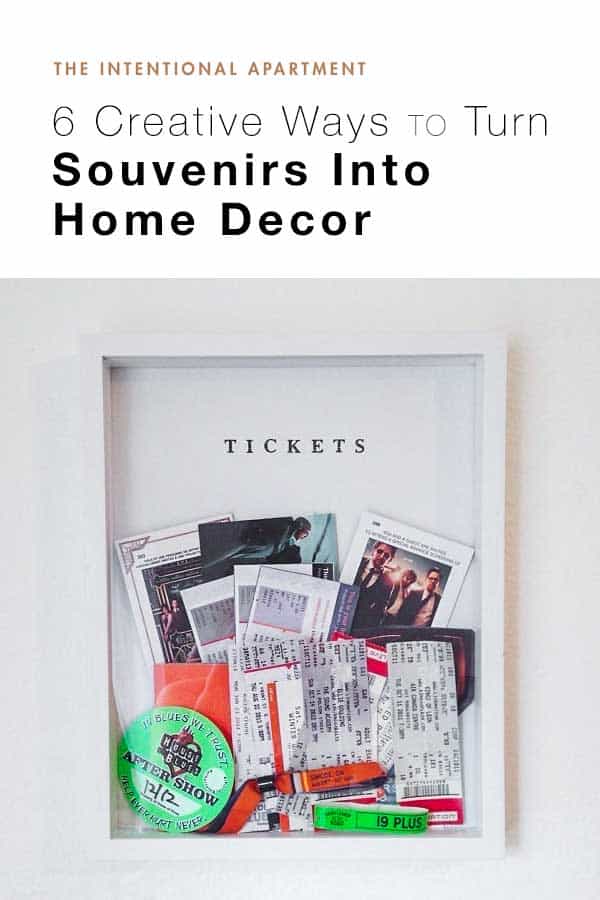
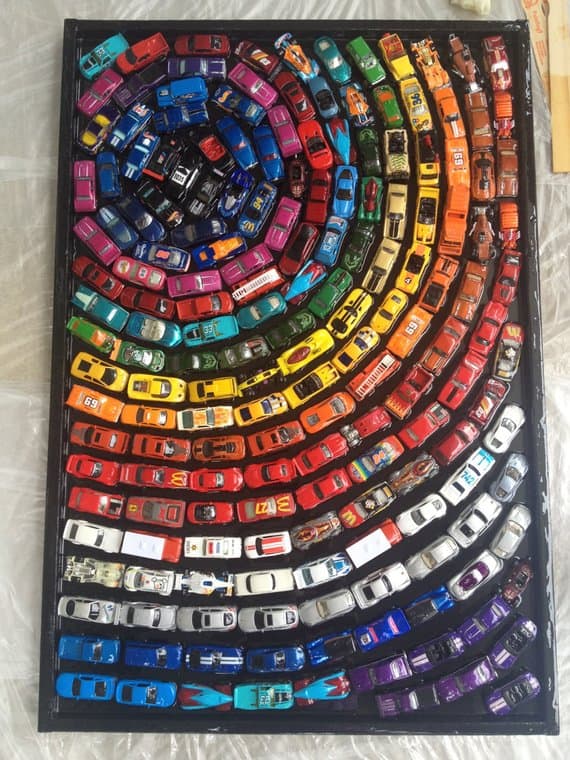
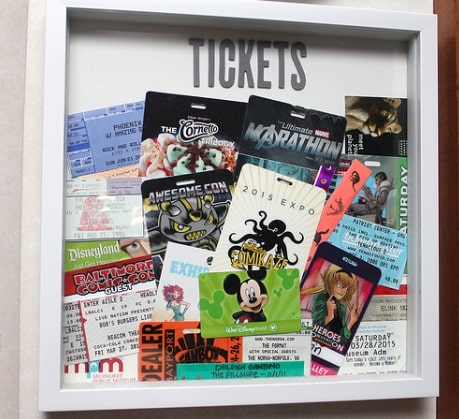
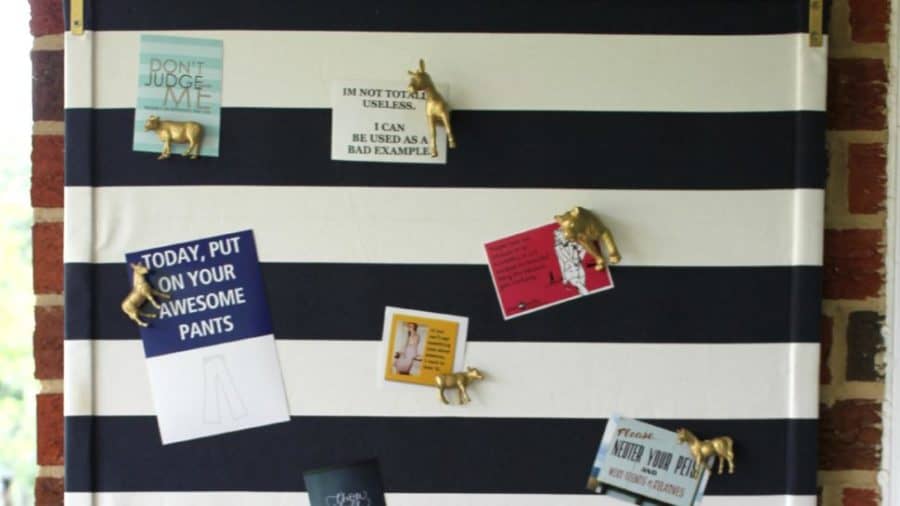
You can loosely fill the box with similar mementos like childhood toys or you can mount multiple items to a backing board like this toy car art. With mostly-flat stuff like ticket stubs, wristbands, or lanyard badges, you can arrange them in a visually interesting way, glue them to a backing board, and label the collage, like this project from The Sorry Girls.
(I personally used this method to collect tickets and badges for the most memorable trips, concerts, conventions, and events I attended in one formative 3-year span. It was super easy!)
And if you’re still actively collecting things like movie tickets, wine corks, or bottle caps, you can quickly turn a shadow box into a wall-mounted “piggy bank” for memories. Just drill or cut a slot in the top of the frame and then, as you accumulate more stubs, corks, or caps, drop them into the box! This allows you to constantly add to your display without having to repeatedly re-adjust it and everything around it to fit the new additions.
Float Frames
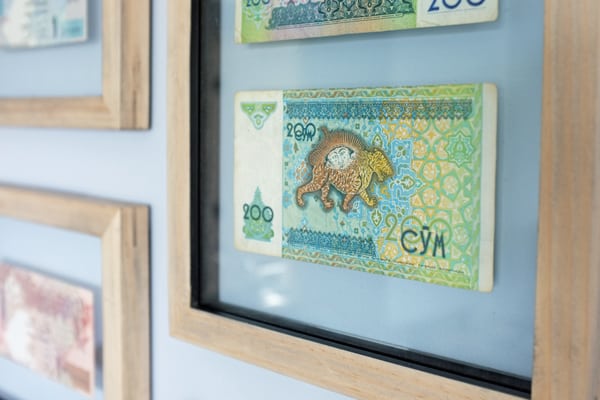
A stylish alternative for a shadow box or regular picture frame is to get a float frame for your paper mementos. This can include traditional float frames where items are sandwiched between two panes of glass (perfect for memorializing foreign currency from trips abroad, for example) and also DIY float frames where wire or string or rails are run across an empty frame so that items can be hung in space.
A custom frame allows the mementos to float, like in this project, which adds depth and dimension to your wall decor. You could also eschew the frame entirely and use one of these hanging displays or hang wire/string directly on the wall, custom-sized to fit your space.
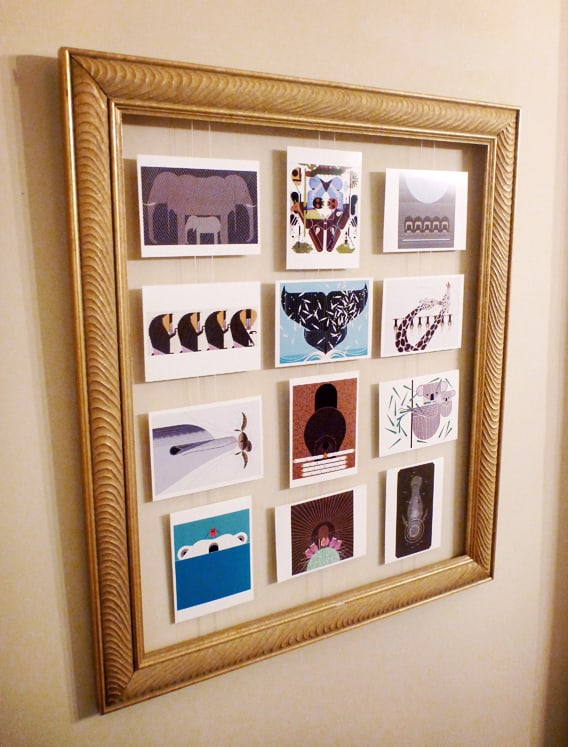
One of the best things about float frames is that they can accommodate items of all sizes and orientations – there’s no need to trim items to fit a regular size. On top of that, you can change the mementos out periodically without much hassle.
Mason Jars
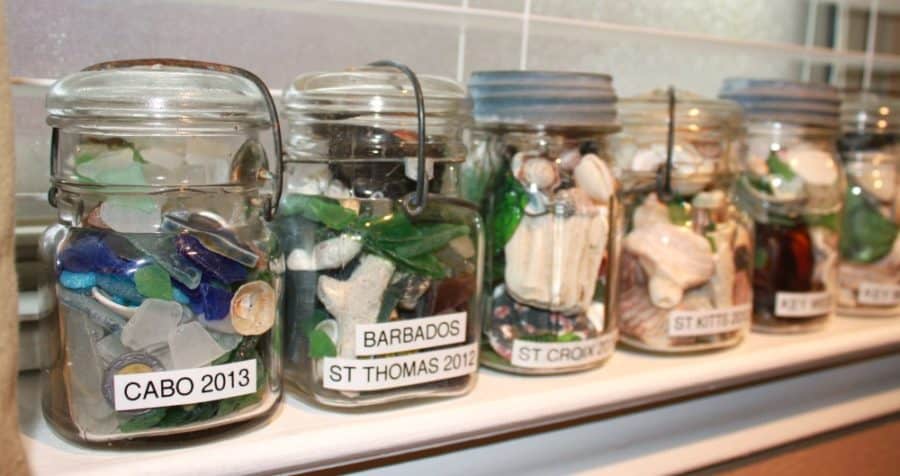
Though the famous hanging mason jar DIY system has historically been used to store things like spices and dried food in the kitchen or nuts and bolts in the garage, it can also serve as a beautiful and eclectic way to show off souvenirs and tchotchkes from your life. A popular idea is to create memory jars after a vacation, assembling all sorts of tokens of the trip into one container, but you could just as easily fill a jar with your collections of guitar picks or LEGO minifigs.
You can also hang mason jars in ways that don’t depend on the lid being affixed to the underside of a shelf or cabinet. With just a few pipe clamps, you can hang jars from a wall or plaque and show off knick knacks that way. Or use wall hooks. Or line them up on a bookshelf!
If your mementos are on the smaller side, you could also repurpose one of those magnetic spice jar sets. Fill each container with sand or soil from your favorite trip and arrange them however you like, even putting them on the refrigerator.
Corkboard
Pinning things to a corkboard is as quick and simple as it gets, but that doesn’t mean the display needs to look basic. The background can easily be transformed with some painted patterns, like the many options on display here. Alternately, you can upholster the board with some fabric and some unique thumb tacks to turn a plain board into something with a distinct and homey feel.
And if you really want to take your cork board to a whole new level, attach some doors in the form of vintage window shutters. This provides even more surface area to display stuff and converts the entire piece into an artistic focal point for the room.
(Bonus: All of these corkboard tips can also be applied to magnetic bulletin boards.)
On (or in) a Tabletop
When you think about it, a tabletop is just horizontal wall space that isn’t being utilized. With that in mind, consider transforming these surfaces into a place where you can show off keepsakes of all sorts.
There are many commercially available display case tables which can hold items of all sizes (IKEA’s LIATORP collection features several glass-top pieces, coffee and end tables alike) but you can also very readily make your own, as this tutorial explains.
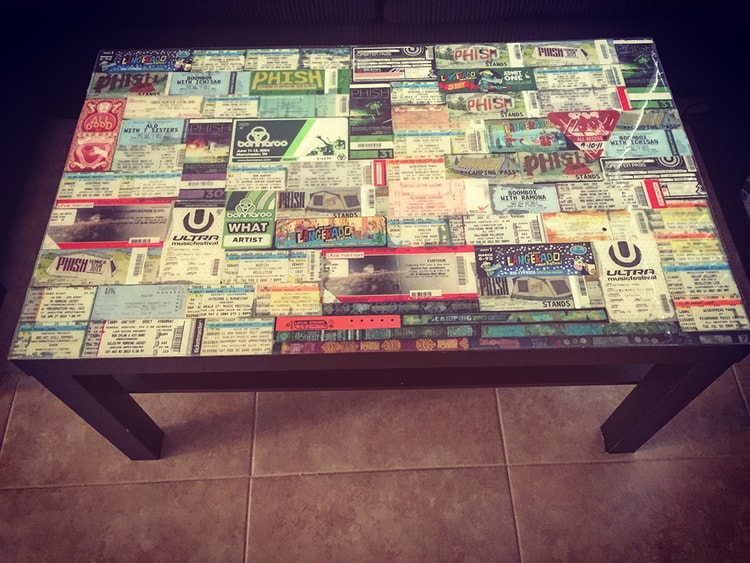
If you’re looking to show off thin souvenirs, an affordable and DIY option is to use something like Mod Podge or clear resin to fix the mementos directly to the tabletop and seal them. It’s like a personalized version of the tabletop at your favorite neighborhood bar or restaurant!
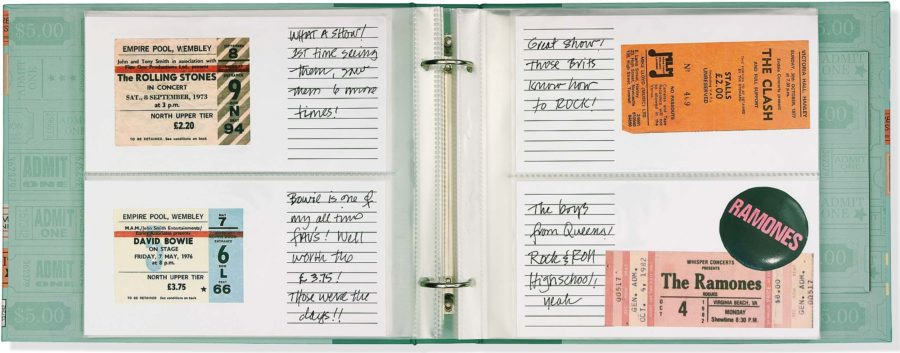
Scrapbooks or Photo Albums
A tried and true classic! When it comes to preserving and displaying two-dimensional mementos in a visually pleasing way that can also be easily hidden away on a normal bookshelf, accept no substitute. And scrapbook pages don’t need to look like something from the 1950s, either. You can add another level by integrating more modern design ideas like giving a page a cool map background or layering pieces with tabs and Washi tape.
However, sometimes the only scrapbooks and albums available scream “scrapbook” from the outside, don’t really work with your style, and don’t allow for enough customization. An easy solution: find a journal or sketchbook (with blank pages) that speaks to your decor and turn that into a scrapbook. All you need is a good glue stick and/or some adhesive photo corners.
If you’re not into the arts & crafts effort required to glue things to pages and label them, pre-made albums for things like ticket stubs or paper money (like this or this) are readily available. So you only need to put the goods under plastic to create a showcase for all of your experiences.