
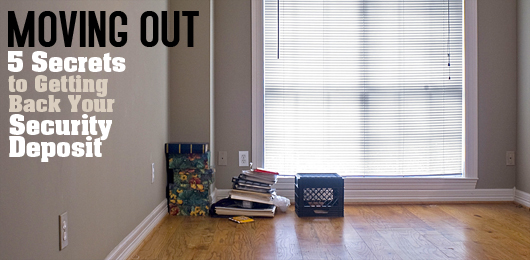
Sure, the indoor baseball and jungle juice ice luge seemed like good ideas, but now you're moving out and there's a lot of wreckage to hide. Utilizing these 5 secret weapons, not only will your place look better than when you moved in, you'll also be 1 months rent richer.
By Jesse Stern | Photos By Jeff Buras
Moving up, moving out. You’ve been living in this dump since your second year of college, and now it’s time to go. The thing is, it’s not quite the same apartment as when you moved in. There are nail holes from where you hung all the Pink Floyd, Barbarella, and Saw movie posters. (And didn’t your landlord specifically say “no holes in the wall”?) The carpet and floor are mottled with stains of various colors.
Oh, and one night you got really mad and punched a hole in the drywall. You covered it up with a poster, but the hole is still there. Although you don’t remember why you were so upset, the wall remembers your wrath. You could really use your deposit to help get you started in your new place. So, before you call your landlord, we bring you
Moving Out: Five Secrets: How To Get Your Security Deposit Back
That’s right, secrets. Secrets are exciting, intriguing. They make a boring subject like security deposits seem fun and interesting. Try to remember this as you read.
There’s a saying that “an ounce of prevention is worth a pound of The Cure”. I’m not sure what prevention has to do with Robert Smith, but the first two secrets I have for you fall into this category. Knowing or doing these when you move in will help you when you move out. The last three secrets fall into the Cure category — fixing stuff.
1. Know the Rules, Know Your Rights
Some less-than-scrupulous landlords may try to keep your deposit. This is an extremely uncool way to exploit cool and artsy types such as ourselves — especially at such a vulnerable and sad moment! But can we really blame them? The truth is that most tenants don’t bother to put up a fight. Besides, everyone’s trying to save a buck, right? Let’s just make sure they’re not saving our buck.
Now, I’m not suggesting that you always put up a fight for a couple of lousy cheeseburgers. You have to choose your battles, and decide for yourself how much your time is worth. Most people agree that a few hours of cleaning is well worth a few hundred bucks of your deposit. But is it worth spending hours looking through old receipts and going to Small Claims Court for $50 that was unfairly withheld for carpet cleaning? Unless you’re that lady who sued the clown because her coffee was too hot, probably not.
Two things to keep in mind:
First, most states have a deadline for landlords returning their former tenants’ security deposits. In California, my beautiful state, it’s three weeks. The landlord must send you a deposit check, along with an itemized statement of any dollars deducted from your deposit. If not, you could have a solid case for your full deposit, plus interest.
Second, the landlord is only allowed to deduct from your deposit for certain things, such as back rent, cleaning, and repairs. The landlord is not allowed to deduct repairs for normal wear & tear from your security deposit.
Examples of normal wear & tear:
- Carpet is worn out from normal foot traffic (as opposed to giant holes, cigarette burns or poo stains)
- Minor nicks or bumps in the wall (as opposed to fist- or head-sized holes)
- An antique, claw-foot bathtub with stains that won’t come out, no matter how hard you scrub (as opposed to grimy dirt rings that you didn’t bother to clean)
If you want to learn more about your rights as a tenant, check out Every Tenant’s Legal Guide, from Nolo.
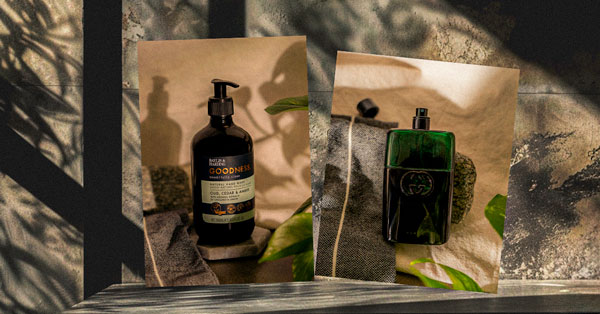
2. Take Pictures
They say a picture is worth a thousand words. Take pictures, just in case there’s a worst-case scenario. Judges want to look at pictures, a lot more than they want to hear sob stories. Ideally, you should take pictures when you move in, and again when you move out. Take pictures of the carpet, the walls, cabinets, sinks, toilet, light fixtures, and so on. Keep track of the dates, and keep the pics in a safe place. If you spend money fixing things, keep track of dates and receipts.
Once you’ve moved out, and — because you’ve read this guide — gotten your full damage deposit back, you can delete the pics and get back your precious hard drive space (or album pages, if you’re old school).
3. Nail and Thumbtack Holes
Okay, enough prevention. Now we get to the fun part: Cure.
Here’s a trick I learned in college. It was actually the RA on the floor of my dorm who taught me this. If you have small holes in the wall, like the kind made from hanging posters, you can hide them with toothpaste. Just squeeze a little dab of toothpaste on your finger and rub it into the hole, using your finger to remove excess paste and make a smooth finish. Hides the holes like magic, and makes the walls smell minty fresh!
Okay, now that you’ve learned that little trick, don’t ever fill wall holes with toothpaste. You’re not a pansy — you do read my articles, after all. That means you already know that there is a much more manly way to hide holes. Here’s what you’re going to do instead.
Go to the hardware store and pick up a small container of spackling paste. If you don’t have a putty knife, get one of those too. A cheap metal one will work fine. All these materials should set you back no more than five bucks. Follow the steps outlined above in the toothpaste trick, only replace the word “toothpaste” with “spackling paste”, and replace “finger” with “putty knife”. Got it? Good.
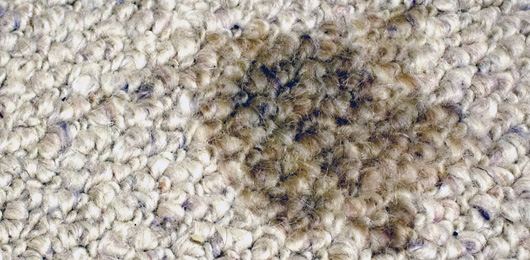
4. Floor & Carpet Stains
Nothing says “good party” like stains on the floor and carpet. The one right there was the first spilled beer. That one was where Matt puked, barely missing the poker table. And the one in the corner you’re trying to forget, so please don’t ask. Yep, “good party.”
However, these stains also have a tendency to make your landlord say “I’m keeping your security deposit.” So let’s see what we can do about getting rid of them. As we’ve already mentioned, the best way to cure a stain is to prevent it. That is, by cleaning up a spill before it has the chance to become a stain. This is easier than you think. Here are the basic supplies you need:
A bunch of shop rags. Hardware and auto parts stores sell bags or boxes of towels & rags. These come in handy when the need arises to sop up a mess. If you don’t have — or run out of — shop rags, any of the following will do in a pinch: paper towels, napkins, bath towels, newspapers, etc.
All-purpose cleaner in a spray bottle (Simple Green is my personal fave). Great for preventing stains, especially on floors.
Baking soda is the duct tape of the cleaning world. It has so many uses you will want to keep some right next to your pillow. Well, maybe not tha close. Use baking soda to soak up colorful stains, like red wine or coffee, or in any cleaning emergency.
Carpet cleaner. This stuff is good for getting messes out of the shag (hairs) of a carpet. It works well for just about any kind of spill — even nasty stuff, like urine or poo from your pets. Or from your drunk friends.
Tip: If your friends take drunken poops on your carpet, they may not be your friends. Even if you personally invited them to the party, they may not be your friends.
Keep all this stuff in a handy spot, like under the kitchen sink. When something spills, the first thing to do is soak it up. Put some shop rags down on the spill and let it soak into the rags. This is called blotting. It’s better than wiping, because it soaks the stain up, rather than rubbing it in.
If the spill is something solid, like a turd or a gooey chocolate brownie, pick it up as best you can without wiping. Wiping only spreads the mess into the carpet. Once you’ve soaked or picked up the mess, put some cleaner down. Carpet cleaner on the carpet, all-purpose cleaner on the floor. If you want, throw a little baking soda down there too. Let the cleaner soak in for a bit, then put some more dry rags over it. In the case of carpet cleaner, you normally wait till it dries, then vacuum it up.
Tip: Red wine spill? Rubbing salt into the spill will prevent a stain. Should work the same with grape juice. If you still drink grape juice.
But who are we kidding? You didn’t clean up the stain right away. You let it sit and fester, and it turned different colors. Now it looks like a clown had food poisoning.
Removing stains once they’ve set in is basically the same, just a little harder. If you spilled something on the carpet long ago, and the stain is already set, there is still hope. Go rent a carpet cleaner from your hardware store. This is basically a fancy vacuum cleaner, except that it washes your carpet. Follow the instructions that come with it (don’t worry it’s easy).
As for the floor, most stains should come right up with a mop, a bucket of strong all-purpose cleaner (diluted with water, like it says on the directions), and a bit of good old-fashioned elbow grease.
Tip: A very effective and all-natural household cleaner can be created with baking soda and household vinegar. When combined, they create a chemical reaction and fizz up, like your 3rd grade science fair volcano. All this activity is good, because it shakes things loose. Things like dirt and dookey and pizza and beer.
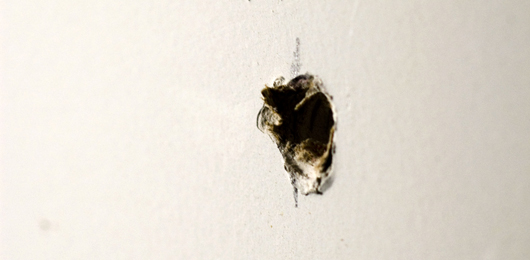
5. Fist or Head-Sized Holes in Drywall
Nothing says “I can’t believe she broke up with me” better than punching a hole in the wall. Nothing says “dude, great party” like a head-sized hole. If said head-sized hole was the result of an angry, drunken brawl, send the pieces of wall, along with flowers, to your recovering friend.
Hold on, don’t actually do that. You’ll want those pieces as a souvenir. This is a slightly more complicated bit of handiwork than the others in this article, but it’s really not that hard. You’ll need something to cut a new piece of drywall that is the size and shape of the hole (with maybe a 1/4” to 1/2” gap all around. A circular saw will do, or a jigsaw if the piece is very small or irregular. Don’t tell anyone I said this, but a really small piece, like 2” or less, can be repaired by taping over it with some drywall tape. But keep reading.
 |
Photo by HidingInABunker |
Now, this isn’t the same kind of job that you would do if you were remodeling Beyonce’s house, but it should do the trick to get a pesky landlord off your back. There are a few extra tools you may need for this job. Buy, rent, borrow or steal. (Contractors are usually big and strong. We don’t actually recommend stealing their tools.)
Here’s what you’ll need:
- A box of drywall screws and an electric screwdriver
- A fresh piece of drywall to replace the broken area
- A cutting tool, like a Skilsaw or jigsaw
- A small bucket of drywall mud
- A roll of drywall tape. There are several varieties. For this job, get the self-adhesive kind that looks a bit like Frankenstein’s bandages.
- A basic 11” drywall trowel. Good ones are slightly concave. You’ll learn why in a minute.
- An electric sander
Step 1: Use your saw to cut the new piece of drywall into the right size and shape. If the hole in the wall is rough, you may want to cut it into a square shape with your saw. Cut along studs, leaving half of the stud exposed. This will help when screwing in the new piece. Warning: Walls have all sorts of cool things inside them, like electrical wires, gas and plumbing pipes, and fiberglass insulation. If you cut into the wall, be absolutely, absolutely sure you know what you’re doing. If you cut into a wire and electrocute yourself, or blow up the place by cutting into a gas line, don’t come crying to me.
Step 2: Screw the new piece into place, onto available studs. Just enough so that it stays in place and won’t jiggle around. It’s fine to leave a gap all the way around between the existing drywall and the new piece. Aim for 1/4” to 1/2”.
Step 3: Lay drywall tape along the gap. Cut where necessary, and do your best to keep the tape centered.
Step 4: Okay, Leonardo, here’s where you get to be the artist. (No, not that Leonardo, the other guy! Oh, never mind.) Cover the gap and the tape with drywall mud. The trick here is to cover the ugly tape, but also make it flush with the wall. This is where the concave trowel is your friend — because of the trowel’s shape, the mud will be thick in the middle (where the tape and gap are), but thin at the edges (so it blends into the rest of the wall). Use your artistry and your trowel to slap it on thick. Wipe it flush, getting the mud as smooth and as flush to the wall as possible. Also, make sure that you have completely covered the drywall tape. Now, wait for it to dry.
Step 5: Sand smooth. The better job you did with the mud, the easier your job will be sanding. Oh, and cover everything with plastic because the dust will get EVERYWHERE.
That’s it! A quick coat of primer and some paint, and no one will ever know you were here!